Nissan Murano: Removal and Installation / Roof Antenna
REMOVAL
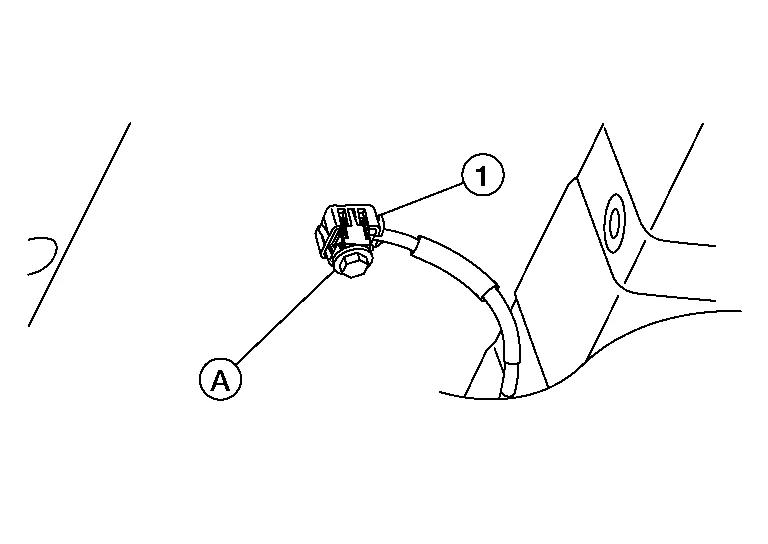
Lower headlining (rear). Refer to Exploded View.
Disconnect the harness connectors from the antenna feeder.
Loosen bolt (A) and remove roof antenna (1).
INSTALLATION
Installation is in the reverse order of removal.
| Roof antenna nut | : 8 N·m (0.82 kg-m, 71 in-lb) |
CAUTION:
If the roof antenna bolt is not tightened to the specified torque, lower sensitivity of the antenna may be experienced. If the bolt is tightened tighter than the specified torque, this will deform the roof panel.
DISASSEMBLY
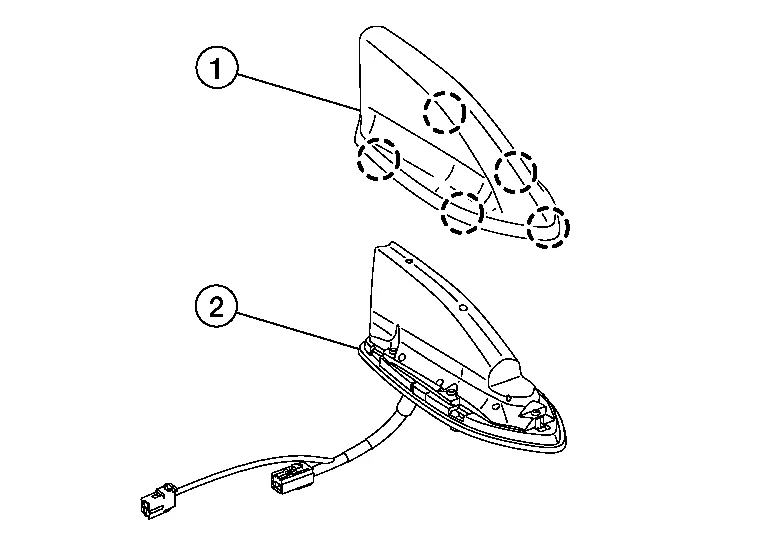
Using a suitable tool, release pawls between roof antenna (2) and the cover (1).
 |
: Pawl |
Remove the cover from roof antenna.
ASSEMBLY
Assembly is in the reverse order of disassembly.
 Front Auxiliary Input Jacks
Removal and Installation
REMOVALRemove shift selector finisher. Refer to Exploded View.
Release pawls and remove front auxiliary input jacks (1).
: PawlINSTALLATIONInstallation is in the reverse order of removal...
 Microphone
Removal and Installation
REMOVALRemove front room\map lamp assembly. Refer to Removal and Installation.
Disconnect the harness connector (A) from front room\map lamp assembly (2)...
Other information:
Nissan Murano (Z52) 2015-2024 Service Manual: Seat :: Precaution. Precautions
Precaution for Supplemental Restraint System (SRS) "AIR BAG" and "SEAT BELT PRE-TENSIONER" The Supplemental Restraint System such as “AIR BAG” and “SEAT BELT PRE-TENSIONER”, used along with a front seat belt, helps to reduce the risk or severity of injury to the driver and front passenger for certain types of collisions...
Nissan Murano (Z52) 2015-2024 Service Manual: Int Lamp
CONSULT Function (BCM - INT LAMP) ECU IDENTIFICATIONThe BCM part number is displayed.SELF DIAGNOSTIC RESULTRefer to DTC Index.DATA MONITOR Monitor Item [Unit] Description REQ SW -DR [On/Off] Indicates condition of door request switch LH. REQ SW -AS [On/Off] Indicates condition of door request switch RH...
Categories
- Manuals Home
- Nissan Murano Owners Manual
- Nissan Murano Service Manual
- System malfunction
- Checking engine oil level
- Turning the AEB system on/off
- New on site
- Most important about car
LATCH (Lower Anchors and Tethers for CHildren) system

LATCH system lower anchor locations - bench seat
Your vehicle is equipped with special anchor points that are used with LATCH system compatible child restraints. This system may also be referred to as the ISOFIX or ISOFIX compatible system. With this system, you do not have to use a vehicle seat belt to secure the child restraint unless the combined weight of the child and child restraint exceeds 65 lbs. (29.5 kg). If the combined weight of the child and child restraint is greater than 65 lbs. (29.5 kg), use the vehicle’s seat belt (not the lower anchors) to install the child restraint. Be sure to follow the child restraint manufacturer’s instructions for installation.