Nissan Murano: Removal and Installation / Rear View Camera
REMOVAL
Remove back door outer finisher. Refer to Removal and Installation.
Disconnect the harness connector (A) from rear camera (1).
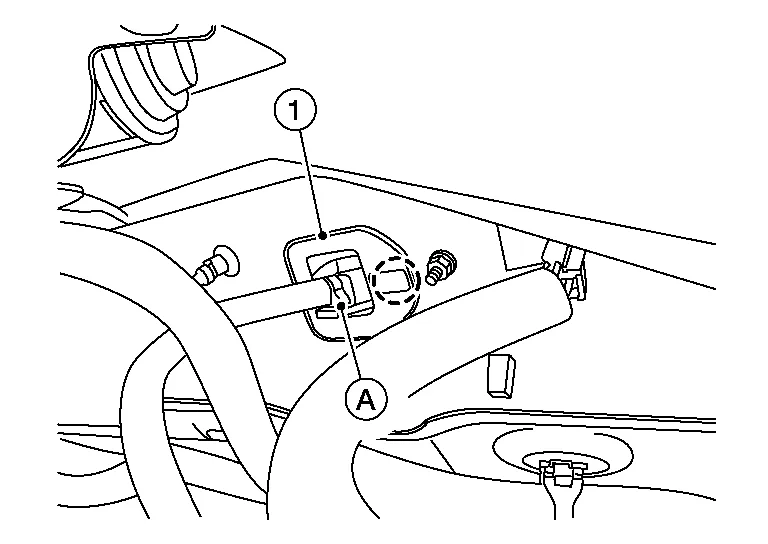
Release pawl then remove rear camera.
 : Pawl
INSTALLATION
Installation is in the reverse order of removal.
 Audio Unit
Exploded View
1.
Audio unit bracket (RH)
2.
Audio unit
3.
Audio unit bracket (LH)
4.
A/C auto amp.
Removal and Installation
REMOVALCAUTION:
Before disconnecting the audio unit and battery terminals, turn the ignition switch OFF and wait at least 30 seconds...

Other information:
Nissan Murano (Z52) 2015-2024 Owners Manual: Fuel recommendation
Use unleaded regular gasoline with an octane rating of at least 87 AKI (Anti-Knock Index) number (Research octane number 91). CAUTION Only vehicles with the E-85 filler door label canoperateonE-85.Fuel system or other damage can occur if E-85 is used in vehicles that are not designed to run on E-85...
Nissan Murano (Z52) 2015-2024 Owners Manual: RearView Monitor system limitations
WARNING Listed below are the system limitations for RearView Monitor. Failure to operate the vehicle in accordance with these system limitations could result in serious injury or death. The system cannot completely eliminate blind spots and may not show every object...
Categories
- Manuals Home
- Nissan Murano Owners Manual
- Nissan Murano Service Manual
- Checking engine oil level
- Shift lock release
- How to enable/disable the LDW system
- New on site
- Most important about car
Seatback pockets
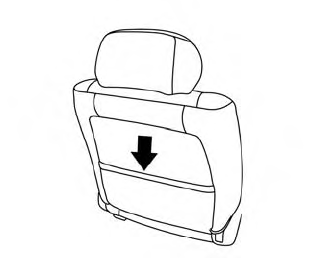
Theremaybe one or two seatback pockets located on the back of the driver and passenger seats. The pockets can be used to store maps.
WARNING
Copyright © 2026 www.nimurano.com