Nissan Murano: Removal and Installation / Audio Unit
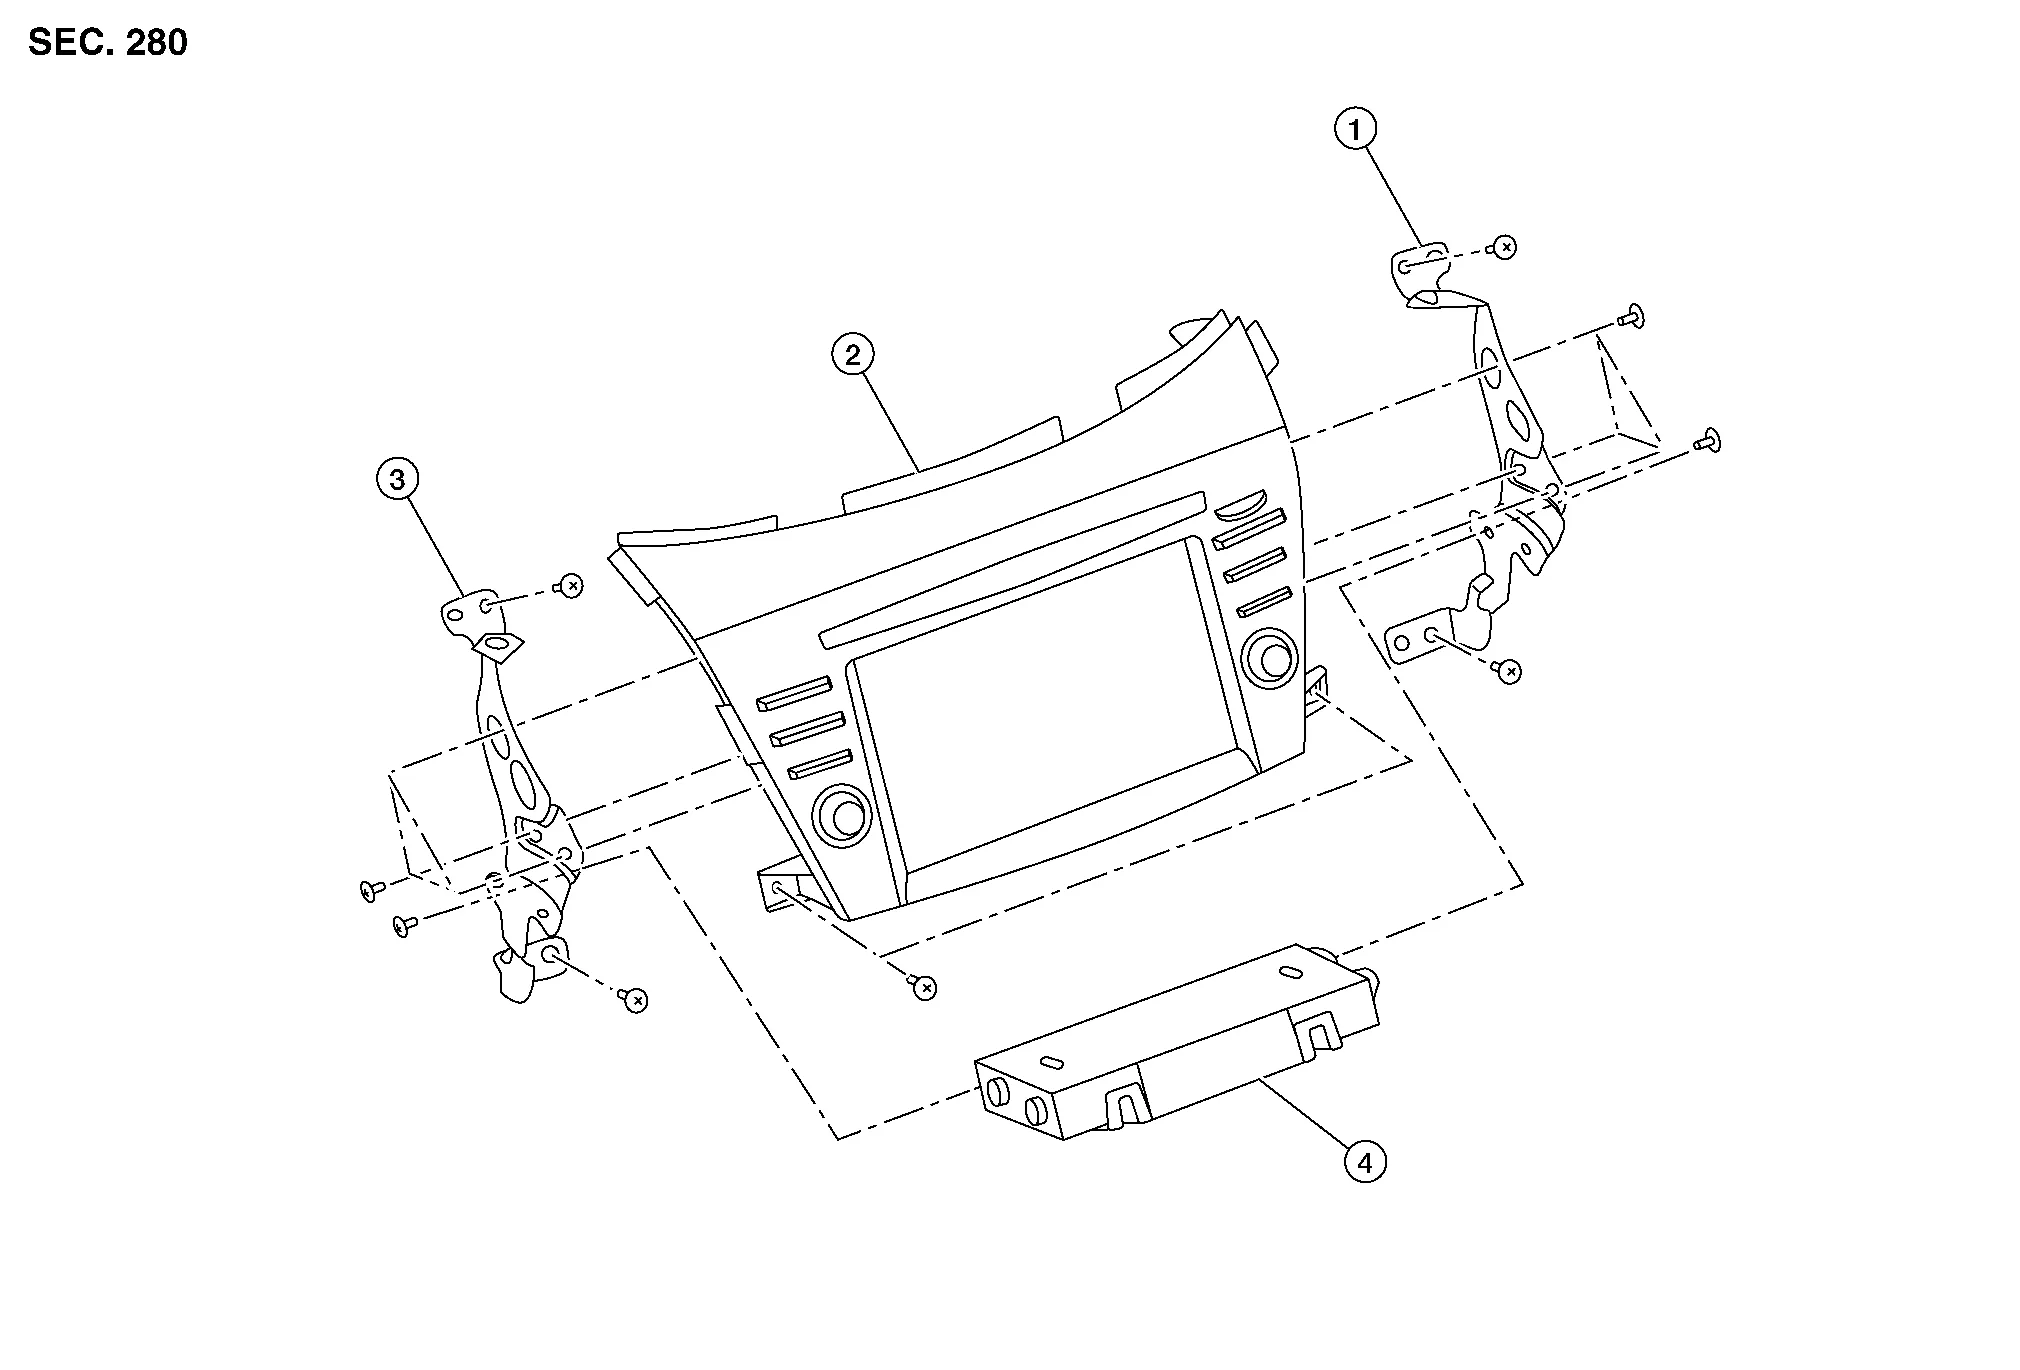
| 1. | Audio unit bracket (RH) | 2. | Audio unit | 3. | Audio unit bracket (LH) |
| 4. | A/C auto amp. |
REMOVAL
CAUTION:
Before disconnecting the audio unit and battery terminals, turn the ignition switch OFF and wait at least 30 seconds.
 NOTE:
NOTE:
-
Before replacing audio unit, perform “Before Replace ECU” of “Read / Write Configuration” to save or print current Nissan Murano vehicle specification. Refer to Description.
-
After the ignition switch is turned OFF, the audio unit continues operating for approximately 30 seconds.
-
Therefore, data corruption may occur if battery voltage is cut off within 30 seconds.
Disconnect the negative battery terminal. Refer to Removal and Installation.
Remove cluster lid D. Refer to Removal and Installation.
Remove A/C switch assembly. Refer to Removal and Installation.
Remove audio unit screws then pull out audio unit.
Disconnect the harness connectors from audio unit and remove.
Remove audio unit bracket (LH/RH) screws and audio unit brackets [(LH/RH) (if necessary)].
INSTALLATION
CAUTION:
Be sure to perform “After Replace ECU” of “Read / Write Configuration” or “Manual Configuration” when replacing audio unit. Refer to Description.
Installation is in the reverse order of removal.

 Rear View Camera
Removal and Installation
REMOVALRemove back door outer finisher. Refer to Removal and Installation.
Disconnect the harness connector (A) from rear camera (1)...
Other information:
Nissan Murano (Z52) 2015-2024 Service Manual: Fuel Pump Control Module
Exploded View 1. Fuel pump control module (FPCM) 2. FPCM bracket Front Removal and Installation REMOVALLift luggage floor rear finisher and locate fuel pump control module (FPCM) behind luggage mask. Remove bolts (A) from the bracket. Disconnect the harness connector (B) from the fuel pump control module (1) and then remove fuel pump control module...
Nissan Murano (Z52) 2015-2024 Service Manual: C1154 Transmission Range Switch
DTC Description DTC DETECTION LOGIC DTC No. CONSULT screen item (Trouble diagnosis content) DTC detected condition C1154 PNP POSI SIG (PNP position signal) Diagnosis condition When ignition switch ON. Signal (terminal) Shift position signal Threshold When a malfunction is detected in TCM system...
Categories
- Manuals Home
- Nissan Murano Owners Manual
- Nissan Murano Service Manual
- Vehicle Dynamic Control (VDC) OFF switch
- Settings
- Power Steering Fluid (PSF)
- New on site
- Most important about car
Autolight system
The autolight system allows the headlights to turn on and off automatically. The autolight system can:
Turn on the headlights, front parking, tail, license plate and instrument panel lights automatically when it is dark. Turn off all the lights (except daylight running lights) when it is light. Keep all the lights on for a period of time after you place the ignition switch in the OFF position and all doors are closed.