
Nissan Murano: HomeLink® Universal Transceiver (if so equipped) / Programming HomeLink® for Canadian customers and gate openers
Canadian radio-frequency laws require transmitter signals to “time-out” (or quit) after several seconds of transmission – which may not be long enough for HomeLink® to pick up the signal during training. Similar to this Canadian law, some U.S. gate operators are designed to “timeout” in the same manner.
If you live in Canada or you are having difficulties training a gate operator or garage door opener by using the “Training” procedures, replace “Programming HomeLink®” step 2 with the following:
NOTE:
When programming a garage door opener, etc., unplug the device during the “cycling” process to prevent possible damageto the garage door opener components.
- For additional information, refer to “Programming HomeLink®” step 1 in this section.
- Using both hands, simultaneously press and hold the desired HomeLink® button and the hand-held transmitter button. During training, your hand-held transmitter may automatically stop transmitting. Continue to press and hold the desired HomeLink® button while you press and re-press (“cycle”) your hand-held transmitter every 2 seconds until the frequency signal has been learned. The HomeLink® indicator light will flash slowly and then rapidly after several seconds upon successful training.DONOT release until the HomeLink® indicator light flashes slowly and then rapidly. When the indicator light flashes rapidly, both buttons may be released. The rapid flashing indicates successful training. Proceed with “Programming HomeLink®” step 3 to complete. If the device was unplugged during the programming procedure, remember to plug it back in when programming is completed.
 Programming HomeLink®
If you have any questions or are having
difficulty programming your HomeLink®
buttons, refer to the HomeLink®website at:
www.homelink.com or call 1-800-355-3515...
 Operating the HomeLink® Universal Transceiver
The HomeLink® Universal Transceiver, after
it is programmed, can be used to activate
the programmed device. To operate, simply
press and release the appropriate programmed
HomeLink® Universal Transceiver
button...
Other information:
Nissan Murano (Z52) 2015-2024 Service Manual: Door Request Switch
Component Function Check CHECK FUNCTION CONSULT Select “REQ SW-DR” or “REQ SW-AS” in “Data Monitor” mode of “BCM(INTELLIGENT KEY)”. Check that the function operates normally according to the following conditions: Monitor Item Condition Status REQ SW -DR LH door request switch Pressed ON Released OFF REQ SW -AS RH door request switch Pressed ON Released OFF Is the inspection result normal? YES>> Front door request switch is OK...
Nissan Murano (Z52) 2015-2024 Owners Manual: NISSAN Vehicle Immobilizer System
The NISSAN Vehicle Immobilizer System will not allow the engine to start without the use of the registered key. If the engine fails to start using a registered key (for example, when interference is caused by another registered key, an automated toll road device or automatic payment device on the key ring), restart the engine using the following procedure: Leave the ignition switch in the ON position for approximately 5 seconds...
Categories
- Manuals Home
- Nissan Murano Owners Manual
- Nissan Murano Service Manual
- Power Steering Fluid (PSF)
- Jacking up vehicle and removing the damaged tire
- Fuel recommendation
- New on site
- Most important about car
LATCH (Lower Anchors and Tethers for CHildren) system
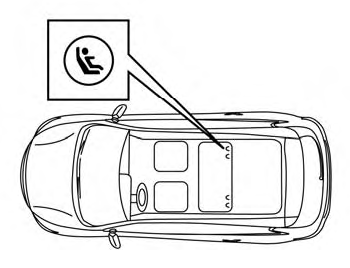
LATCH system lower anchor locations - bench seat
Your vehicle is equipped with special anchor points that are used with LATCH system compatible child restraints. This system may also be referred to as the ISOFIX or ISOFIX compatible system. With this system, you do not have to use a vehicle seat belt to secure the child restraint unless the combined weight of the child and child restraint exceeds 65 lbs. (29.5 kg). If the combined weight of the child and child restraint is greater than 65 lbs. (29.5 kg), use the vehicle’s seat belt (not the lower anchors) to install the child restraint. Be sure to follow the child restraint manufacturer’s instructions for installation.
