Nissan Murano: Rear Door Lock / Outside Handle
REMOVAL
Fully close rear door glass.
Remove rear door finisher. Refer to Removal and Installation.
Remove rear door vapor barrier.
Remove door side grommet and bolt from grommet hole.

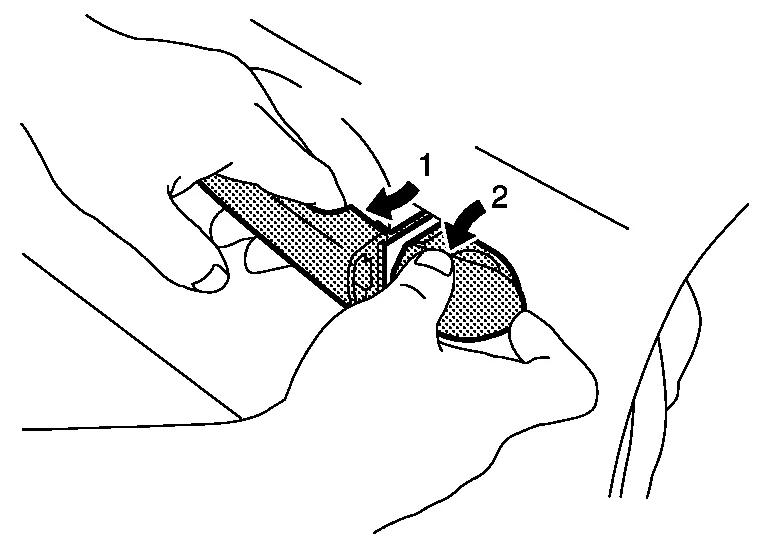
While pulling (1) outside handle, remove (2) outside handle escutcheon.
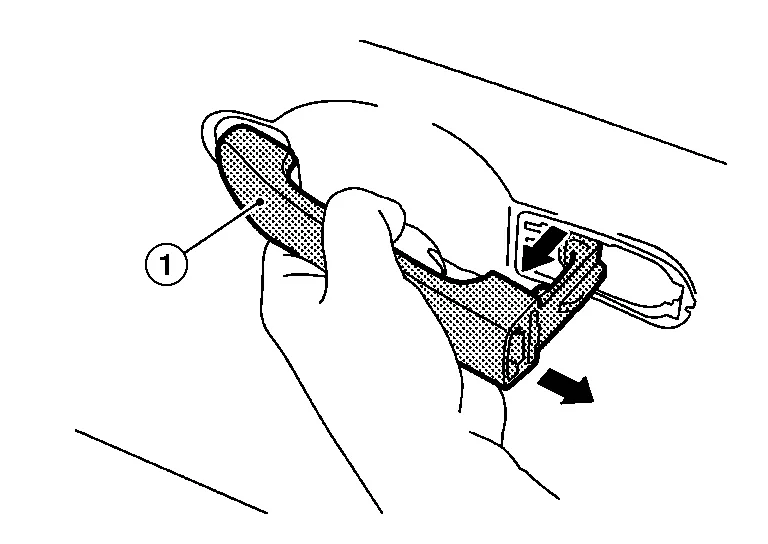
While pulling outside handle (1), slide toward rear of Nissan Murano vehicle to remove outside handle.
Remove front gasket and rear gasket.
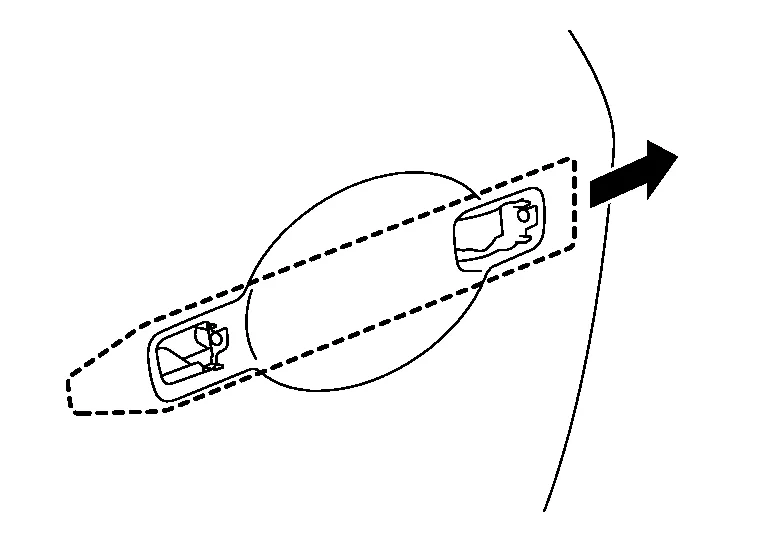
Slide outside handle bracket toward rear of Nissan Murano vehicle to remove.
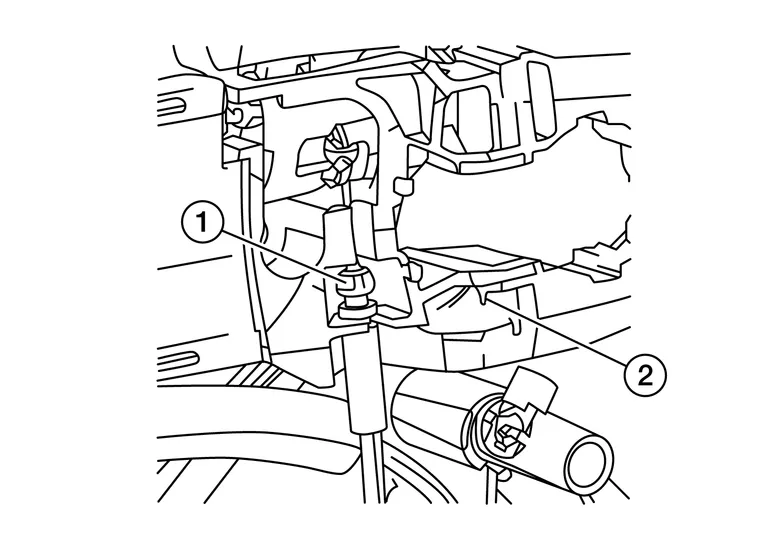
Disconnect outside handle cable(1) from outside handle bracket(2).
INSTALLATION
Installation is in the reverse order of removal.
CAUTION:
-
After installation, check that door lock cable is properly engaged to outside handle bracket.
-
After installation, check door open/close and lock/unlock operation.
 Inside Handle
Removal and Installation
REMOVALRemove rear door finisher. Refer to Removal and Installation.
Remove inside handle screws.INSTALLATIONInstallation is in the reverse order of removal...

Other information:
Nissan Murano (Z52) 2015-2024 Service Manual: P0443 Evap Canister Purge Volume Control Solenoid Valve
DTC Description DTC DETECTION LOGIC The canister purge flow is detected during the vehicle is stopped while the engine is running, even when EVAP canister purge volume control solenoid valve is completely closed. The canister purge flow is detected during the specified driving conditions, even when EVAP canister purge volume control solenoid valve is completely closed...
Nissan Murano (Z52) 2015-2024 Owners Manual: Installing the spare tire
The spare tire is designed for emergency use. For additional information, refer to “Wheels and tires” in the “Do-it-yourself” section of this manual. Clean any mud or dirt from the surface between the wheel and hub. Carefully put the spare tire on and tighten the wheel nuts finger tight...
Categories
- Manuals Home
- Nissan Murano Owners Manual
- Nissan Murano Service Manual
- Fuel recommendation
- Warning lights
- How to enable/disable the LDW system
- New on site
- Most important about car
LATCH (Lower Anchors and Tethers for CHildren) system

LATCH system lower anchor locations - bench seat
Your vehicle is equipped with special anchor points that are used with LATCH system compatible child restraints. This system may also be referred to as the ISOFIX or ISOFIX compatible system. With this system, you do not have to use a vehicle seat belt to secure the child restraint unless the combined weight of the child and child restraint exceeds 65 lbs. (29.5 kg). If the combined weight of the child and child restraint is greater than 65 lbs. (29.5 kg), use the vehicle’s seat belt (not the lower anchors) to install the child restraint. Be sure to follow the child restraint manufacturer’s instructions for installation.