Nissan Murano: Removal and Installation / Control Cable
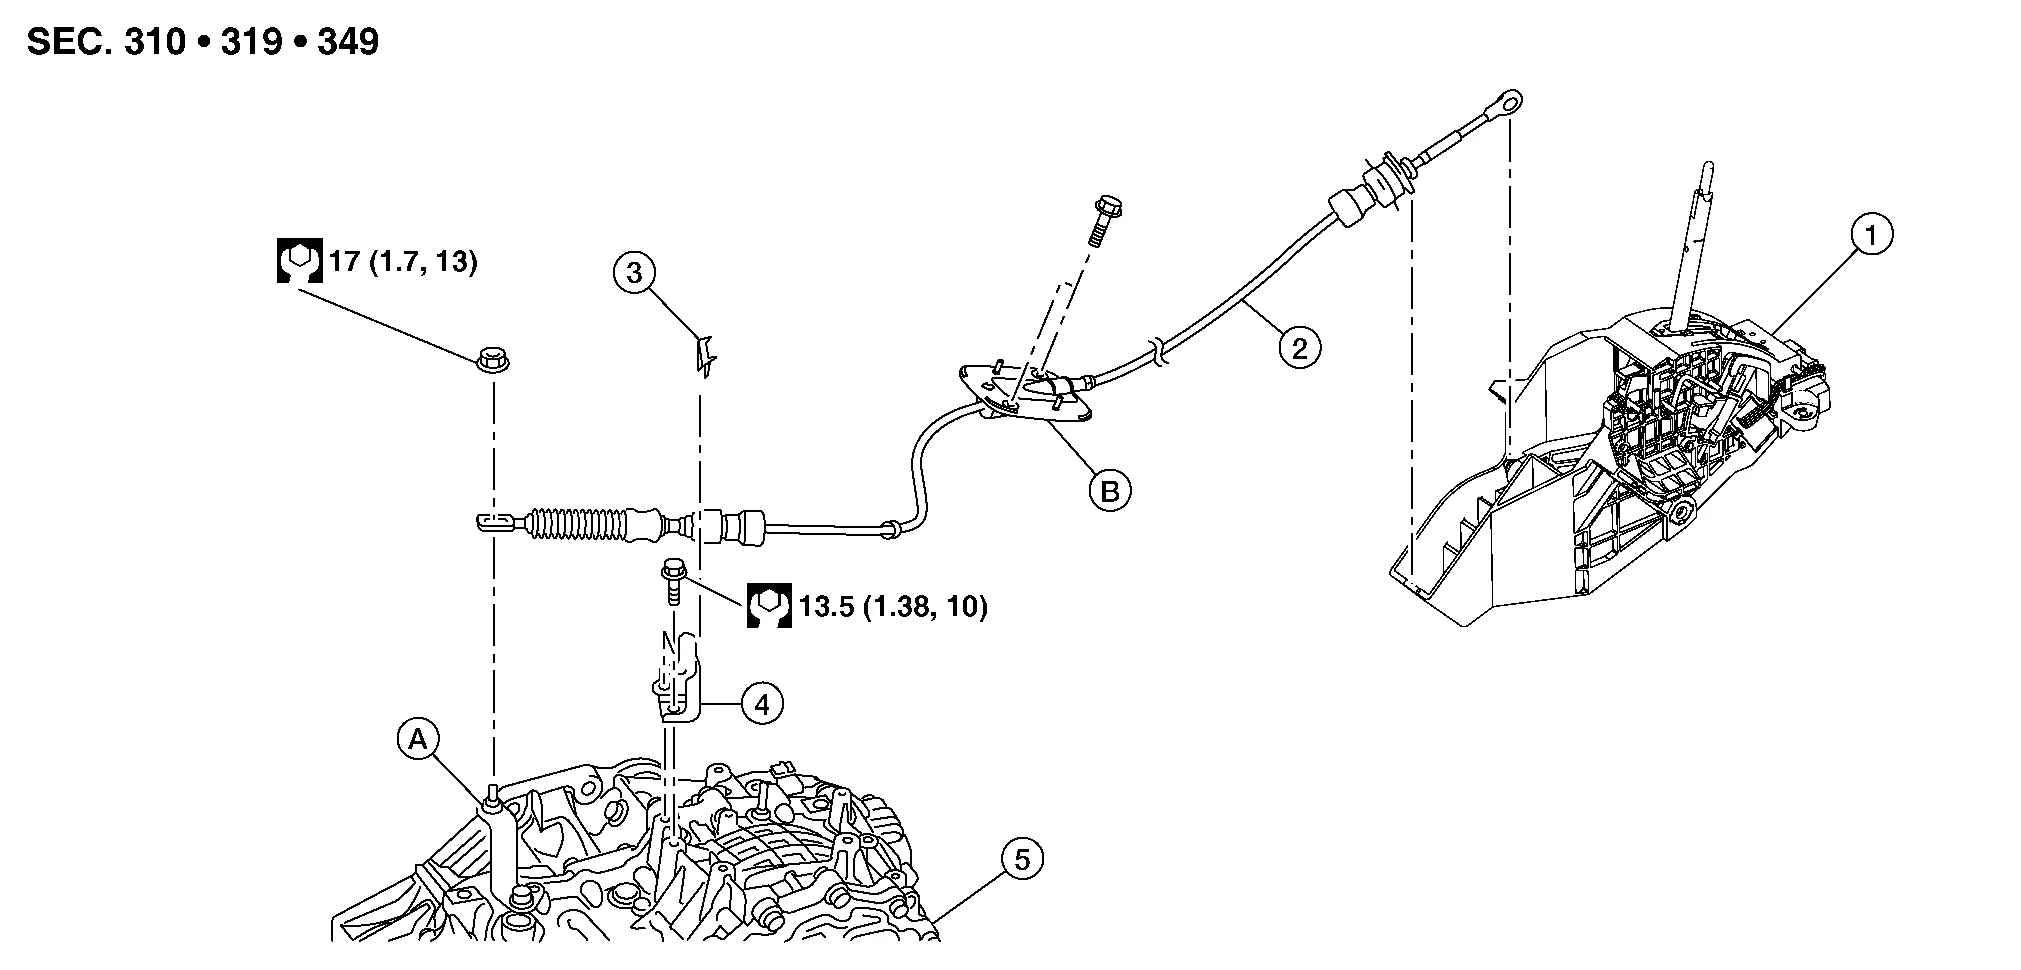
| 1. | Shift selector assembly | 2. | Control cable | 3. | Lock plate |
| 4. | Bracket | 5. | Transaxle assembly | A. | Manual lever |
| B. | Grommet |
REMOVAL
Apply the parking brake.
CAUTION:
Make sure the vehicle cannot move with the parking brake applied.
Remove the front air duct, air cleaner cases (upper and lower) with mass air flow sensor and air duct assembly. Refer to Removal and Installation.
Remove control cable nut ( ), using suitable tool.
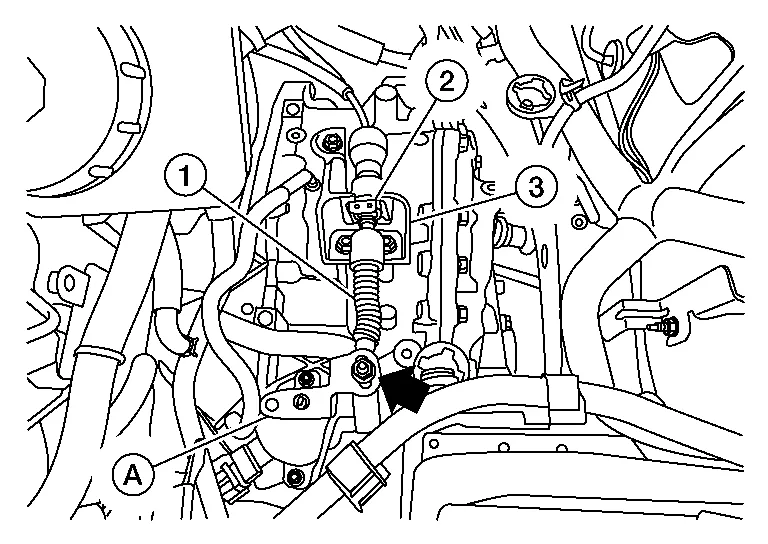
Remove control cable (1) from manual lever (A).
Remove lock plate (2) from control cable (1).
Remove control cable (1) from bracket (3).
Remove the shift lock override button cover (1) using a suitable tool, and insert the suitable tool into opening (A) to depress the shift lock override button. Move the shift selector to the "N" position while depressing the shift lock override button.

Remove the shift selector handle with the following procedure.Slide the shift selector handle cover (1) down.
CAUTION:
Do not damage the knob cover.
Pull out the lock pin (2) from the shift selector handle (3). Pull the shift selector handle and the shift selector handle cover upwards to remove them.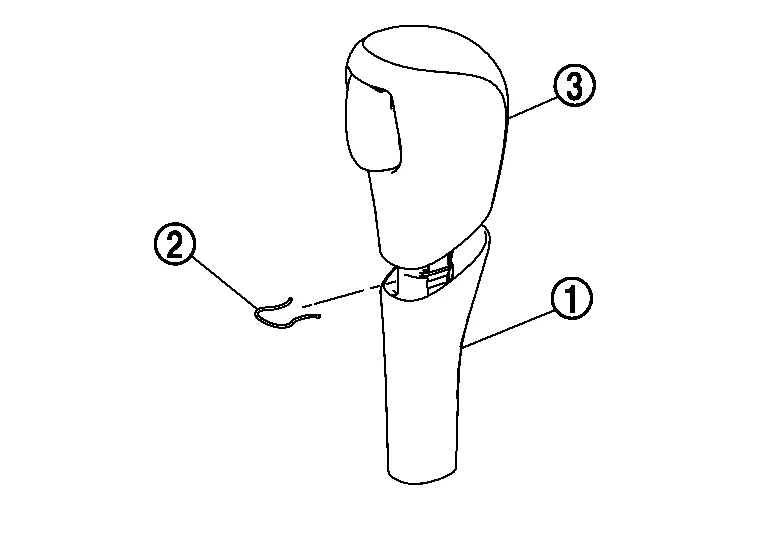
Release shift selector finisher clips and pawls using a suitable tool; disconnect the harness connectors and remove. Refer to Exploded View.
Release center console side finisher (RH) clip and pawls using a suitable tool and remove. Refer to Exploded View.
Position aside the center console lower side finisher (RH). Refer to Exploded View.
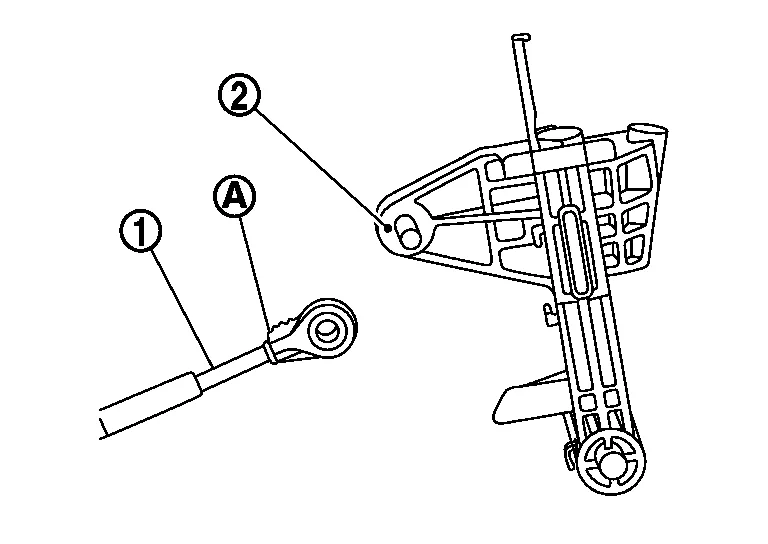
Remove control cable (1) from shift selector assembly (2).
(A): Ribbed surface
Pull back dash trim (A) and remove bolts (), using suitable tool.
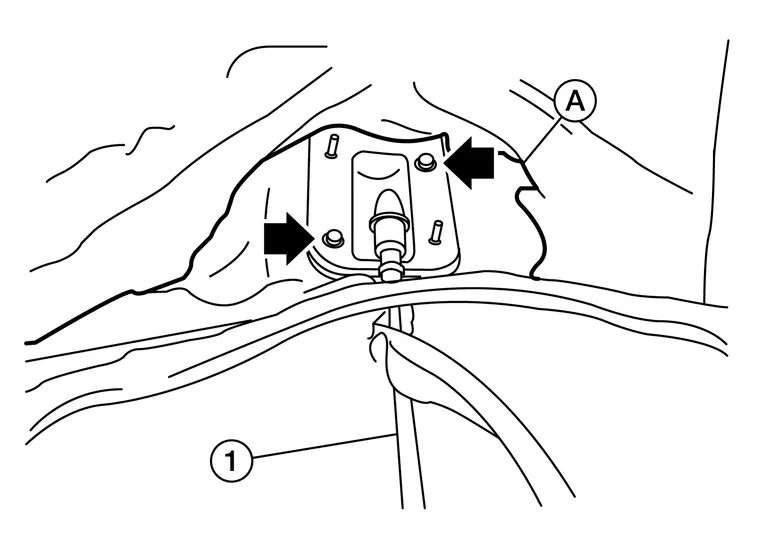
Remove the control cable (1) from the Nissan Murano vehicle.
INSTALLATION
Installation is in the reverse order of removal.
-
When installing control cable (1) to shift selector assembly (2), make sure that control cable is fully pressed in with the ribbed surface (A) facing upward.
 NOTE:
NOTE:
Apply multi-purpose grease to control cable before assembly.
-
Adjust control cable as necessary. Refer to Inspection and Adjustment.
Check CVT position. Refer to Inspection and Adjustment.
If malfunction is found, adjust CVT position. Refer to Inspection and Adjustment.
 Cvt Shift Selector
Exploded View
1.
Shift selector handle
2.
Shift selector handle clip
3.
Control cable
4
Shift selector assembly
5.
Shift selector handle cover
Removal and Installation
REMOVALApply the parking brake...
 Tcm
Tcm
Exploded View
1.
Bracket
2.
TCM
Removal and Installation
CAUTION:
To replace TCM, perform "WRITE IP CHARA – REPLACEMENT TCM" of the CONSULT Work Support before removing TCM and save TCM data in CONSULT...
Other information:
Nissan Murano (Z52) 2015-2024 Service Manual: Front Axle :: Symptom Diagnosis. Noise, Vibration and Harshness (nvh) Troubleshooting
NVH Troubleshooting Chart Use chart below to find the cause of the symptom. If necessary, repair or replace these parts. Reference — Inspection — Exploded View — Inspection NVH Troubleshooting Chart Inspection NVH Troubleshooting Chart NVH Troubleshooting Chart Inspection NVH Troubleshooting Chart NVH Troubleshooting Chart Possible cause and SUSPECTED PARTS Excessive joint angle Joint sliding resistance Imbalance Improper installation, looseness Parts interference Wheel bearing damage FRONT SUSPENSION FRONT AXLE TIRE WHEEL DRIVE SHAFT BRAKE STEERING Symptom DRIVE SHAFT Noise × × - - - × × × × × - × × Shake × - × - - × × × × × - × × FRONT AXLE Noise - - - × × × × × × × × × Shake - - - × × × × × × × × × Vibration - - - × × × × - × - × - × Shimmy - - - × × - × - × × - × × Shudder - - - × - × - × × - × × Poor quality ride or handling - - - × × - × - × × - - - Inspect Front Axle for cracks or damage...
Nissan Murano (Z52) 2015-2024 Service Manual: Diagnosis System (automatic Back Door Control Module)
CONSULT Function (AUTO BACK DOOR) APPLICATION ITEMSCONSULT performs the following functions via CAN communication with automatic back door control module: Diagnosis mode Function Description Self diagnostic result Displays the diagnosis results judged by automatic back door control module...
Categories
- Manuals Home
- Nissan Murano Owners Manual
- Nissan Murano Service Manual
- Intelligent Forward Collision Warning (I-FCW)
- All-Wheel Drive (AWD) (if so equipped)
- Shift lock release
- New on site
- Most important about car
Fuel gauge
The gauge indicates the approximate fuel level in the tank.
The gauge may move slightly during braking, turning, acceleration, or going up or down hills.
The gauge needle returns to 0 (Empty) after the ignition switch is placed in the OFF position.