Nissan Murano: Ducts and Grilles / Center Floor Duct
REMOVAL
Remove the center console assembly. Refer to Exploded View.
Remove the steering member brace (LH). Refer to Exploded View.
Remove the screws and center floor duct.
INSTALLATION
Installation is in the reverse order of removal.
 Rear Center Ventilator Duct
Removal and Installation
REMOVALRemove the center console rear finisher. Refer to Exploded View.
Remove the clip and rear center ventilator duct.INSTALLATIONInstallation is in the reverse order of removal...
 Front Floor Duct Nozzle
Removal and Installation
REMOVALRemove the floor trim. Refer to Removal and Installation.
Remove the screw and the front floor duct nozzle.INSTALLATIONInstallation is in the reverse order of removal...
Other information:
Nissan Murano (Z52) 2015-2024 Service Manual: P1572 Icc Brake Switch
DTC Description DTC DETECTION LOGICNOTE: This self-diagnosis has the one trip detection logic. When malfunction A is detected, DTC is not stored in ECM memory. And in that case, 1st trip DTC and 1st trip freeze frame data are displayed. 1st trip DTC is erased when ignition switch OFF...
Nissan Murano (Z52) 2015-2024 Service Manual: Both Side Front Fog Lamps Are Not Turned on
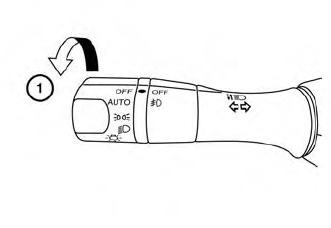
Diagnosis Procedure Both side front fog lamps are not turned ON in any condition.COMBINATION SWITCH INSPECTION Check combination switch. Refer to Symptom Table. Is the inspection result normal? YES>> GO TO 2. NO>> Repair or replace the malfunctioning part...
Categories
- Manuals Home
- Nissan Murano Owners Manual
- Nissan Murano Service Manual
- High Beam Assist (if so equipped)
- System malfunction
- Turning the AEB system on/off
- New on site
- Most important about car
Autolight system
The autolight system allows the headlights to turn on and off automatically. The autolight system can:
Turn on the headlights, front parking, tail, license plate and instrument panel lights automatically when it is dark. Turn off all the lights (except daylight running lights) when it is light. Keep all the lights on for a period of time after you place the ignition switch in the OFF position and all doors are closed.
Copyright © 2026 www.nimurano.com