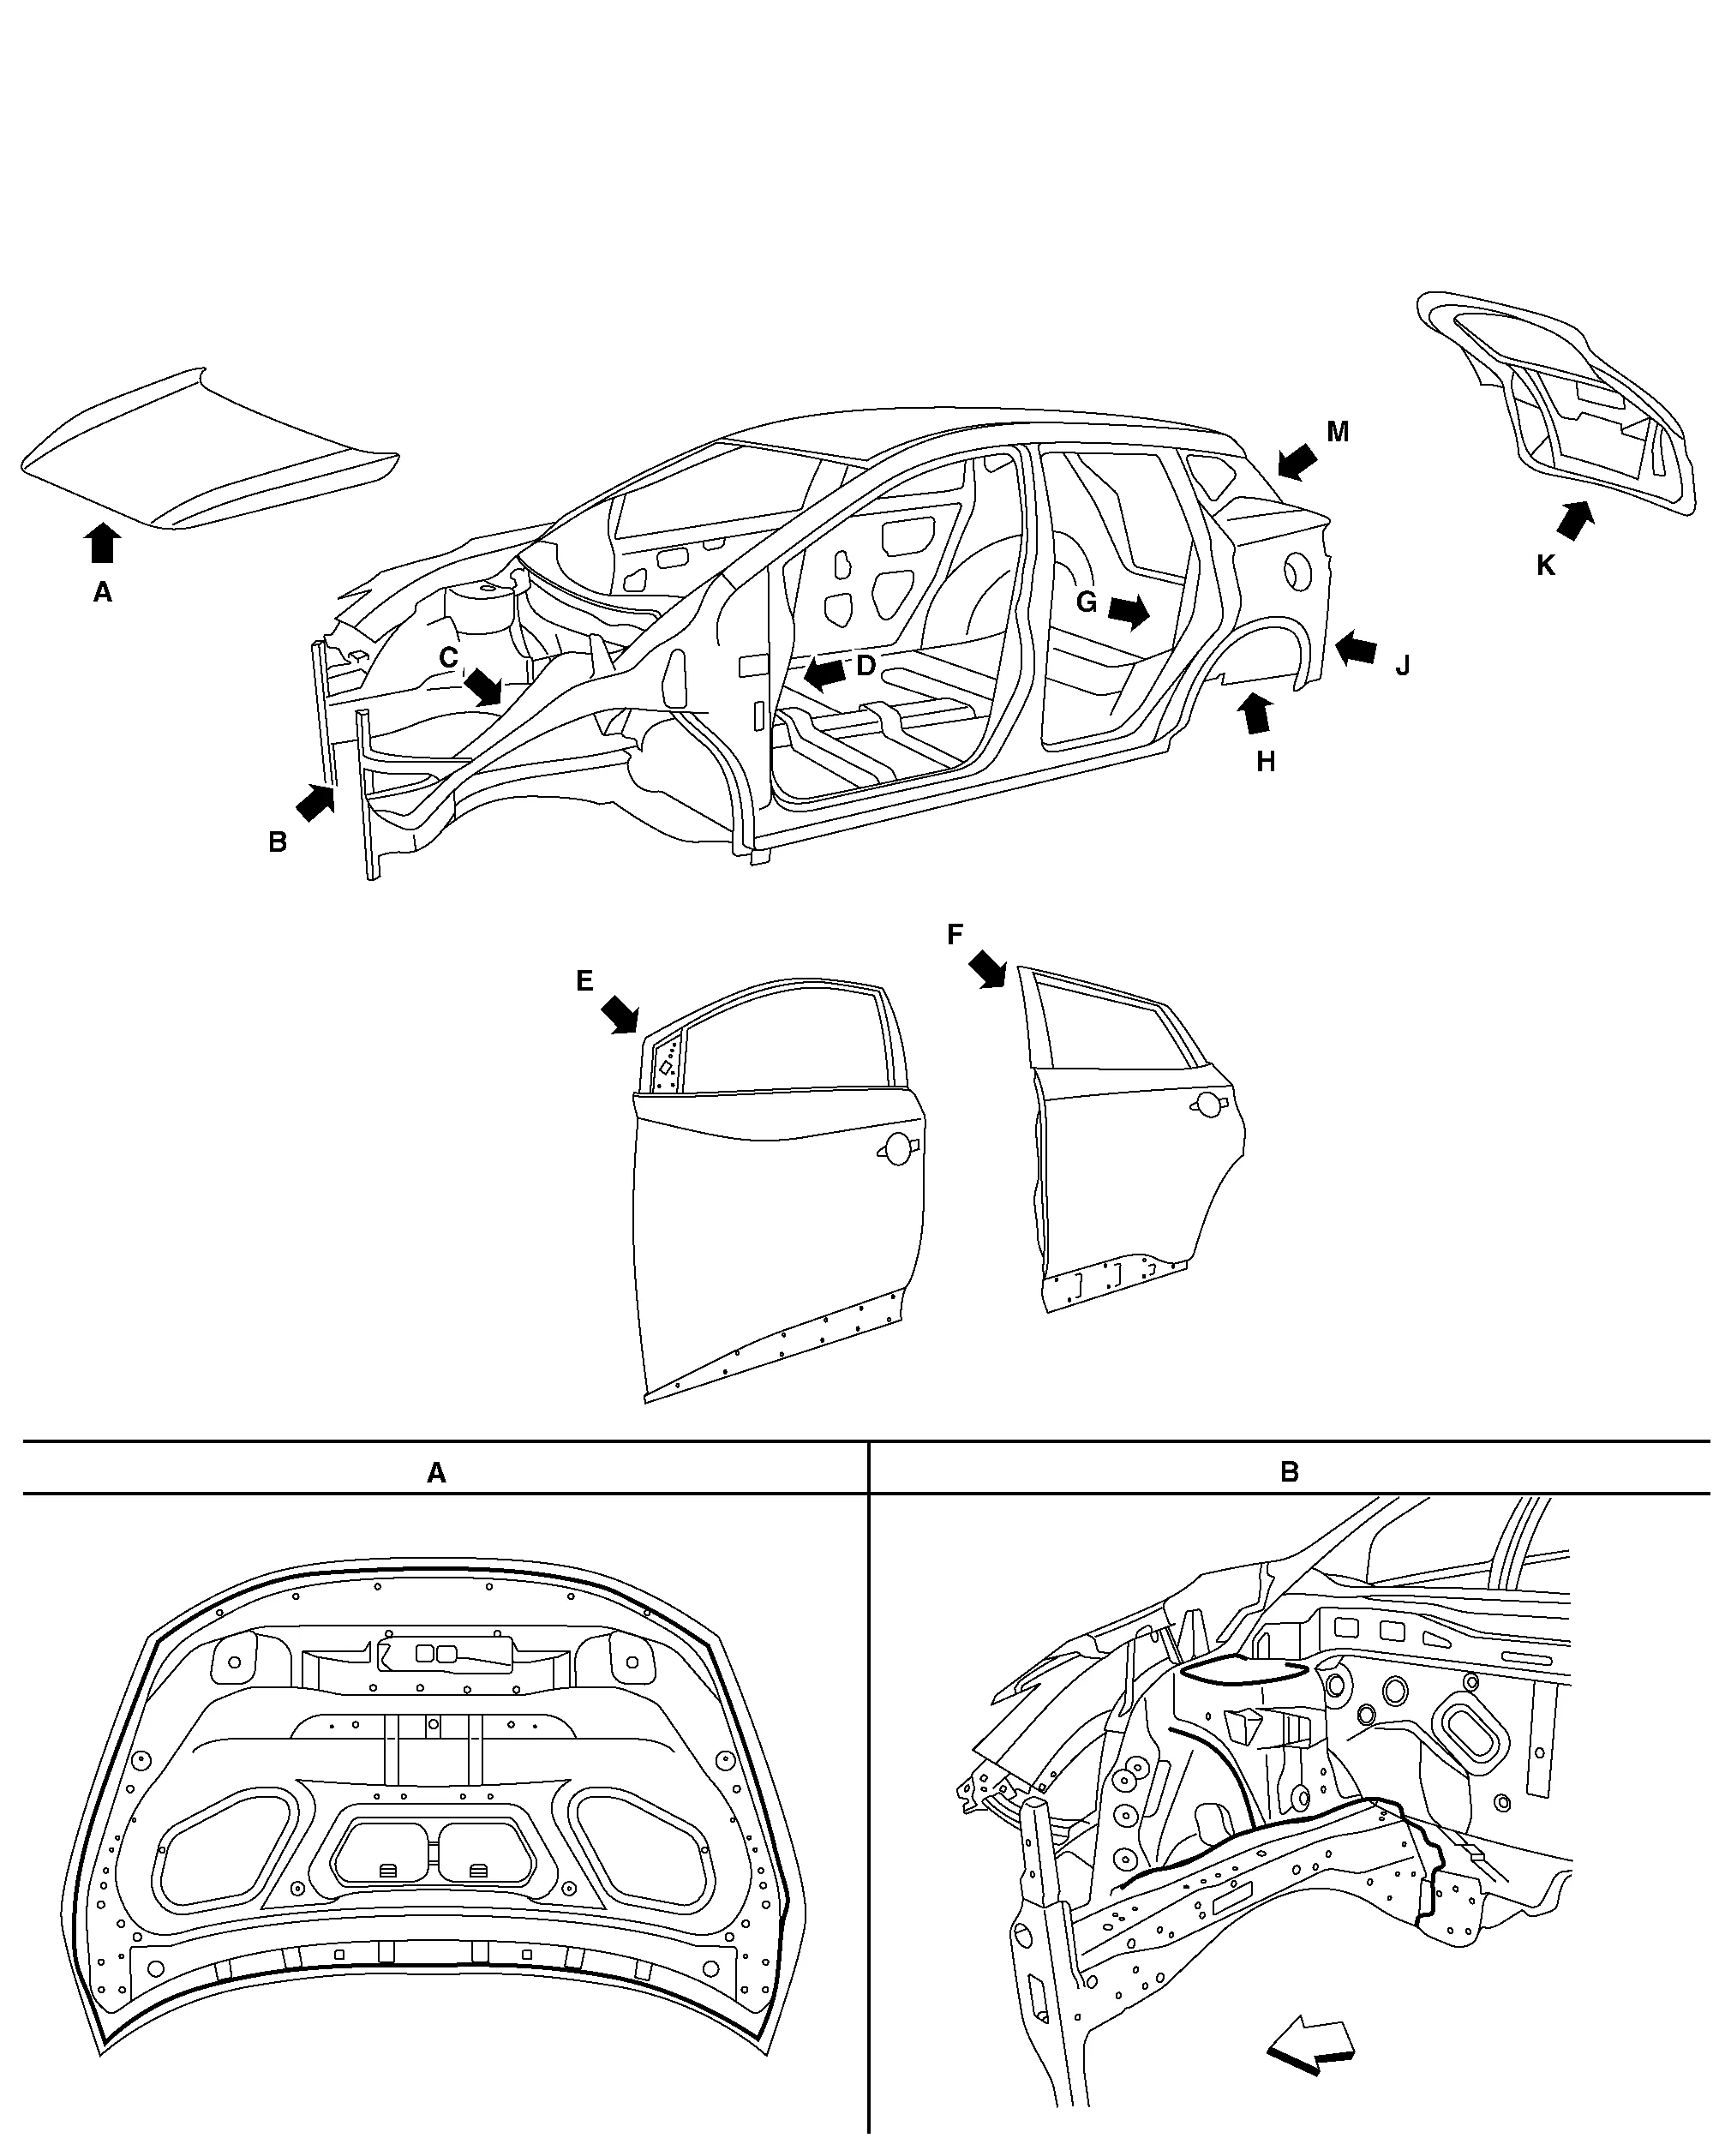
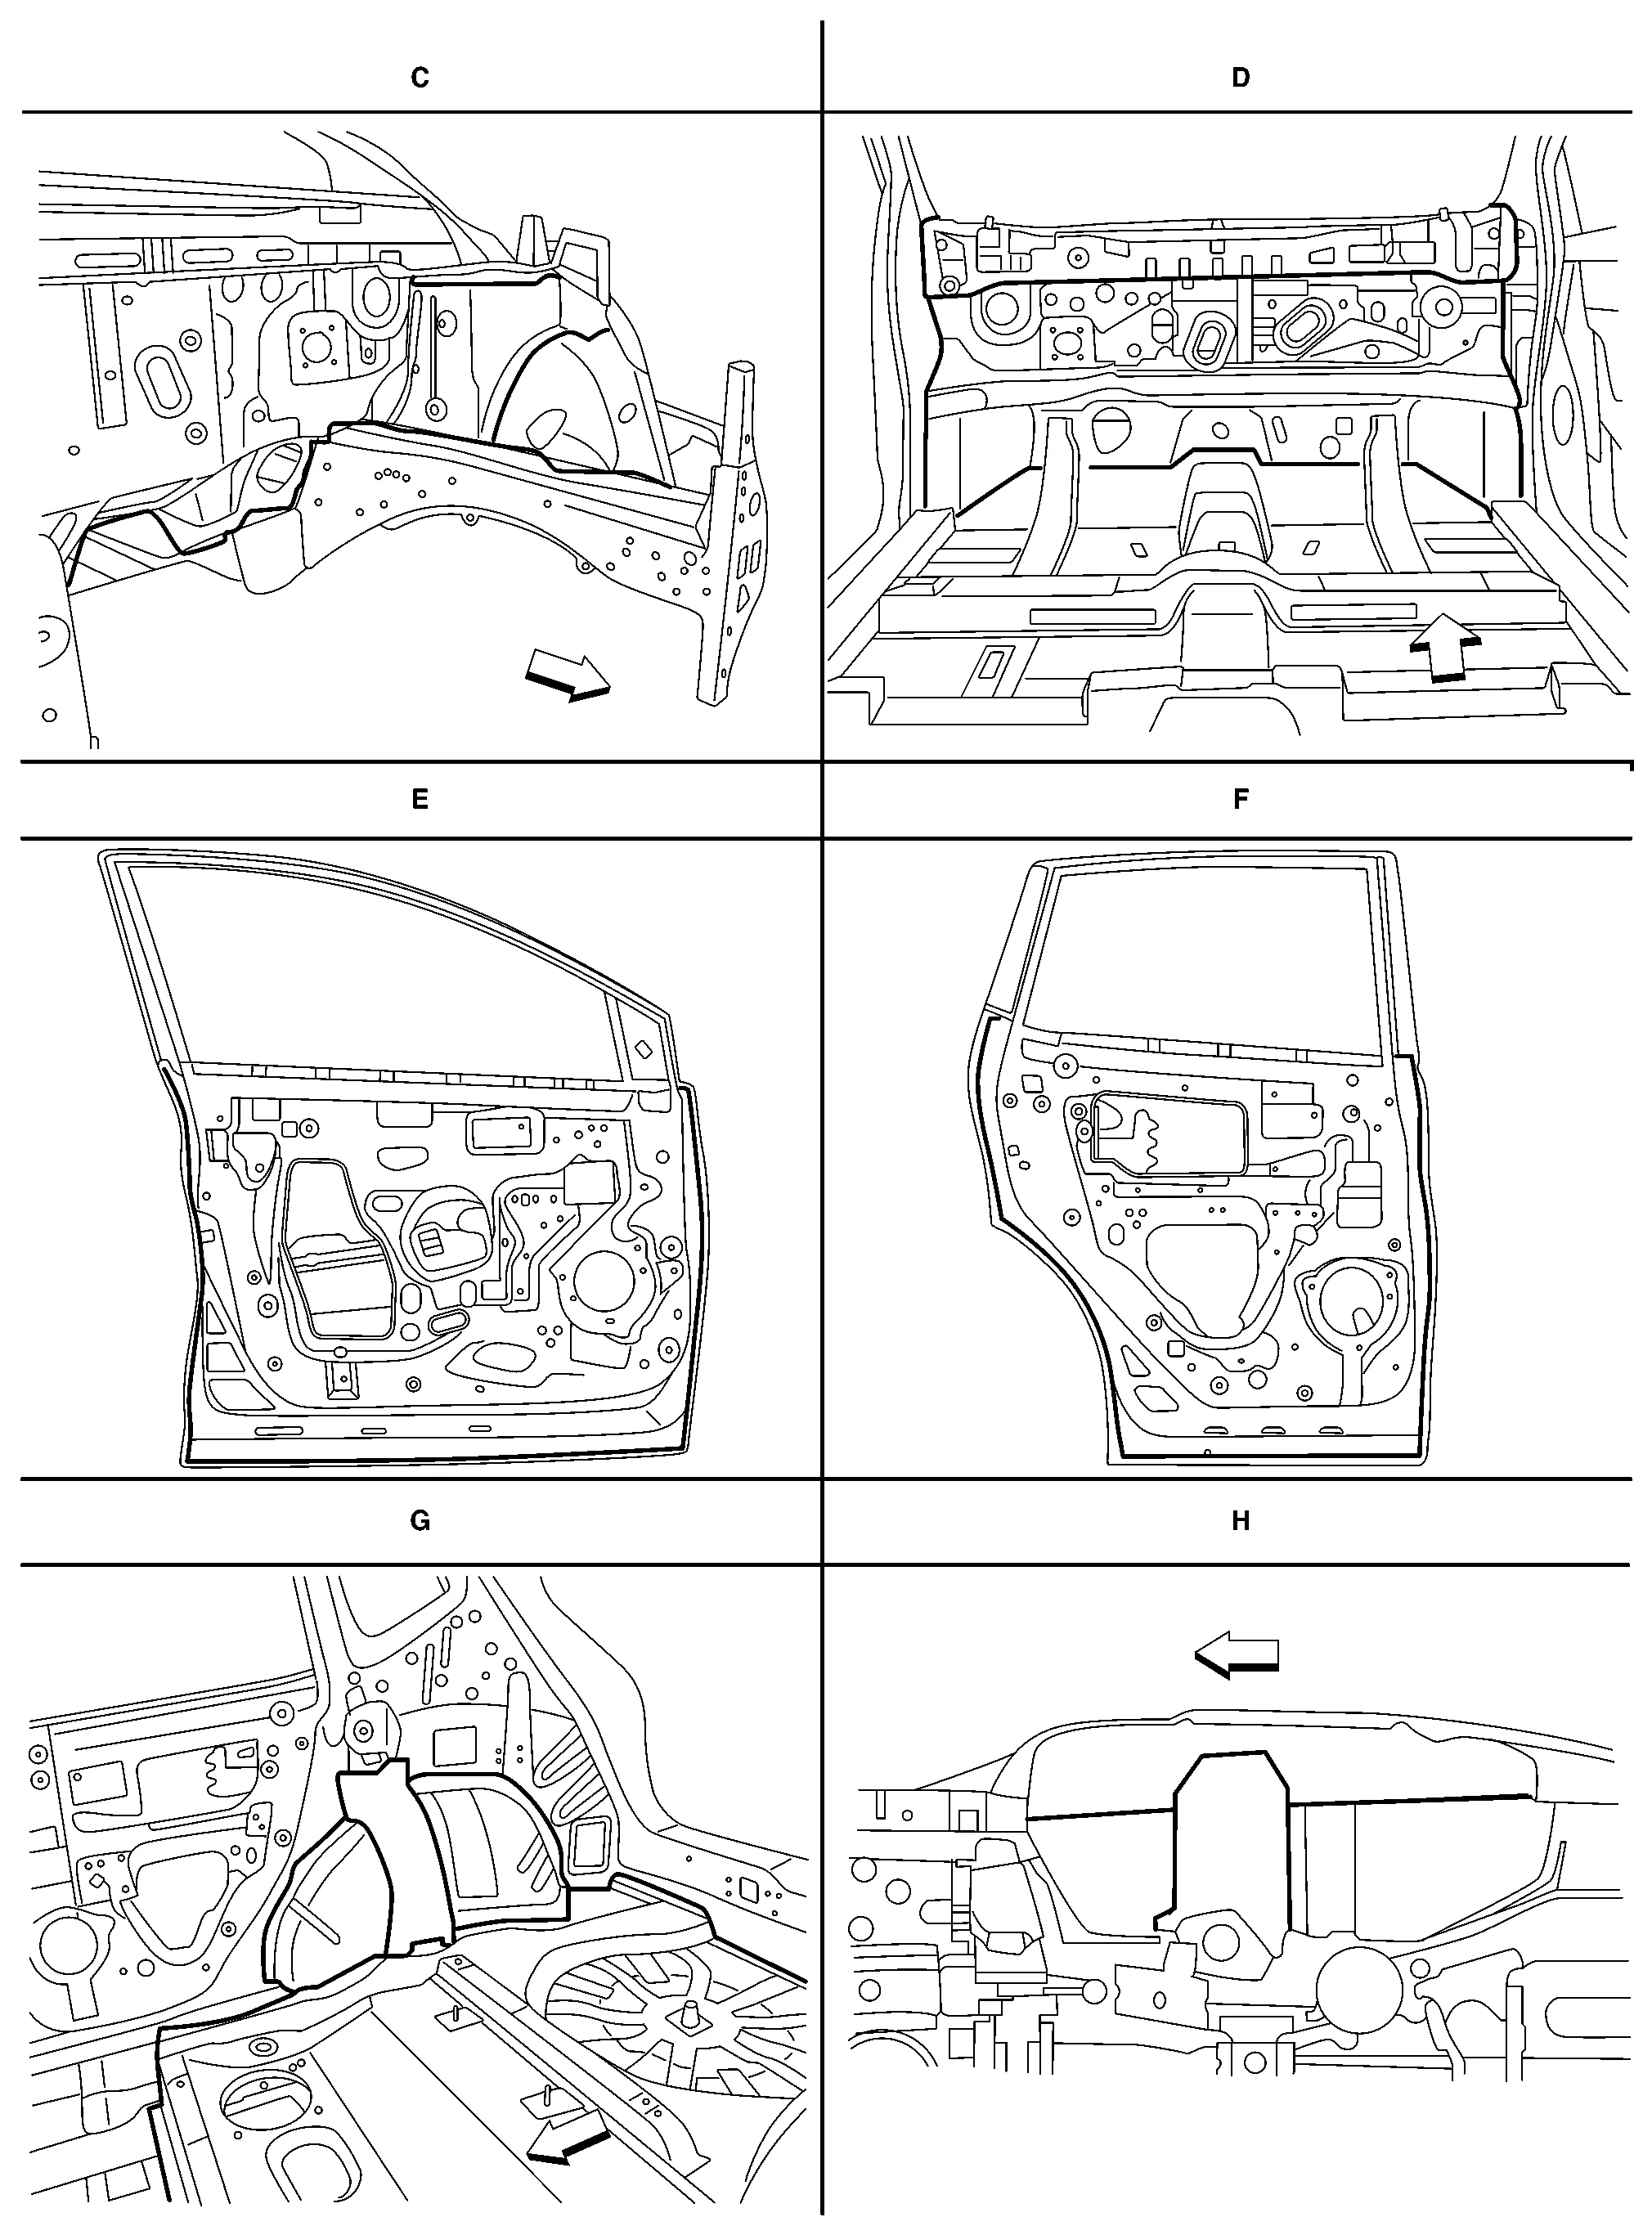
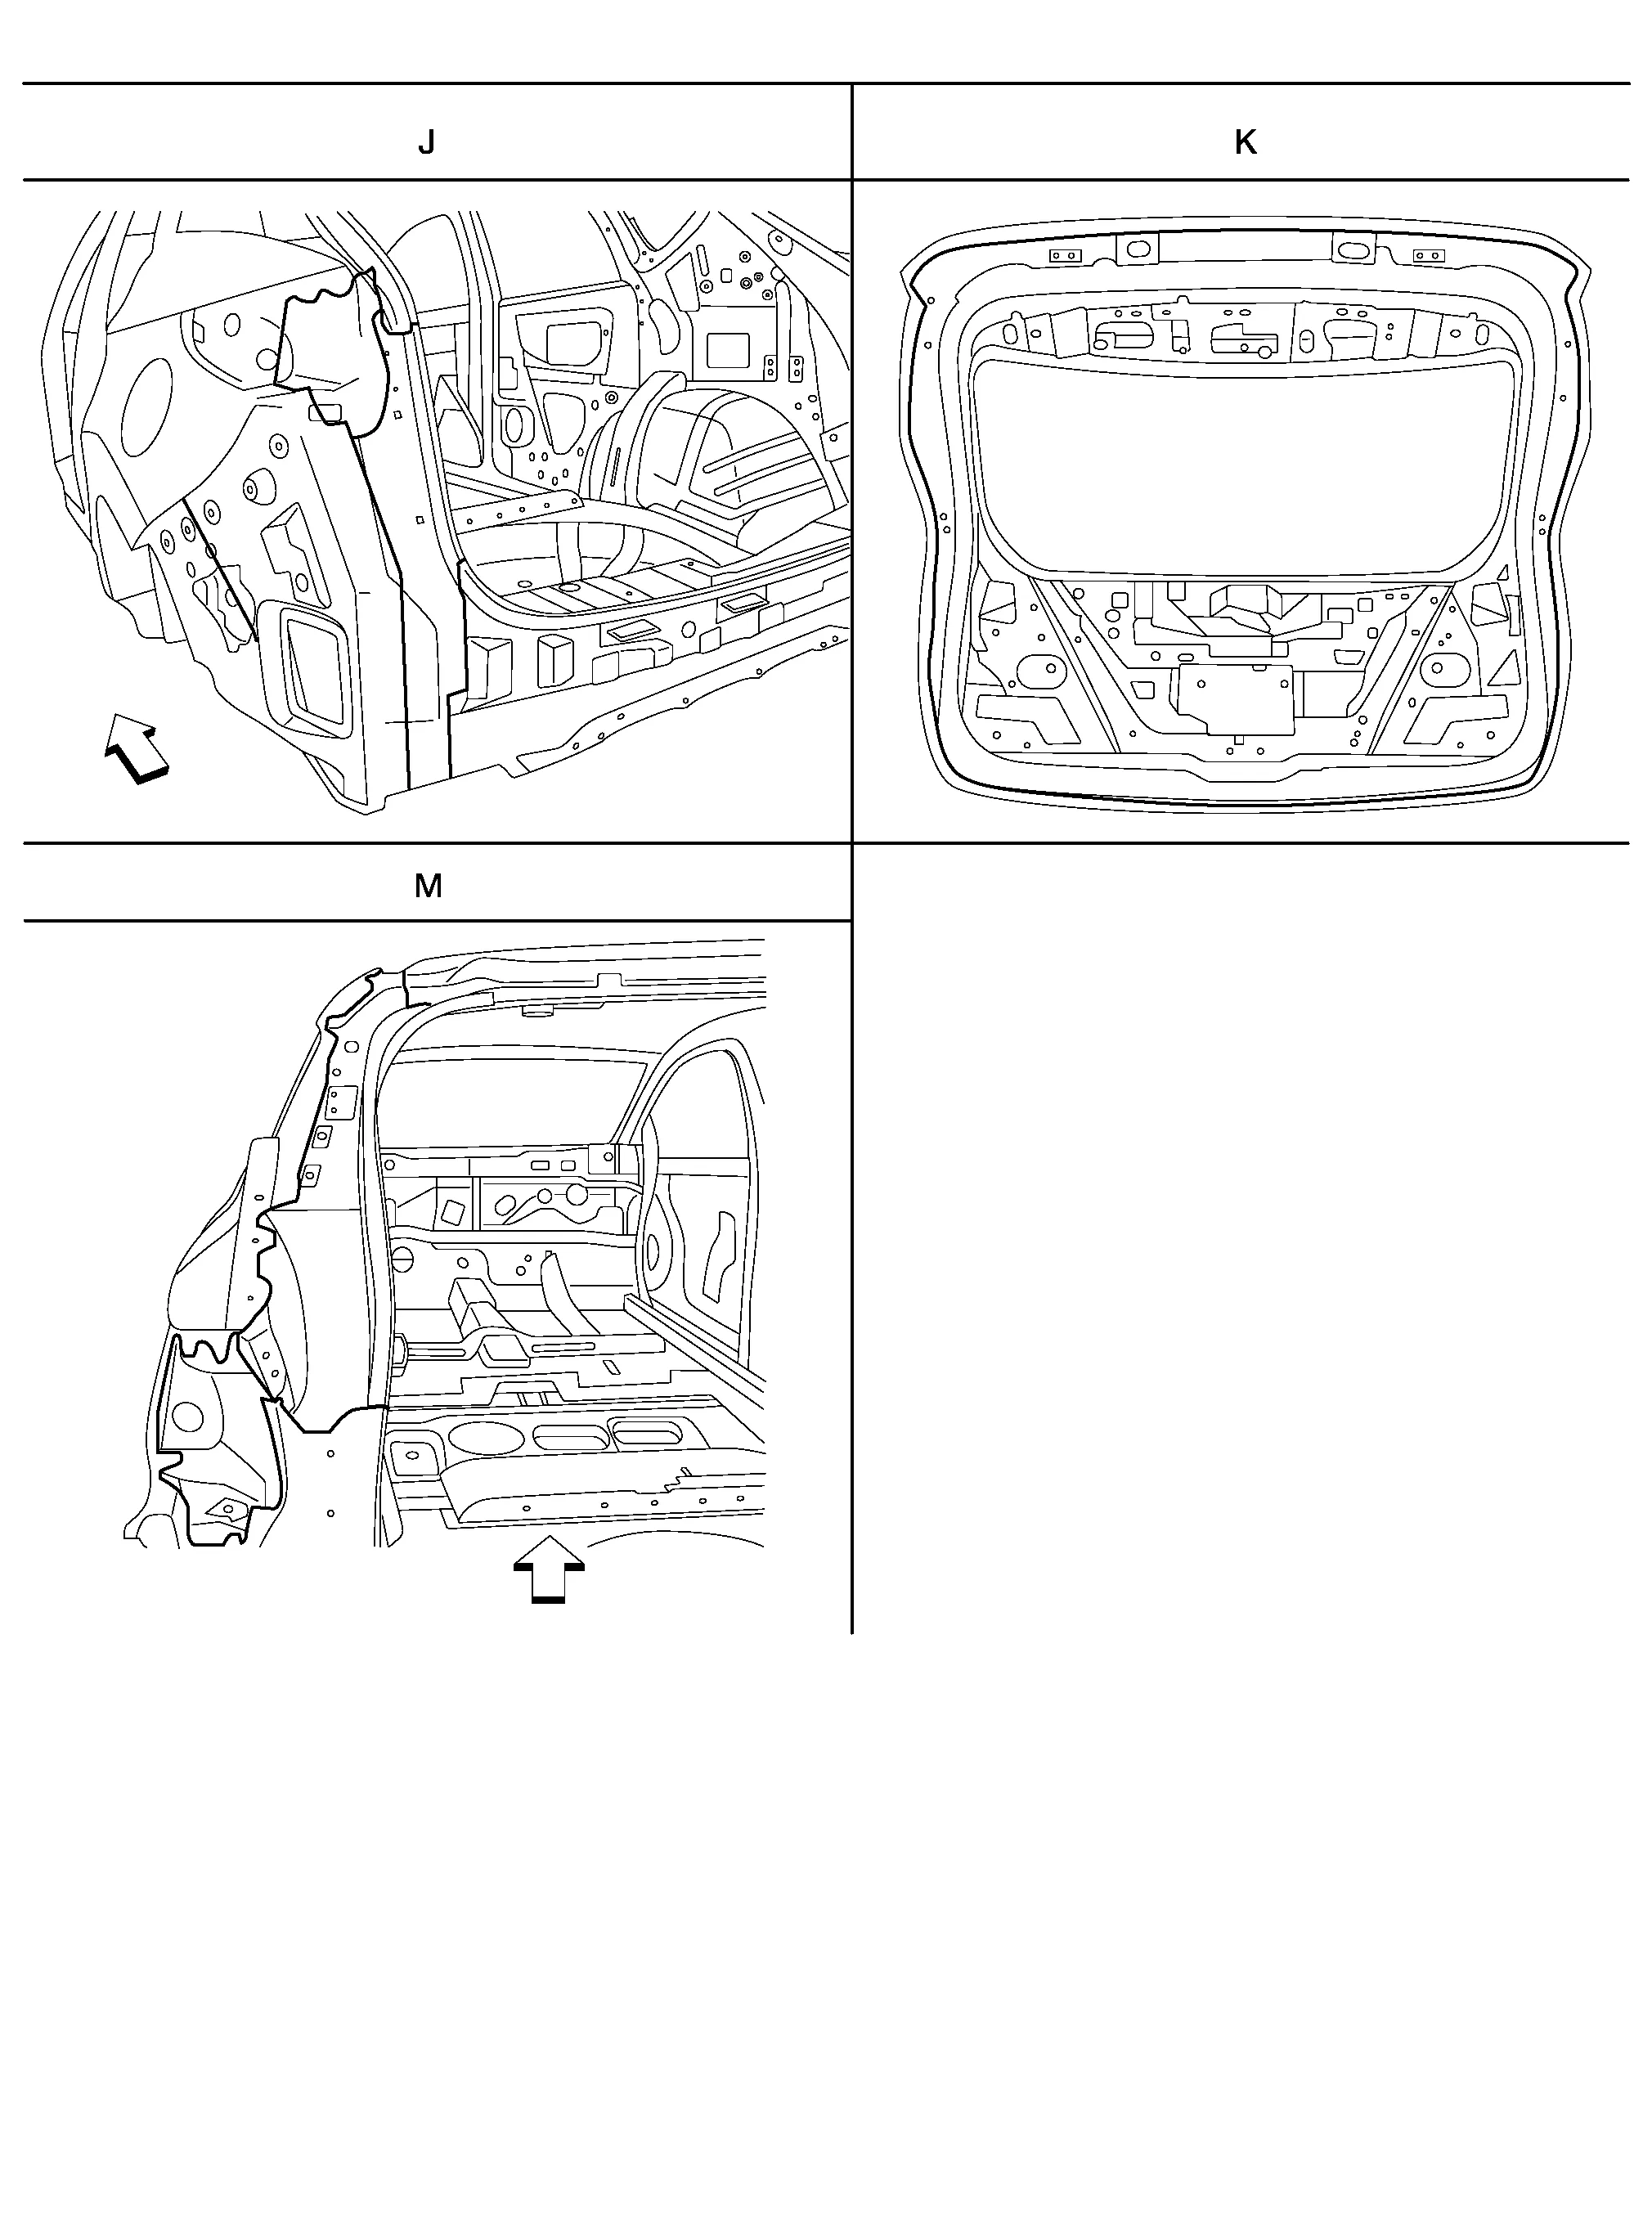
Nissan Murano: Removal and Installation / Body Sealing
The following figure shows the areas which are sealed at the factory. Sealant which has been applied to these areas should be smooth and free from cuts or gaps. Care should be taken not to apply an excess amount of sealant and not to allow other unaffected parts to come into contact with the sealant.
| Front |
| Front |
| Front |
 Corrosion Protection
Description
To provide improved corrosion prevention, the following anti-corrosive measures have been implemented in NISSAN production plants. When repairing or replacing body panels, it is necessary to use the same anti-corrosive measures...
 Body Construction
Body Construction
1.
Body side outer
2.
Front pillar inner upper
3.
Upper front pillar reinforcement
4.
Dash side inner
5.
Front hinge pillar lower reinforcement
6...
Other information:
Nissan Murano (Z52) 2015-2024 Service Manual: System
System Description SYSTEM DIAGRAMTCU Input Signal (CAN Communication)Transmit unitSignal name Air bag diagnosis sensor unit Air bag crash order signal ABS actuator and electrical unit (Control unit) ABS malfunction signal BCM Door switches state signal Combination meter Nissan Murano Vehicle speed signal Hand brake switch signal ECM Engine RPM signal MIL lamp signal IPDM E/R Anti-theft horn status signal TCM Transmission range indication signal DESCRIPTION The Telematics system is a system for providing information by connecting the vehicle and the user to the NissanConnect center...
Nissan Murano (Z52) 2015-2024 Service Manual: P0573 Brake Pedal Switch a
DTC Description DTC DETECTION LOGIC DTC CONSULT screen terms (Trouble diagnosis content) DTC detection condition P0573 Brake pedal switch A (Brake Switch "B" Circuit High) Diagnosis condition When a deceleration G of -0.13 G or more occurs after the Nissan Murano vehicle speed exceeds 30 km/h (19 MPH)...
Categories
- Manuals Home
- Nissan Murano Owners Manual
- Nissan Murano Service Manual
- Turning the AEB system on/off
- Settings
- All-Wheel Drive (AWD) (if so equipped)
- New on site
- Most important about car
Autolight system
The autolight system allows the headlights to turn on and off automatically. The autolight system can:
Turn on the headlights, front parking, tail, license plate and instrument panel lights automatically when it is dark. Turn off all the lights (except daylight running lights) when it is light. Keep all the lights on for a period of time after you place the ignition switch in the OFF position and all doors are closed.
Copyright © 2026 www.nimurano.com