Nissan Murano: Removal and Installation / Telematics Switch
REMOVAL
Remove the map lamp assembly. Refer to Removal and Installation.
Remove the connector  and screws
  .
.

Remove the telematics switch with the map lamp assembly finisher  as a single unit from the map lamp assembly.

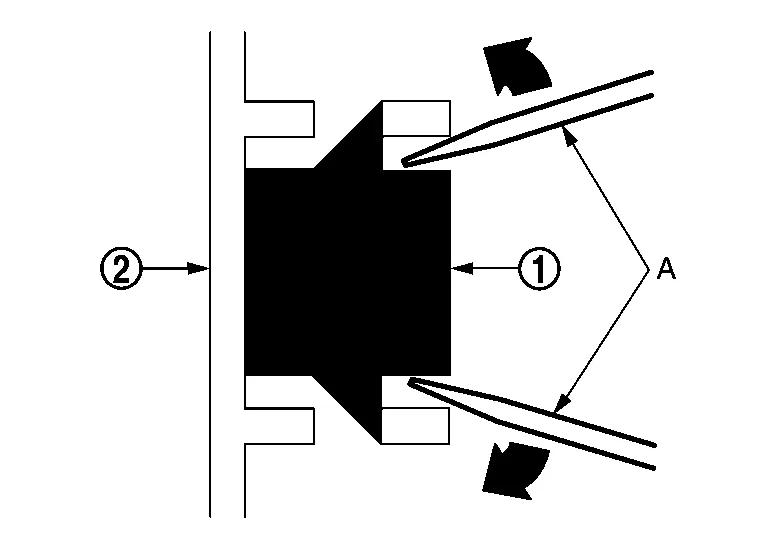
Remove the telematics switch , stretching pawls of the map lamp assembly finisher .
| A | : Removal tool |
INSTALLATION
Installation is the reverse order of removal.
 Microphone
Removal and Installation
REMOVALRemove the map lamp assembly. Refer to Removal and Installation.
Remove the microphone connector from the map lamp assembly ...
 Telematics Antenna
Feeder Layout
Telematics antenna
Connector
: Clips
Removal and Installation
REMOVALRemove the instrument panel assembly. Refer to Removal and Installation...
Other information:
Nissan Murano (Z52) 2015-2024 Service Manual: U1000 Can Comm Circuit
DTC Description DESCRIPTIONITS COMMUNICATION ITS communication is a multiplex communication system. This enables the system to transmit and receive large quantities of data at high speeds by connecting control units with two communication lines. ITS communication lines adopt twisted-pair line style (two lines twisted) for noise immunity...
Nissan Murano (Z52) 2015-2024 Service Manual: Diagnosis System [distance Sensor (icc Sensor)]
CONSULT Function (LASER/RADAR) APPLICATION ITEMSCONSULT performs the following functions via CAN communication with ADAS control unit and the communication with distance sensor (ICC sensor). Diagnosis mode Description Self Diagnostic Result Displays malfunctioning system memorized in distance sensor (ICC sensor) Data Monitor Displays real-time input/output data of distance sensor (ICC sensor) Work support It can monitor the adjustment direction indication in order to perform the radar adjustment operation smoothly ECU Identification Displays distance sensor (ICC sensor) part number CAN Diag Support Monitor The results of transmit/receive diagnosis of ITS communication can be read...
Categories
- Manuals Home
- Nissan Murano Owners Manual
- Nissan Murano Service Manual
- How to enable/disable the LDW system
- GAS STATION INFORMATION
- Tire rotation
- New on site
- Most important about car
Copyright © 2026 www.nimurano.com