
Nissan Murano: Driveline :: Rear Final Drive: R145 / Symptom Diagnosis. Noise, Vibration and Harshness (nvh) Troubleshooting
Nissan Murano (Z52) 2015-2024 Service Manual / Transmission & Driveline / Driveline :: Rear Final Drive: R145 / Symptom Diagnosis. Noise, Vibration and Harshness (nvh) Troubleshooting
Use the chart below to find the cause of the symptom. If necessary, repair or replace these parts.
| Reference | Inspection | Adjustment | Inspection | Adjustment | — | Inspection | NVH Troubleshooting Chart |
NVH Troubleshooting Chart, NVH Troubleshooting Chart, NVH Troubleshooting Chart, NVH Troubleshooting Chart | NVH Troubleshooting Chart | NVH Troubleshooting Chart |
NVH Troubleshooting Chart, NVH Troubleshooting Chart | NVH Troubleshooting Chart | NVH Troubleshooting Chart | Removal and Installation | |
|---|---|---|---|---|---|---|---|---|---|---|---|---|---|---|---|
| Possible cause and SUSPECTED PARTS | Gear tooth rough | Gear contact improper | Tooth surfaces worn | Backlash incorrect | Companion flange excessive runout | Gear oil improper | PROPELLER SHAFT | AXLE AND SUSPENSION | TIRE | ROAD WHEEL | DRIVE SHAFT | BRAKE | STEERING | Electronic controlled coupling | |
| Symptom | Noise | × | × | × | × | × | × | × | × | × | × | × | × | × | × |
| Vibration | × | ||||||||||||||
×: Applicable
 System Description. Structure and Operation
Sectional View
Drive gear
Side bearing
Differential case
Pinion mate shaft
Side gear
Pinion mate gear
Drive pinion
Collapsible spacer
AWD solenoid
Stud bolt
Electric controlled coupling
Pinion front bearing
Pinion rear bearing
Electric Controlled Coupling
The electric controlled coupling operates as the AWD system...
 Periodic Maintenance. Rear Differential Gear Oil
Inspection
OIL LEAKAGEMake sure that oil is not leaking from final drive assembly or around it.OIL LEVELCheck oil level from filler plug mounting hole as shown in the figure after removing filler plug (1) and gasket from final drive assembly...
Other information:
Nissan Murano (Z52) 2015-2024 Service Manual: Transfer Case
Exploded View Oil seal Transfer cover Filler plug Gasket Drain plug Oil seal O-ring Ring gear bearing adjusting shim (transfer cover side) Ring gear bearing (transfer cover side) Drive shaft oil seal Ring gear shaft Ring gear bearing (transfer case side) Ring gear bearing adjusting shim (transfer case side) Ring gear Baffle plate Transfer case Plug O-ring Oil seal Dowel pin Drive pinion Drive pinion adjusting shim O-ring Pinion bearing assembly Oil seal Dust cover Companion flange Pinion lock nut Oil seal lip Comply with the assembly procedure when tightening...
Nissan Murano (Z52) 2015-2024 Service Manual: License Plate Lamp
Exploded View 1. License plate lamp 2. Back door outer finisher Clip Pawl Removal and Installation REMOVALRemove back door outer finisher. Refer to Removal and Installation. Disconnect harness connector from license plate lamp...
Categories
- Manuals Home
- Nissan Murano Owners Manual
- Nissan Murano Service Manual
- Tire rotation
- System malfunction
- Shift lock release
- New on site
- Most important about car
Seatback pockets
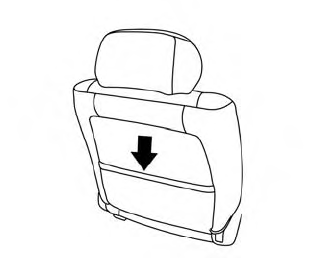
Theremaybe one or two seatback pockets located on the back of the driver and passenger seats. The pockets can be used to store maps.
WARNING

Copyright © 2026 www.nimurano.com