
Nissan Murano: Removal and Installation / Steering Switches
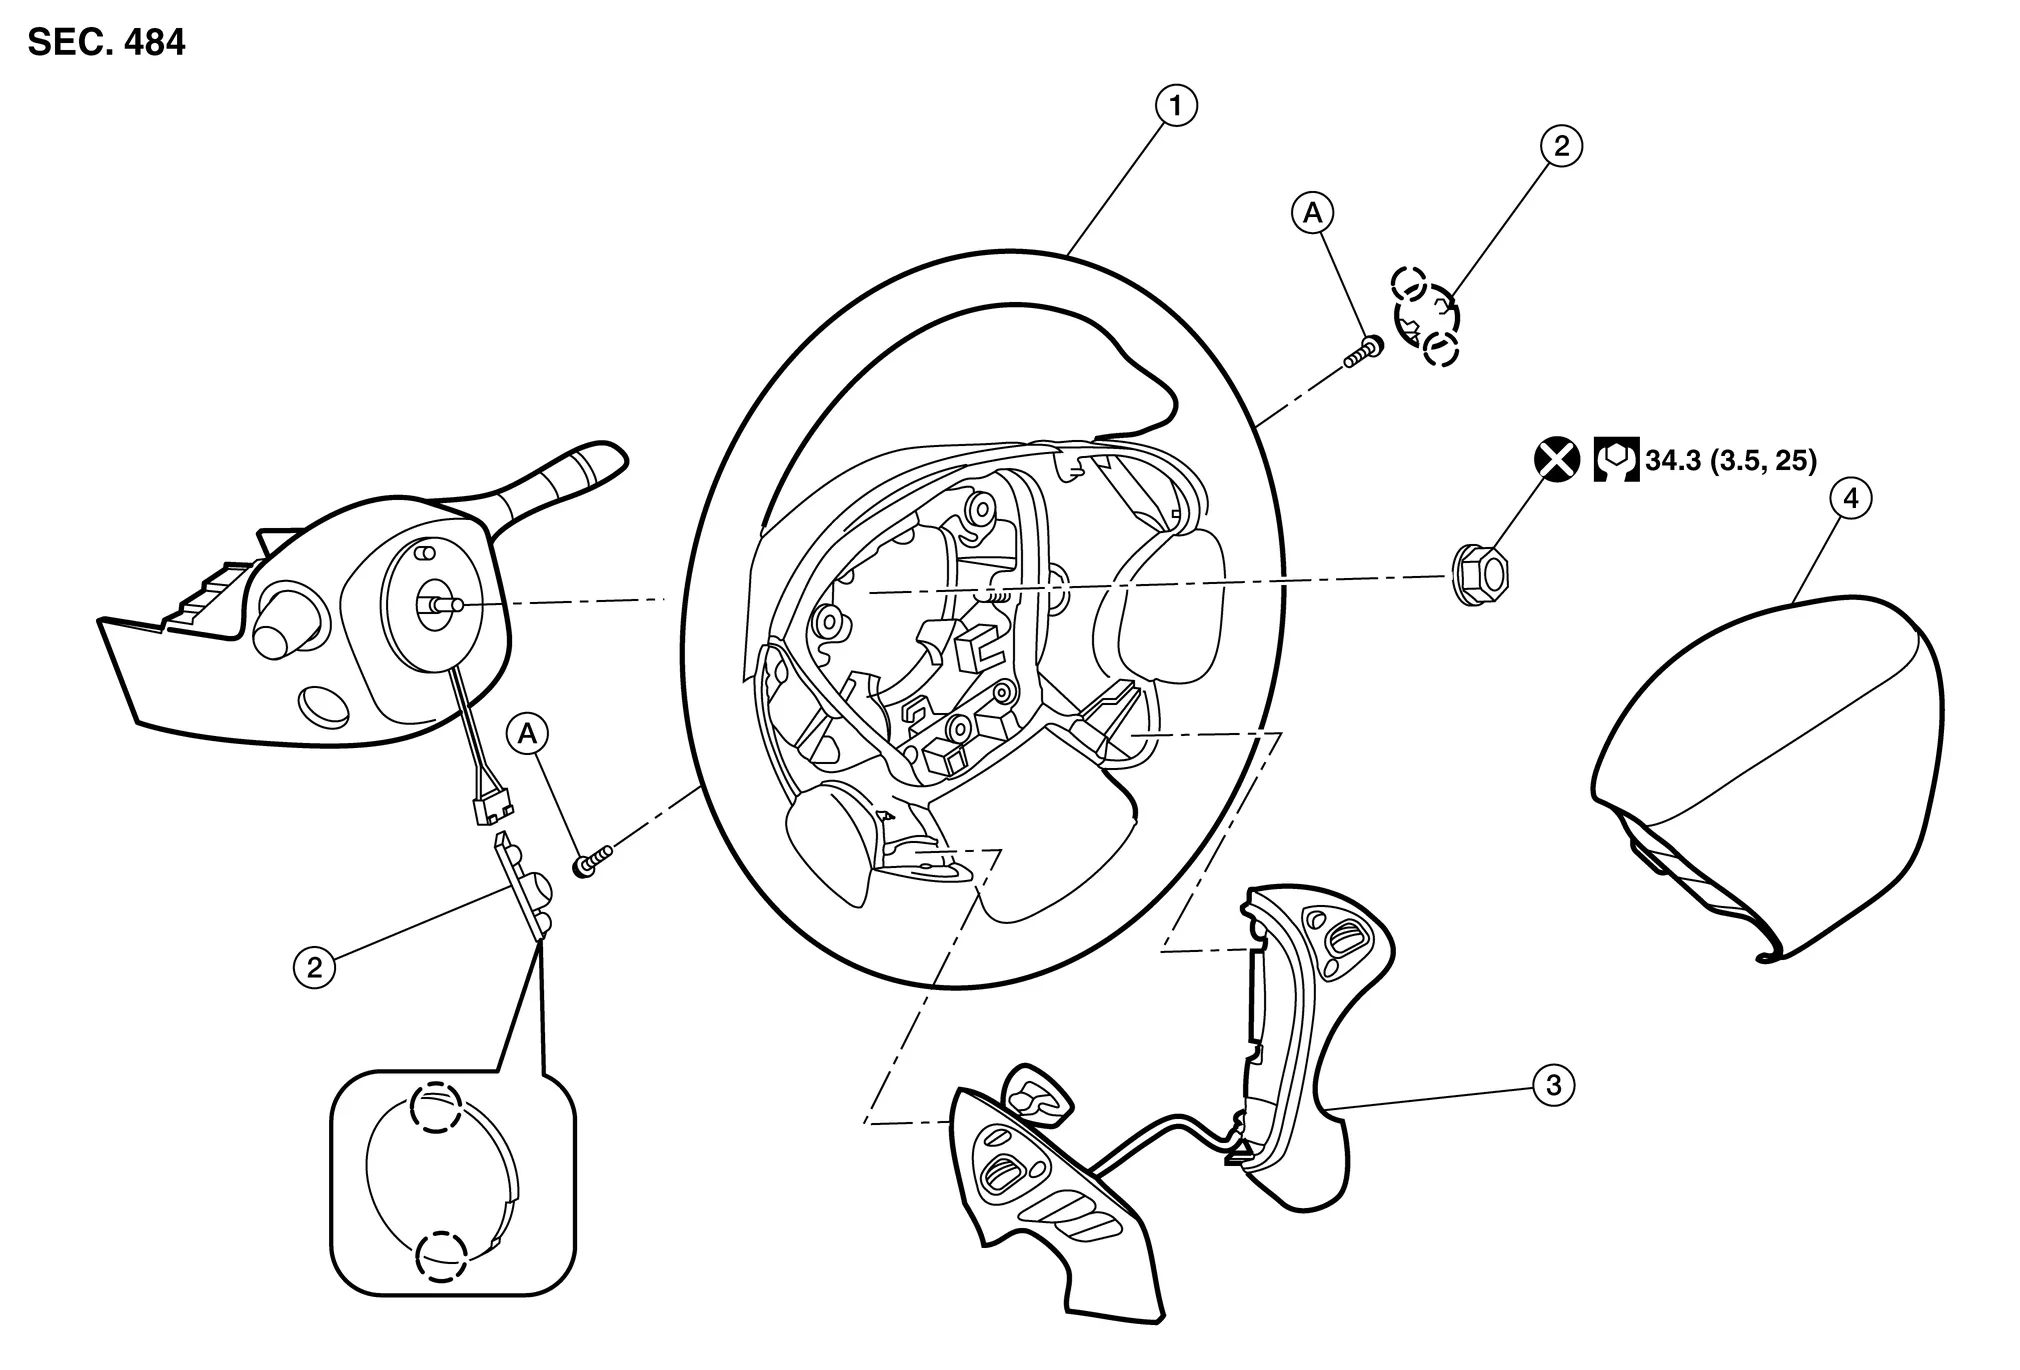
| 1. | Steering wheel | 2. | Cover | 3. | Steering switches |
| 4. | Driver air bag module | A. | Refer to Exploded View. |  |
Pawl |
REMOVAL
 NOTE:
NOTE:
The steering switches is serviced as an assembly.
Remove steering wheel. Refer to Removal and Installation.
Release pawls ( ) and remove steering wheel rear finisher (1) from steering wheel (2).

Remove steering switch screws.

Remove steering switches (1) from steering wheel (2).
INSTALLATION
Installation is in the reverse order of removal.
 Audio Unit
Exploded View
1.
Audio unit bracket (RH)
2.
Audio unit
3.
Audio unit bracket (LH)
4.
A/C auto amp.
Removal and Installation
REMOVALCAUTION:
Before disconnecting the audio unit and battery terminals, turn the ignition switch OFF and wait at least 30 seconds...
 Front Auxiliary Input Jacks Control Unit
Removal and Installation
RemovalRemove A/C switch assembly Removal and Installation.
Disconnect the harness connectors from the front auxiliary input jacks control unit...
Other information:
Nissan Murano (Z52) 2015-2024 Owners Manual: Power Steering Fluid (PSF)
Check the fluid level in the reservoir. The fluid level should be checked when the fluid is cold at fluid temperatures of 32 to 86ºF (0 to 30ºC). The fluid level can be checked with the level gauge which is attached to the cap. To check the fluid level, remove the cap...
Nissan Murano (Z52) 2015-2024 Service Manual: Main Power Window and Door Mirror Switch
Removal and Installation REMOVALRemove main power window and door lock/unlock switch finisher. Refer to Removal and Installation. Release pawls and remove door mirror remote control switch (1) from main power window and door lock/unlock switch finisher (2)...
Categories
- Manuals Home
- Nissan Murano Owners Manual
- Nissan Murano Service Manual
- All-Wheel Drive (AWD) (if so equipped)
- Turning the AEB system on/off
- Warning lights
- New on site
- Most important about car
Luggage hooks
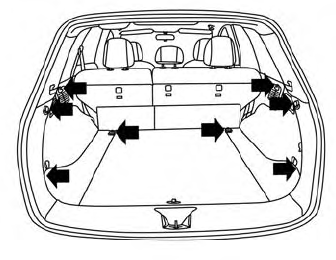
When securing items using luggage hooks located on the back of the seat or side finisher do not apply a load over more than 6.5 lbs. (29 N) to a single hook.
The luggage hooks that are located on the floor should have loads less than 110 lbs. (490 N) to a single hook.

Copyright © 2026 www.nimurano.com