Nissan Murano: Removal and Installation / Front Camera Unit
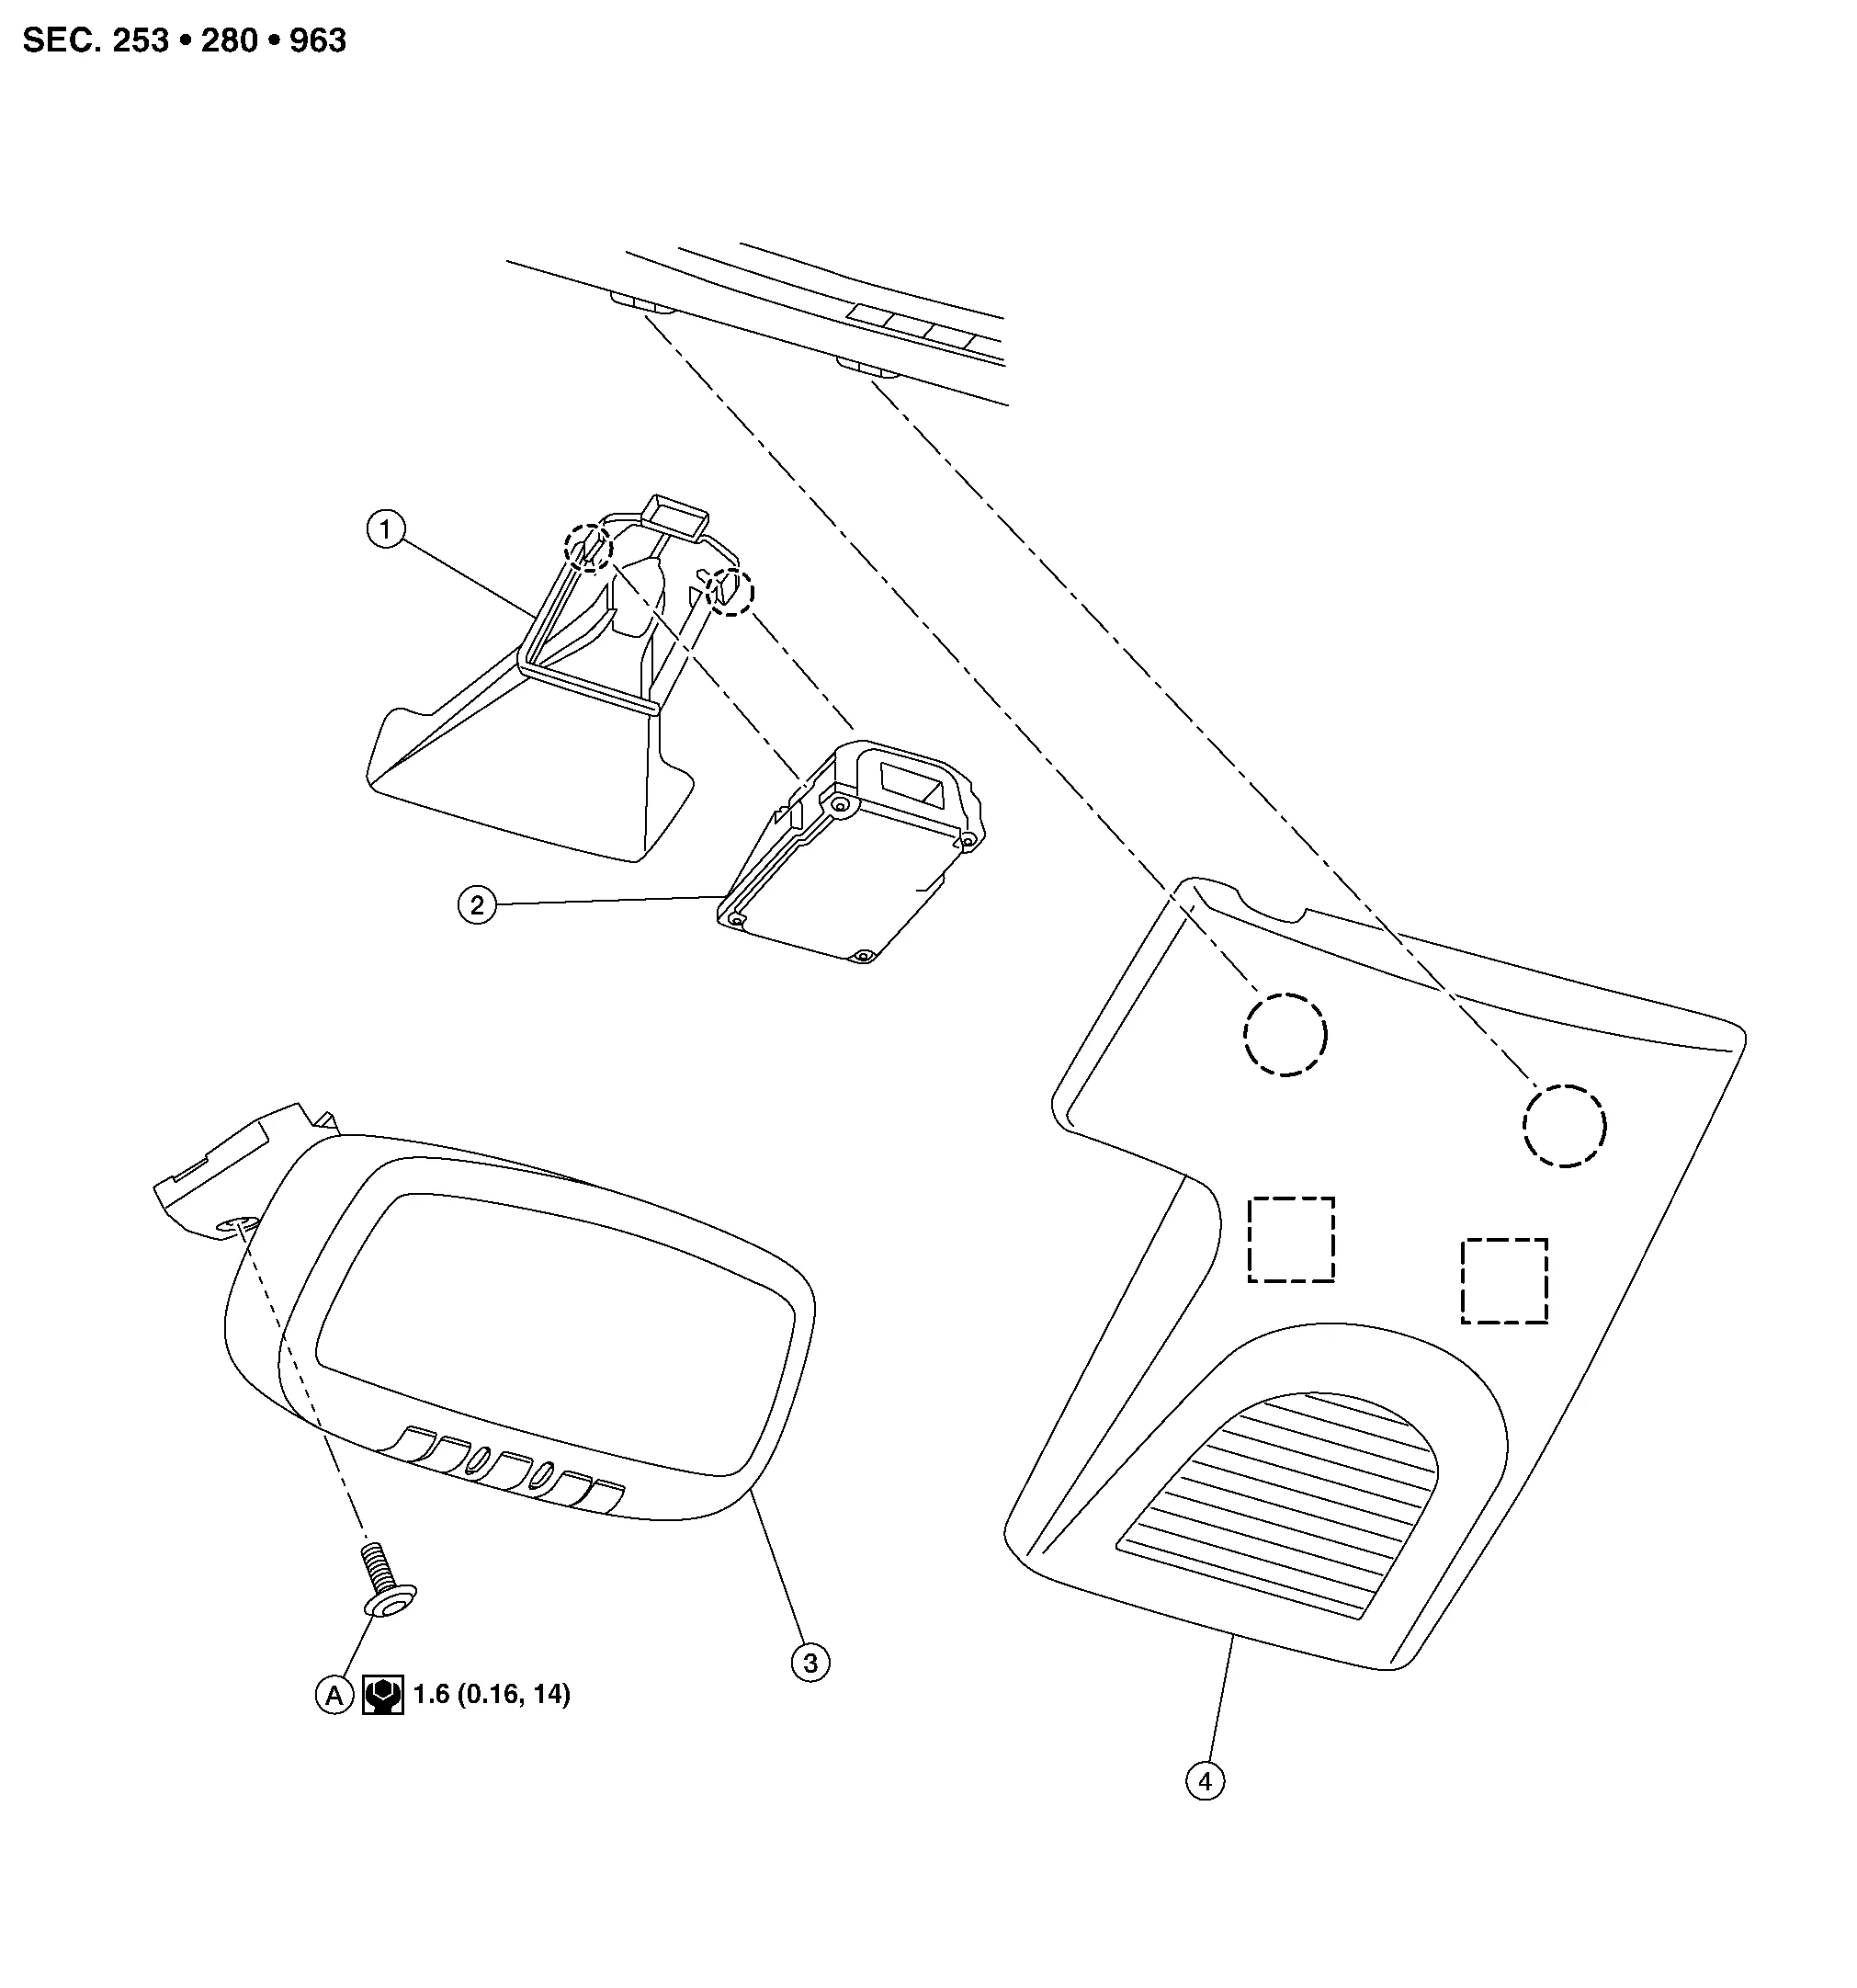
| 1. | Lane camera bracket | 2. | Lane camera unit | 3. | Inside mirror |
| 4. | Inside mirror finisher | A. | Screw |  |
Metal clip |
 |
Pawl |
REMOVAL
Release pawls and metal clips using a suitable tool and remove the inside mirror finisher.
Release pawls using a suitable tool and remove the lane camera unit from the lane camera bracket.
Disconnect the harness connector from the lane camera unit and remove the lane camera unit.
INSTALLATION
Installation is in the reverse order of removal.
CAUTION:
-
Do not touch or shock the lane camera lens area or drop the lane camera unit.
-
Make sure that the lane camera harness is not twisted after installation.
-
Align the inside mirror finisher clips with the cover bracket holes and install by hand. Do not use excessive force.
-
Perform "ADDITIONAL SERVICE WHEN REPLACING LANE CAMERA UNIT" when removing or replacing the lane camera unit. Refer to Work Procedure.
 Warning Buzzer
Removal and Installation
REMOVALRemove the glove box assembly and housing. Refer to Removal and Installation.
Disconnect harness connector (B) from the warning buzzer...
 Lane Intervention Switch
Exploded View
1.
Upper switch carrier
2.
Middle switch carrier
3.
Heated steering wheel switch (if equipped)
4.
VDC OFF switch
5.
Automatic back door switch (if equipped)
6...
Other information:
Nissan Murano (Z52) 2015-2024 Service Manual: Repair of Rust and Corrosion
Repair of Rust and Corrosion Rust on sheet metal is the result of the chemical reaction of steel to oxygen in the air, which is called oxidation. This rust, if left untreated, will increase and finally corrode and damage the sheet metal. If the Nissan Murano vehicle is used for a long time under severe environmental conditions, rust or corrosion may form on body surfaces...
Nissan Murano (Z52) 2015-2024 Service Manual: Operation
Switch Name and Function No. Switch name Description AEB system setting screen (Integral switch settings screen) The setting of AEB/I-FCW system can be switched between ON and OFF Menu Displayed by Pressing Each Switch SYSTEM DISPLAY No. Switch name Description AEB warning lamp When any of the following conditions, the AEB warning lamp illuminates: An abnormal condition is present in the AEB system The AEB system is turned OFF When any of the following conditions, the AEB warning lamp blinks: The distance sensor area of the front of the Nissan Murano vehicle is covered with dirt or is obstructed The interior temperature of the vehicle is extremely high The windshield is dirty, frosted, fogged up, or damaged in front of the lane camera unit The lane camera unit or the lane camera unit bracket is not mounted properly Nissan Murano Vehicle ahead indicator Indicates whether it detects a vehicle ahead...
Categories
- Manuals Home
- Nissan Murano Owners Manual
- Nissan Murano Service Manual
- Intelligent Forward Collision Warning (I-FCW)
- System malfunction
- Jacking up vehicle and removing the damaged tire
- New on site
- Most important about car