Nissan Murano: Automatic Drive Positioner :: Dtc/circuit Diagnosis / Door Mirror Motor
ACTIVE TEST
 CONSULT
-
Select “MIRROR MOTOR RH” and “MIRROR MOTOR LH” in “Active Test” mode of “AUTO DRIVE POS.”.
-
Check that the function operates normally.
| Test item | Description | ||
|---|---|---|---|
| MIRROR MOTOR LH | UP | Door mirror LH | Upward |
| DWN | Downward | ||
| L | Leftward | ||
| R | Rightward | ||
| Off | Stop | ||
| MIRROR MOTOR RH | UP | Door mirror RH | Upward |
| DWN | Downward | ||
| L | Leftward | ||
| R | Rightward | ||
| Off | Stop | ||
Is the inspection result normal?
YES>>Door mirror motor function is OK.
NO>>Refer to Diagnosis Procedure.
CHECK DOOR MIRROR MOTOR INPUT SIGNAL
-
Ignition switch ON.
-
Check voltage between door mirror connector and ground.
(+) (–) Door mirror remote control switch condition Voltage
(Approx.)Door mirror Connector Terminal D4 (LH)
D107 (RH)19 Ground UP Battery voltage Other than above 0V 8 LEFT Battery voltage Other than above 0V 7 DOWN / RIGHT Battery voltage Other than above 0V
Is the inspection result normal?
YES>>Refer to Component Inspection.
NO>>GO TO 2.
CHECK HARNESS CONTINUITY
-
Ignition switch OFF.
-
Disconnect automatic drive positioner control unit and door mirror.
-
Check continuity between automatic drive positioner control unit connector and door mirror connector.
Door mirror LH Automatic drive positioner control unit Door mirror LH Continuity Connector Terminal Connector Terminal M33 12 D4 7 Yes 23 19 24 8 Door mirror RH Automatic drive positioner control unit Door mirror RH Continuity Connector Terminal Connector Terminal M33 10 D107 19 Yes 11 8 22 7 -
Check continuity between automatic drive positioner control unit connector and ground.
Door mirror LH Automatic drive positioner control unit Ground Continuity Connector Terminal M33 12 No 23 24 Door mirror RH Automatic drive positioner control unit Ground Continuity Connector Terminal M33 10 No 11 22
Is the inspection result normal?
YES>>GO TO 3.
NO>>Repair or replace harness.
CHECK AUTOMATIC DRIVE POSITIONER CONTROL UNIT OUTPUT SIGNAL
-
Connect automatic drive positioner control unit.
-
Ignition switch ON.
-
Check voltage between automatic drive positioner control unit connector and ground.
Door mirror LH (+) (-) Mirror switch condition Voltage
(Approx.)Automatic drive positioner control unit Connector Terminal M33 12 Ground DOWN / RIGHT Battery voltage Other than above 0V 23 UP Battery voltage Other than above 0V 24 LEFT Battery voltage Other than above 0V Door mirror RH (+) (-) Mirror switch condition Voltage
(Approx.)Automatic drive positioner control unit Connector Terminal M33 10 Ground UP Battery voltage Other than above 0V 11 LEFT Battery voltage Other than above 0V 22 DOWN / RIGHT Battery voltage Other than above 0V
Is the inspection result normal?
YES>>GO TO 4.
NO>>Replace automatic drive positioner control unit. Refer to Removal and Installation.
CHECK DOOR MIRROR MOTOR
Check door mirror motor.
Refer to Component Inspection.
Is the inspection result normal?
YES>>Refer to Intermittent Incident.
NO>>Replace door mirror actuator. Refer to Removal and Installation.
CHECK DOOR MIRROR MOTOR 1
Check that door mirror motor does not trap foreign objects and does not have any damage.
Refer to Exploded View.
Is the inspection result normal?
YES>>GO TO 2.
NO>>Replace door mirror actuator. Refer to Removal and Installation.
CHECK DOOR MIRROR MOTOR 2
-
Ignition switch OFF.
-
Disconnect door mirror.
-
Apply 12V to each power supply terminal of door mirror motor.
Door mirror connector Terminal Operational direction (+) (–) D4 (LH)
D107 (RH)7 8 RIGHT 8 7 LEFT 19 7 UP 7 19 DOWN
Is the inspection result normal?
YES>>Inspection End.
NO>>Replace door mirror actuator. Refer to Removal and Installation.
 Tilt Motor
Component Function Check
ACTIVE TEST
CONSULT
Select “TILT MOTOR” in “Active Test” mode of “AUTO DRIVE POS.”.
Check that the function operates normally...
 Seat Memory Indicator
Component Function Check
ACTIVE TEST
CONSULT
Select “MEMORY SW INDCTR” in “Active Test” mode of “AUTO DRIVE POS.”.
Check that the function operates normally...
Other information:
Nissan Murano (Z52) 2015-2024 Service Manual: P2270 Ho2s2
DTC Description DTC DETECTION LOGICThe heated oxygen sensor 2 has a much longer switching time between rich and lean than the air fuel ratio (A/F) sensor 1. The oxygen storage capacity of the three way catalyst (manifold) causes the longer switching time...
Nissan Murano (Z52) 2015-2024 Service Manual: Open/closure Function
Diagnosis Procedure Back door auto closure function does not operate when back door opening and closing operations are performed.CHECK DTC WITH AUTOMATIC BACK DOOR CONTROL MODULE Check that DTC is not detected with automatic back door control module. Is the inspection result normal? YES>> GO TO 2...
Categories
- Manuals Home
- Nissan Murano Owners Manual
- Nissan Murano Service Manual
- Vehicle Dynamic Control (VDC) OFF switch
- How to enable/disable the LDW system
- Fuel recommendation
- New on site
- Most important about car
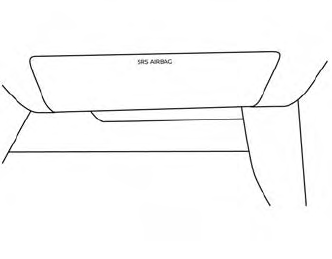
Driver and passenger supplemental knee air bag
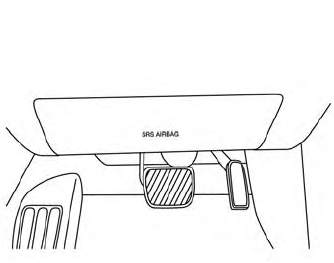
Driver’s side
The knee air bag is located in the knee bolster, on the driver’s and passenger’s side. All of the information, cautions and warnings in this manual apply and must be followed. The knee air bag is designed to inflate in higher severity frontal collisions, although it may inflate if the forces in another type of collision are similar to those of a higher severity frontal impact. It may not inflate in certain collisions.
Passenger’s side