
Nissan Murano: Basic Inspection / Diagnosis and Repair Workflow
OVERALL SEQUENCE

DETAILED FLOW
GET INFORMATION FOR SYMPTOM
Get detailed information from the customer about the symptom (the condition and the environment when the incident/malfunction occurred).
>>
GO TO 2.
CONFIRM THE SYMPTOM
Try to confirm the symptom described by the customer. Verify relation between the symptom and the condition when the symptom is detected.
>>
GO TO 3.
PERFORM SELF DIAGNOSTIC RESULT
 CONSULT
-
Ignition switch ON and wait for 2 seconds or more.
-
Select “Self Diagnostic Result” mode of “MULTI AV”.
Are any DTCs displayed?
YES>>Refer to DTC Index.
NO>>GO TO 4.
PERFORM SYMPTOM DIAGNOSIS
Refer to Symptom Table.
>>
GO TO 5.
FINAL CHECK
Refer to symptom described by the customer in step 1.
Is the symptom still present?
YES>>GO TO 2.
NO>>Inspection End.

 Additional Service When Replacing Audio Unit
Description
BEFORE REPLACEMENTWhen replacing audio unit, save or print current vehicle specification with CONSULT configuration before replacement.NOTE:
If “Before Replace ECU” cannot be used, use the “After Replace ECU” or “Manual Configuration” after replacing audio unit...
Other information:
Nissan Murano (Z52) 2015-2024 Owners Manual: Maintenance schedules
To help ensure smooth, safe and economical driving, NISSAN provides two maintenance schedules that may be used, depending upon the conditions in which you usually drive. These schedules contain both distance and time intervals, up to 120,000 miles (192,000 km)/144 months...
Nissan Murano (Z52) 2015-2024 Owners Manual: Moving Object Detection (MOD) (if so equipped)
CAMERA button WARNING Failure to follow the warnings and instructions for proper use of the Moving Object Detection (MOD) system could result in serious injury or death. The MOD system is not a substitute for proper vehicle operation and is not designed to prevent contact with objects surrounding the vehicle...
Categories
- Manuals Home
- Nissan Murano Owners Manual
- Nissan Murano Service Manual
- GAS STATION INFORMATION
- How to enable/disable the LDW system
- Turning the AEB system on/off
- New on site
- Most important about car
LATCH (Lower Anchors and Tethers for CHildren) system
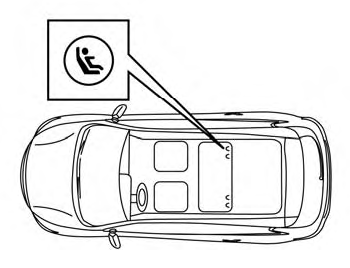
LATCH system lower anchor locations - bench seat
Your vehicle is equipped with special anchor points that are used with LATCH system compatible child restraints. This system may also be referred to as the ISOFIX or ISOFIX compatible system. With this system, you do not have to use a vehicle seat belt to secure the child restraint unless the combined weight of the child and child restraint exceeds 65 lbs. (29.5 kg). If the combined weight of the child and child restraint is greater than 65 lbs. (29.5 kg), use the vehicle’s seat belt (not the lower anchors) to install the child restraint. Be sure to follow the child restraint manufacturer’s instructions for installation.
