Nissan Murano: Dtc/circuit Diagnosis / C1109 Power and Ground System
DTC DETECTION LOGIC
| DTC No. |
CONSULT screen item (Trouble diagnosis content) | DTC detection condition | |
|---|---|---|---|
| C1109 |
BATTERY VOLTAGE [ABNORMAL] (Battery voltage [abnormal]) |
Diagnosis condition | When ignition switch ON. |
| Signal (terminal) | Ignition power supply | ||
| Threshold | When ignition power supply voltage out of range. | ||
| Diagnosis delay time | 5 second or more | ||
POSSIBLE CAUSE
 NOTE:
NOTE:
Confirm if DTC is PAST or CRNT. If DTC is CRNT, proceed with Diagnosis Procedure. If DTC is PAST, clear DTC. Do not replace the ABS actuator and electric unit (control unit) for a PAST DTC.
| PAST DTC | CRNT DTC |
|---|---|
|
|
FAIL-SAFE
The following functions are suspended:
-
VDC function
-
TCS function
-
ABS function
-
EBD function
-
Brake assist function
-
Hill start assist function
PRECONDITIONING
If “DTC CONFIRMATION PROCEDURE” has been previously conducted, always ignition switch OFF and wait at least 10 seconds before conducting the next test.
>>
GO TO 2.
CHECK DTC DETECTION
 CONSULT
-
Ignition switch OFF.
NOTE:
Wait at least 10 seconds after ignition switch OFF.
-
Start the engine.
NOTE:
Wait at least 10 seconds after start the engine.
-
Select “Self Diagnostic Result” mode of “ABS”.
Is DTC “C1109” detected?
YES>>“CRNT” is displayed: Proceed to DTC Diagnosis Procedure.
YES>>“PAST” is displayed: Inspection End. (Erase the memory of “Self Diagnostic Result” mode of “ABS”.)
NO>>To check malfunction symptom before repair: Refer to Intermittent Incident.
NO>>Confirmation after repair: Inspection End.
CHECK CONNECTOR
-
Ignition switch OFF.
-
Check the ABS actuator and electric unit (control unit) harness connector for disconnection or looseness.
Is the inspection result normal?
YES>>GO TO 3.
NO>>Repair / replace harness or connector, securely lock the connector, and GO TO 2.
PERFORM SELF DIAGNOSTIC RESULT
-
Ignition switch OFF.
NOTE:
Wait at least 10 seconds after ignition switch OFF.
-
Start the engine.
NOTE:
Wait at least 10 seconds after start the engine.
-
Select “Self Diagnostic Result” mode of “ABS”.
Is DTC “C1109” detected?
YES>>GO TO 3.
NO>>Inspection End.
CHECK ABS ACTUATOR AND ELECTRIC UNIT (CONTROL UNIT) POWER SUPPLY AND GROUND CIRCUIT
Check the ABS actuator and electric unit (control unit) power supply and ground circuit. Refer to Diagnosis Procedure.
Is the inspection result normal?
YES>>GO TO 4.
NO>>Repair / replace harness, connector, fuse, or fusible link.
CHECK TERMINAL
-
Check the ABS actuator and electric unit (control unit) pin terminals for damage or loose connection with harness connector.
-
Check the IPDM E/R pin terminals for damage or loose connection with harness connector.
Is the inspection result normal?
YES>>Replace the ABS actuator and electric unit (control unit). Refer to Removal and Installation.
NO>>Repair / replace harness, connector, or terminal.
 C1105 Wheel Sensor
DTC Description
DTC DETECTION LOGIC DTC No.
CONSULT screen items
(Trouble diagnosis content) DTC detection condition
C1105
RR RH SENSOR-2
(Rear RH wheel sensor-2)
1
Diagnosis condition
When ignition switch ON...
 C1110 Abs Actuator and Electric Unit (control Unit)
DTC Description
DTC DETECTION LOGIC DTC No.
CONSULT screen item
(Trouble diagnosis content) DTC detected condition
C1110
CONTROLLER FAILURE
(Controller failure)
Diagnosis condition
When ignition switch ON...
Other information:
Nissan Murano (Z52) 2015-2024 Owners Manual: Booster seat installation
WARNING To avoid injury to child, do not use the lap/shoulder belt in the Automatic Locking Retractor (ALR) mode when using a booster seat with the seat belts. For additional information, refer to allWarnings and Cautions in the “Child safety,” “Child restraints” and “Booster seats” sections of this manual before installing a child restraint...
Nissan Murano (Z52) 2015-2024 Owners Manual: Front and rear sonar system (if so equipped)
The sonar (parking sensor) system sounds a tone to inform the driver of obstacles near the bumper. When the “DISPLAY” key is ON, the sonar view will automatically appear in the meter. WARNING The sonar (parking sensor) system is a convenience but it is not a substitute for proper parking...
Categories
- Manuals Home
- Nissan Murano Owners Manual
- Nissan Murano Service Manual
- Memory storage function (key-link)
- How to enable/disable the LDW system
- Warning lights
- New on site
- Most important about car
Seatback pockets
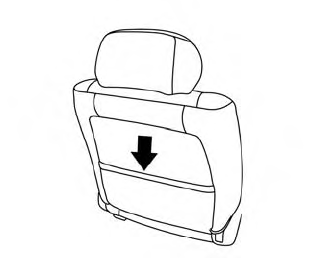
Theremaybe one or two seatback pockets located on the back of the driver and passenger seats. The pockets can be used to store maps.
WARNING