Nissan Murano: Removal and Installation / Av Control Unit
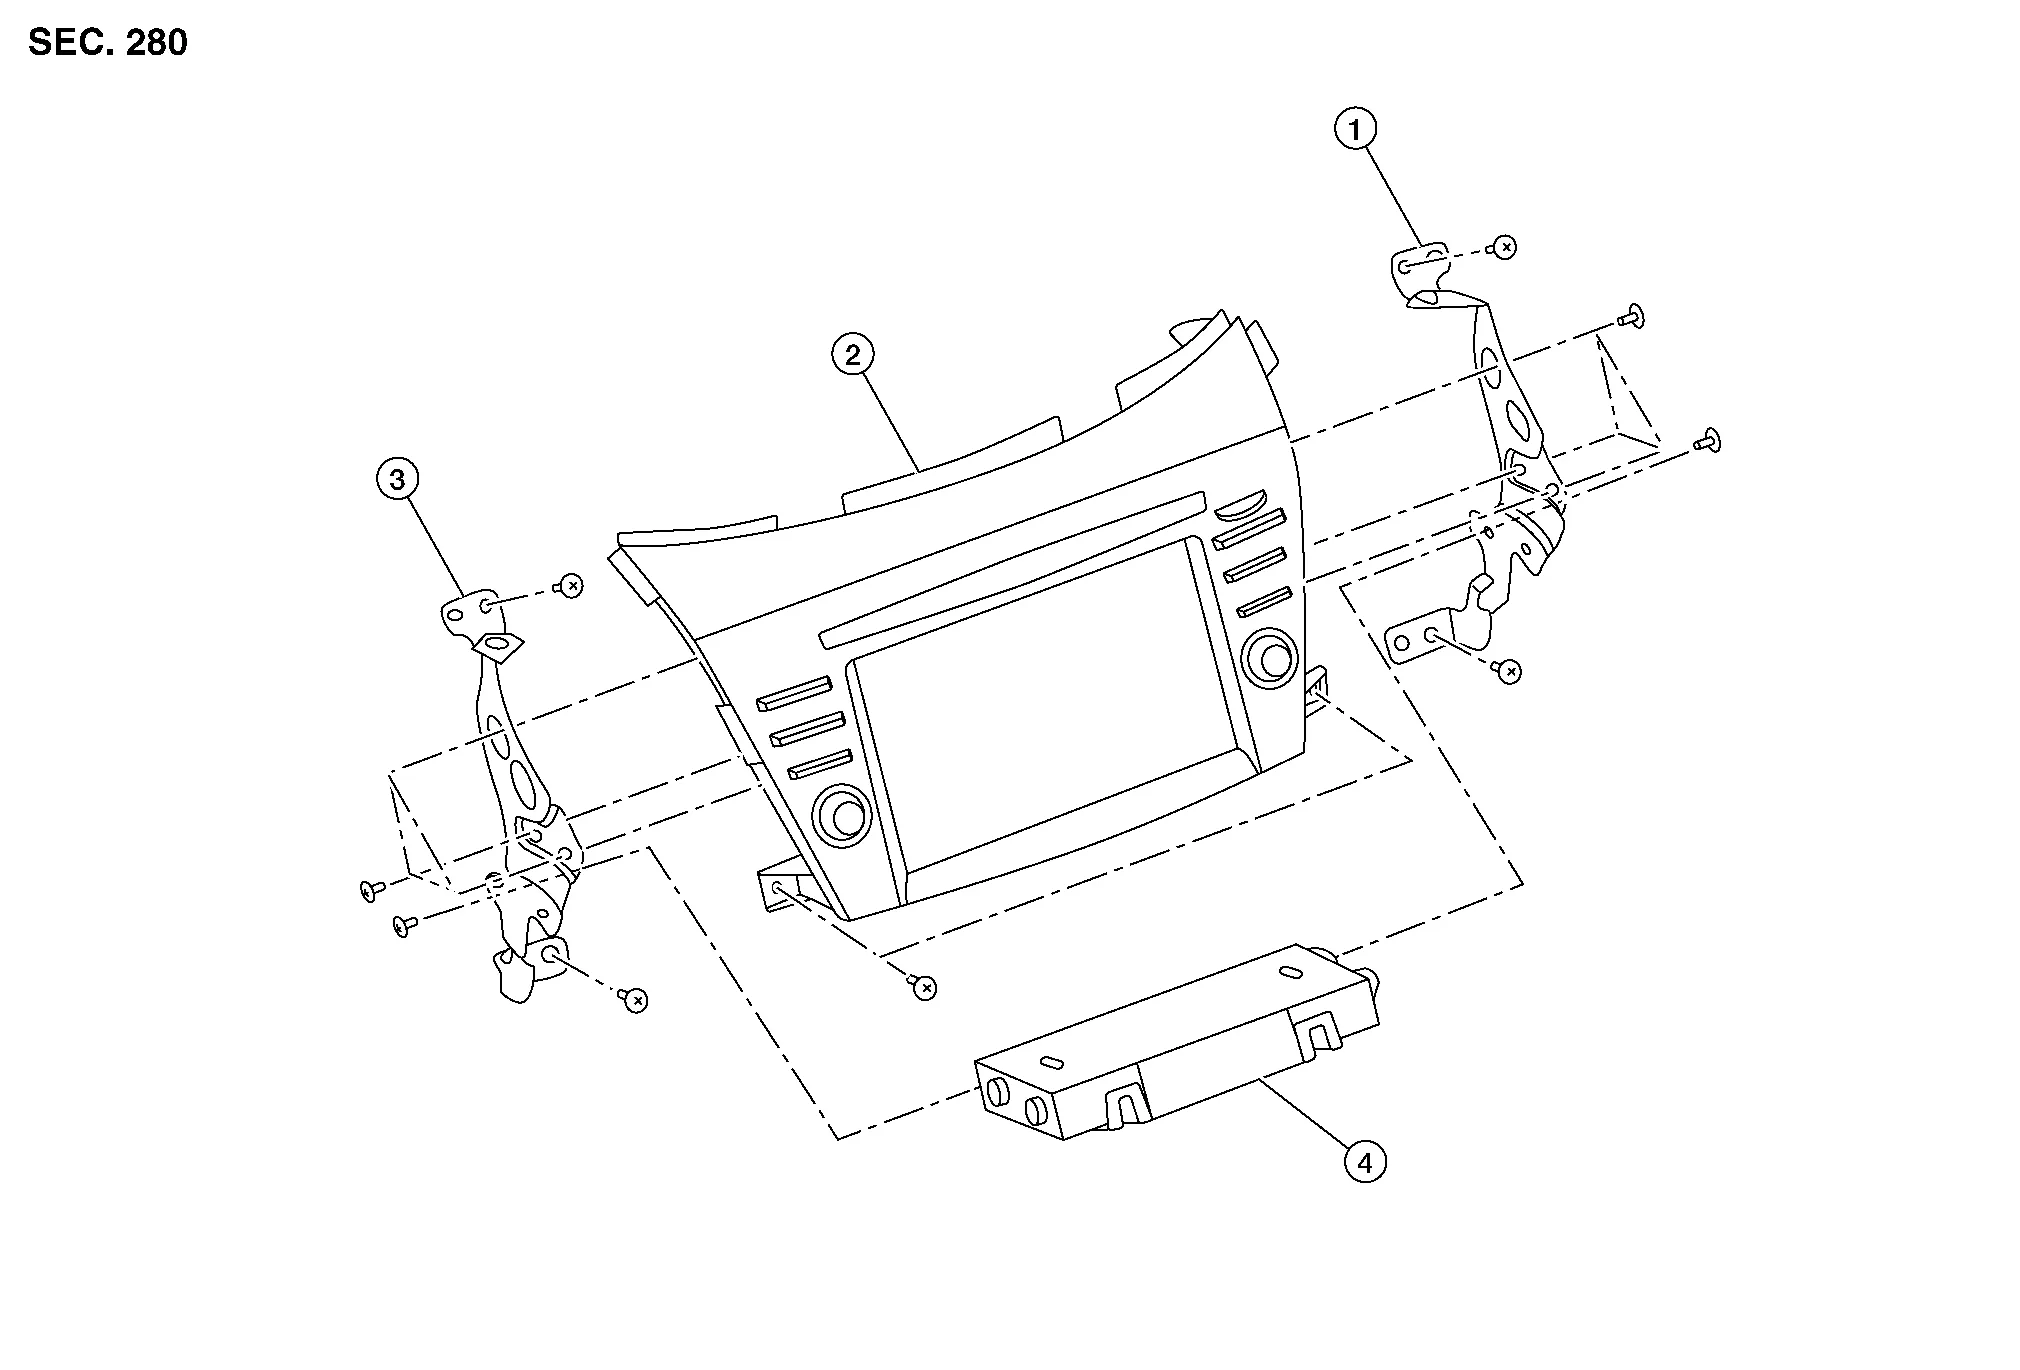
| 1. | AV control unit bracket (RH) | 2. | AV control unit | 3. | AV control unit bracket (LH) |
| 4. | A/C auto amp. |
REMOVAL
CAUTION:
Before disconnecting the AV control unit and battery terminals, turn the ignition switch OFF and wait at least 30 seconds.
 NOTE:
NOTE:
-
Before replacing AV control unit, perform “Before Replace ECU” of “Read / Write Configuration” to save or print current Nissan Murano vehicle specification. Refer to Description.
-
After the ignition switch is turned OFF, the AV control unit continues operating for approximately 30 seconds.
-
Therefore, data corruption may occur if battery voltage is cut off within 30 seconds.
Disconnect the negative battery terminal. Refer to Removal and Installation.
Remove cluster lid D. Refer to Removal and Installation.
Remove A/C switch assembly. Refer to Removal and Installation.
Remove AV control unit screws then pull out AV control unit.
Disconnect the harness connectors from AV control unit and remove.
Remove AV control unit bracket (LH/RH) screws and AV control unit brackets [(LH/RH) (if necessary)].
INSTALLATION
CAUTION:
Be sure to perform “After Replace ECU” of “Read / Write Configuration” or “Manual Configuration” when replacing AV control unit. Refer to Description.
Installation is in the reverse order of removal.

 Around View Monitor Control Unit
Exploded View
1.
Instrument panel assembly
2.
Around view monitor control unit
Removal and Installation
REMOVALNOTE:
Before replacing around view monitor control unit, perform “Before Replace ECU” of “Read / Write Configuration” to save or print current Nissan Murano vehicle specification...
Other information:
Nissan Murano (Z52) 2015-2024 Service Manual: Trunk
CONSULT Function (BCM - TRUNK) ECU IDENTIFICATIONThe BCM part number is displayed.SELF DIAGNOSTIC RESULTRefer to DTC Index.DATA MONITOR Monitor Item [Unit] Description PUSH SW [On/Off] Indicates condition of push-button ignition switch. UNLK SEN -DR [On/Off] Indicates condition of door unlock sensor...
Nissan Murano (Z52) 2015-2024 Service Manual: Int Lamp
CONSULT Function (BCM - INT LAMP) ECU IDENTIFICATIONThe BCM part number is displayed.SELF DIAGNOSTIC RESULTRefer to DTC Index.DATA MONITOR Monitor Item [Unit] Description REQ SW -DR [On/Off] Indicates condition of door request switch LH. REQ SW -AS [On/Off] Indicates condition of door request switch RH...
Categories
- Manuals Home
- Nissan Murano Owners Manual
- Nissan Murano Service Manual
- Jacking up vehicle and removing the damaged tire
- Passenger compartment
- GAS STATION INFORMATION
- New on site
- Most important about car
Autolight system
The autolight system allows the headlights to turn on and off automatically. The autolight system can:
Turn on the headlights, front parking, tail, license plate and instrument panel lights automatically when it is dark. Turn off all the lights (except daylight running lights) when it is light. Keep all the lights on for a period of time after you place the ignition switch in the OFF position and all doors are closed.