Nissan Murano: Driveline :: Rear Final Drive: R145 / Unit Removal and Installation. Rear Final Drive Assembly

| 1. | Final drive bracket | 2. | Stopper | 3. | Rear final drive assembly |
 NOTE:
NOTE:
-
When removing components such as hoses, tubes/lines, etc., cap or plug openings to prevent fluid from spilling.
-
Before replacing, servicing, or repairing rear final drive assembly due to vibration and/or noise when making low speed turns, refer to TSB to assist in proper diagnosis.
REMOVAL
Remove rear drive shaft. Refer to Removal and Installation.
CAUTION:
Oil may leak from the opening. Use cap and/or plug to prevent leakage.
Remove propeller shaft from rear final drive assembly. Refer to Removal and Installation.
CAUTION:
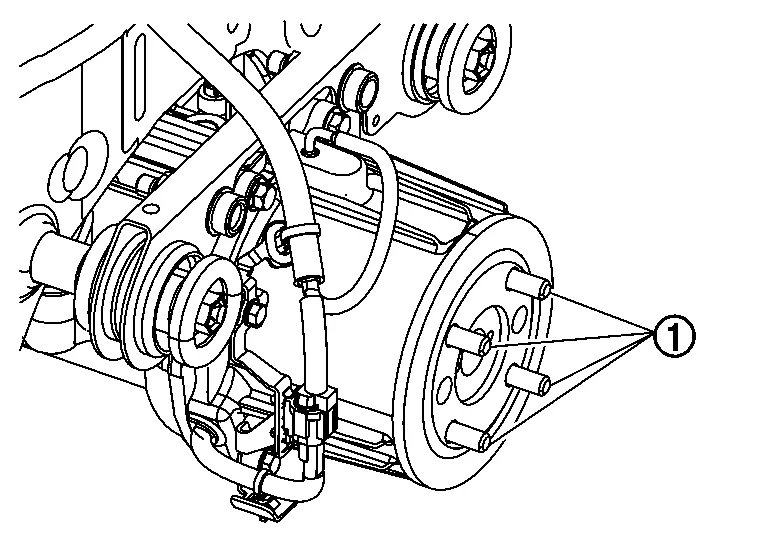
After removing propeller shaft, replace stud bolt (1).
NOTE:
When replacing rear final drive assembly, stud bolts are not required to be removed.
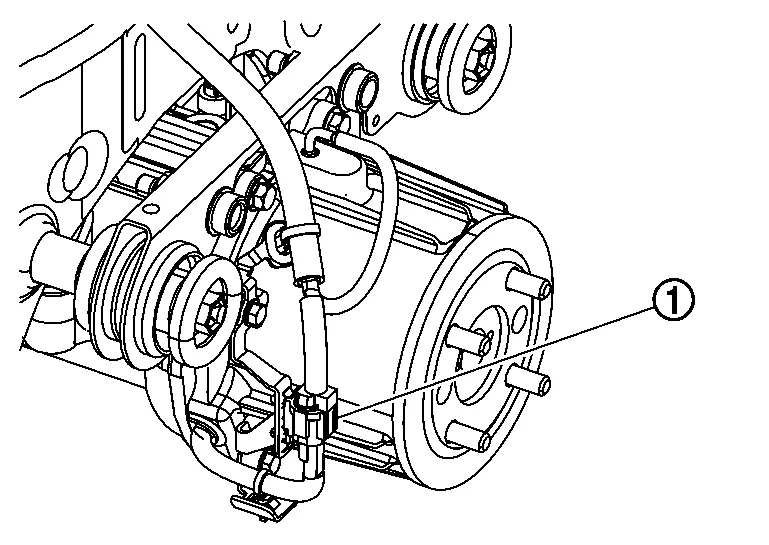
Disconnect harness connector (1) from AWD solenoid.
Remove air breather hoses from rear final drive and electric controlled coupling assembly. Refer to Removal and Installation.
Remove fuel tank protector. Refer to Exploded View (FWD models),Exploded View (AWD models).
Set a suitable jack to rear final drive assembly.
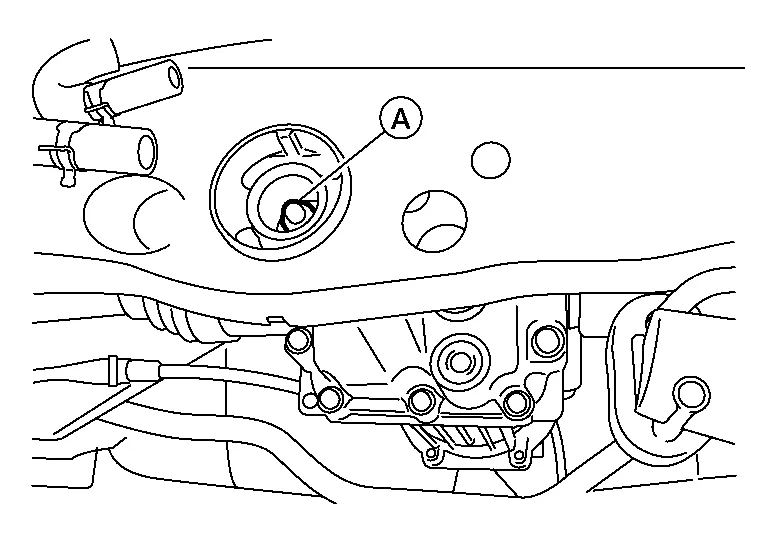
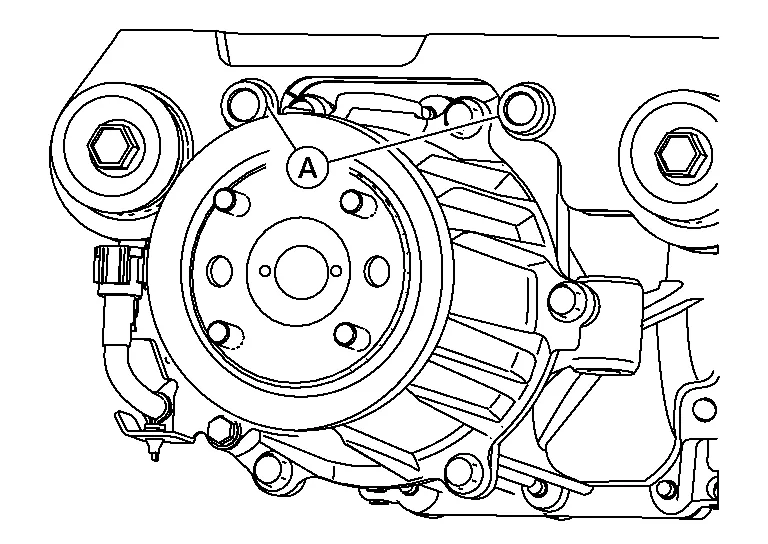
Remove rear final drive assembly nut (A) at rear suspension member.
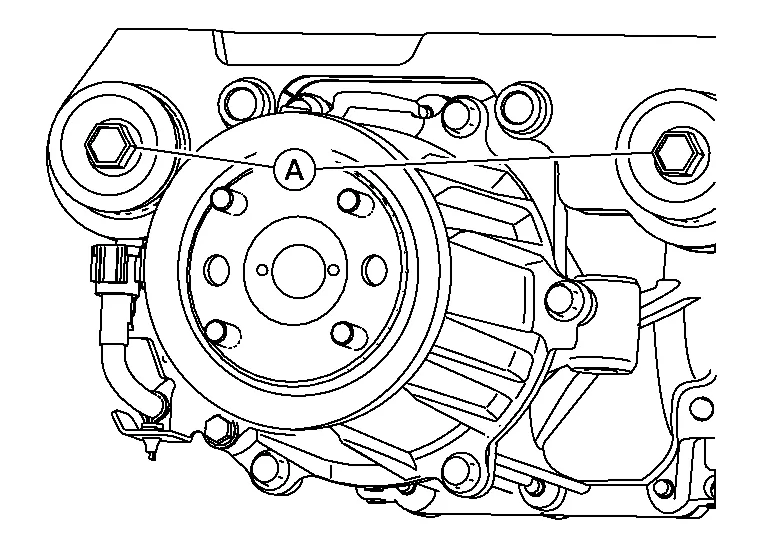
Remove bolts and nuts (A) engaging final drive bracket with rear suspension member.
CAUTION:
Secure rear final drive assembly to suitable jack.
Remove stoppers.
Remove rear final drive assembly.
CAUTION:
Secure rear final drive assembly to suitable jack while removing it.
Remove bolts and nuts (A) engaging final drive bracket with rear final drive assembly.
Remove final drive bracket.
INSTALLATION
Installation is in the reverse order of removal.
CAUTION:
-
Do not reuse final drive nuts.
-
When replacing rear final drive assembly, perform writing unit characteristics. Refer to Description.
-
Be careful not to install wrong stud bolt (1) direction.
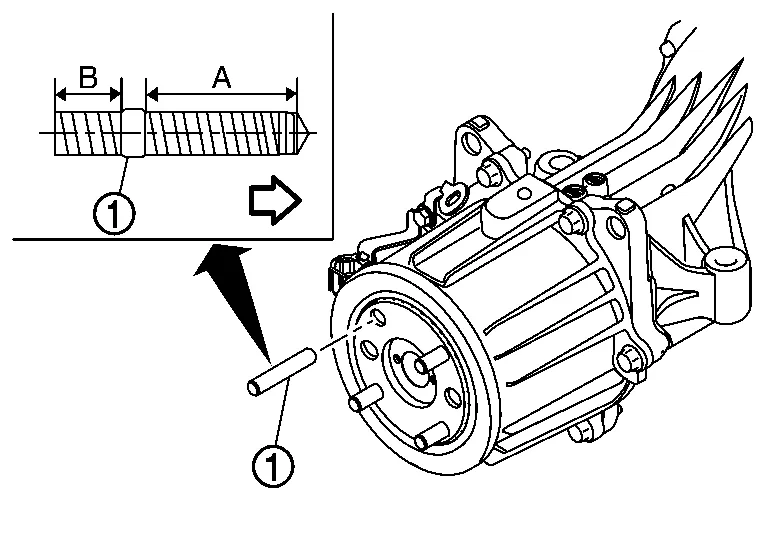

: Electric controlled coupling side Thread length (A) : Long (B) : Short CAUTION:
-
After removing propeller shaft, replace stud bolt.
-
Screw long thread side of stud bolt to electric controlled coupling.
-
Screw the stud bolt until the stop by applying a torque of 15 N·m (1.5 kg-m, 11 ft-lb) ±20%.
-
After installing stud bolt, the length of the protrusion from electric controlled coupling must be as described below.
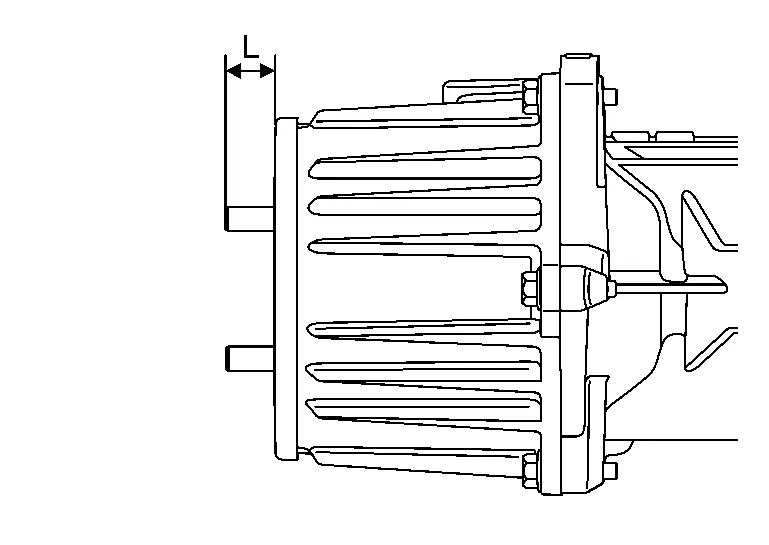
Length (L) : 19.8 mm (0.780 in) ±1.4 mm (0.055 in)
NOTE:
When replacing rear final drive assembly, stud bolts are not required to be installed.
-
INSPECTION AFTER INSTALLATION
When oil leaks while removing/installing final drive assembly, check oil level after the installation. Refer to Inspection.
ADJUSTMENT AFTER INSTALLATION
When replaced rear final drive assembly, perform writing unit characteristics. Refer to Description.
When electric controlled coupling was changed, perform writing unit characteristics. Refer to Description.
 Air Breather
Exploded View
1.
Rear final drive breather
2.
Breather connector (resin)
3.
Air breather hose
4.
Breather connector (metal)
5.
Rear final drive assembly
: Always replace after every disassembly...

Other information:
Nissan Murano (Z52) 2015-2024 Service Manual: B13d9 Usb Connection
DTC Description DTC DETECTION LOGIC DTC No. CONSULT screen terms (Trouble diagnosis content) DTC detection condition B13D9 USB CONNECTION (USB connection) Diagnosis condition When ignition switch is ON. Signal (terminal) USB communication signal Threshold — Diagnosis delay time 1 second or more POSSIBLE CAUSE USB harness TCU FAIL-SAFE Telematics system does not function Inform a NissanConnect center about abnormality DTC Confirmation Procedure PERFORM DTC CONFIRMATION PROCEDURE CONSULT Ignition switch ON...
Nissan Murano (Z52) 2015-2024 Service Manual: Configuration (av Control Unit)
Description Vehicle specification needs to be written with CONSULT because it is not written after replacing AV control unit.Configuration has three functions as follows: Function Description "Before Replace ECU" Reads the Nissan Murano vehicle configuration of current AV control unit...
Categories
- Manuals Home
- Nissan Murano Owners Manual
- Nissan Murano Service Manual
- All-Wheel Drive (AWD) (if so equipped)
- How to enable/disable the LDW system
- Checking engine oil level
- New on site
- Most important about car
Autolight system
The autolight system allows the headlights to turn on and off automatically. The autolight system can:
Turn on the headlights, front parking, tail, license plate and instrument panel lights automatically when it is dark. Turn off all the lights (except daylight running lights) when it is light. Keep all the lights on for a period of time after you place the ignition switch in the OFF position and all doors are closed.