Nissan Murano: Heater & Air Conditioning Control System :: Removal and Installation / Sunload Sensor
REMOVAL
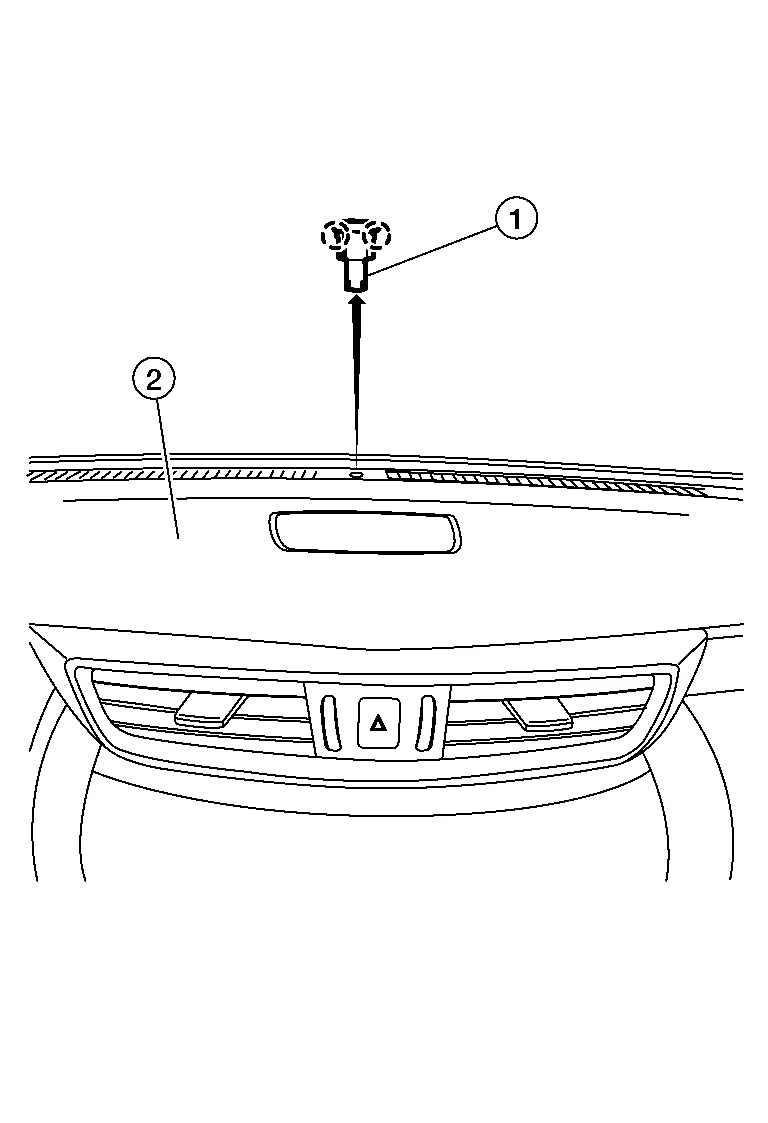
Release the pawls using a suitable tool, then remove sunload sensor (1) from the instrument panel (2).
 : Pawl
Disconnect the harness connector from the sunload sensor.
INSTALLATION
Installation is in the reverse order of removal.
 In-Vehicle Sensor
Removal and Installation
REMOVALRemove the instrument lower panel LH. Refer to Removal and Installation.
Remove the screw (A) and in-Nissan Murano vehicle sensor (1)...
 Intake Sensor
Removal and Installation
REMOVALRemove the evaporator assembly from the heating and cooling unit. Refer to Removal and Installation.
Remove the intake sensor (1) from the evaporator (2)...
Other information:
Nissan Murano (Z52) 2015-2024 Service Manual: P0130 A/f Sensor 1
DTC Description DTC DETECTION LOGICTo judge malfunctions, the diagnosis checks that the A/F signal computed by ECM from the A/F sensor 1 signal fluctuates according to fuel feedback control. The A/F signal computed by ECM from the A/F sensor 1 signal is constantly in a range other than approx...
Nissan Murano (Z52) 2015-2024 Service Manual: C1a34-64 Command Error
DTC Description DTC DETECTION LOGIC DTC No. CONSULT screen items (Trouble diagnosis content) DTC detection condition C1A34–64 COMMAND ERROR (Command error) Diagnosis condition When MAIN switch of ICC system is ON When driving the Nissan Murano vehicle Signal (terminal) CAN communication signal Threshold If an error occurs in the command signal that ADAS control unit transmits to ECM via CAN communication Diagnosis delay time 1 second or less POSSIBLE CAUSEADAS control unitFAIL-SAFEThe following systems are canceled: Vehicle-to-vehicle distance control mode Conventional (fixed speed) cruise control mode Automatic Emergency Braking (AEB) Automatic Emergency Braking (AEB) with pedestrian detection Intelligent Forward Collision Warning (I-FCW) Confirmation Procedure CHECK DTC PRIORITY If DTC “C1A34–64” is displayed with DTC “U1000–01”, first diagnose the DTC “U1000–01”...
Categories
- Manuals Home
- Nissan Murano Owners Manual
- Nissan Murano Service Manual
- Tire rotation
- Jacking up vehicle and removing the damaged tire
- Intelligent Forward Collision Warning (I-FCW)
- New on site
- Most important about car
LATCH (Lower Anchors and Tethers for CHildren) system

LATCH system lower anchor locations - bench seat
Your vehicle is equipped with special anchor points that are used with LATCH system compatible child restraints. This system may also be referred to as the ISOFIX or ISOFIX compatible system. With this system, you do not have to use a vehicle seat belt to secure the child restraint unless the combined weight of the child and child restraint exceeds 65 lbs. (29.5 kg). If the combined weight of the child and child restraint is greater than 65 lbs. (29.5 kg), use the vehicle’s seat belt (not the lower anchors) to install the child restraint. Be sure to follow the child restraint manufacturer’s instructions for installation.