Nissan Murano: Repairing Procedures and Precautions / Replacement of Panel
Panel replacement work includes replacement of the front fenders and hood which are installed by bolts, and replacement of rear fenders and the roof which are welded. This section explains panel replacement procedures after adjusting body alignment.
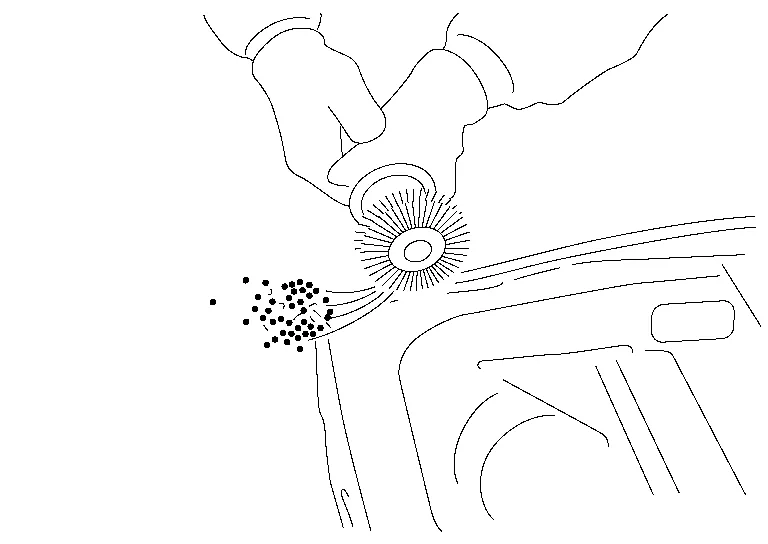
(a) Grind the edge of the door panel using 3M Cubitron II Abrasive Fibre Disc #33415 (grade 60+) or equivalent.

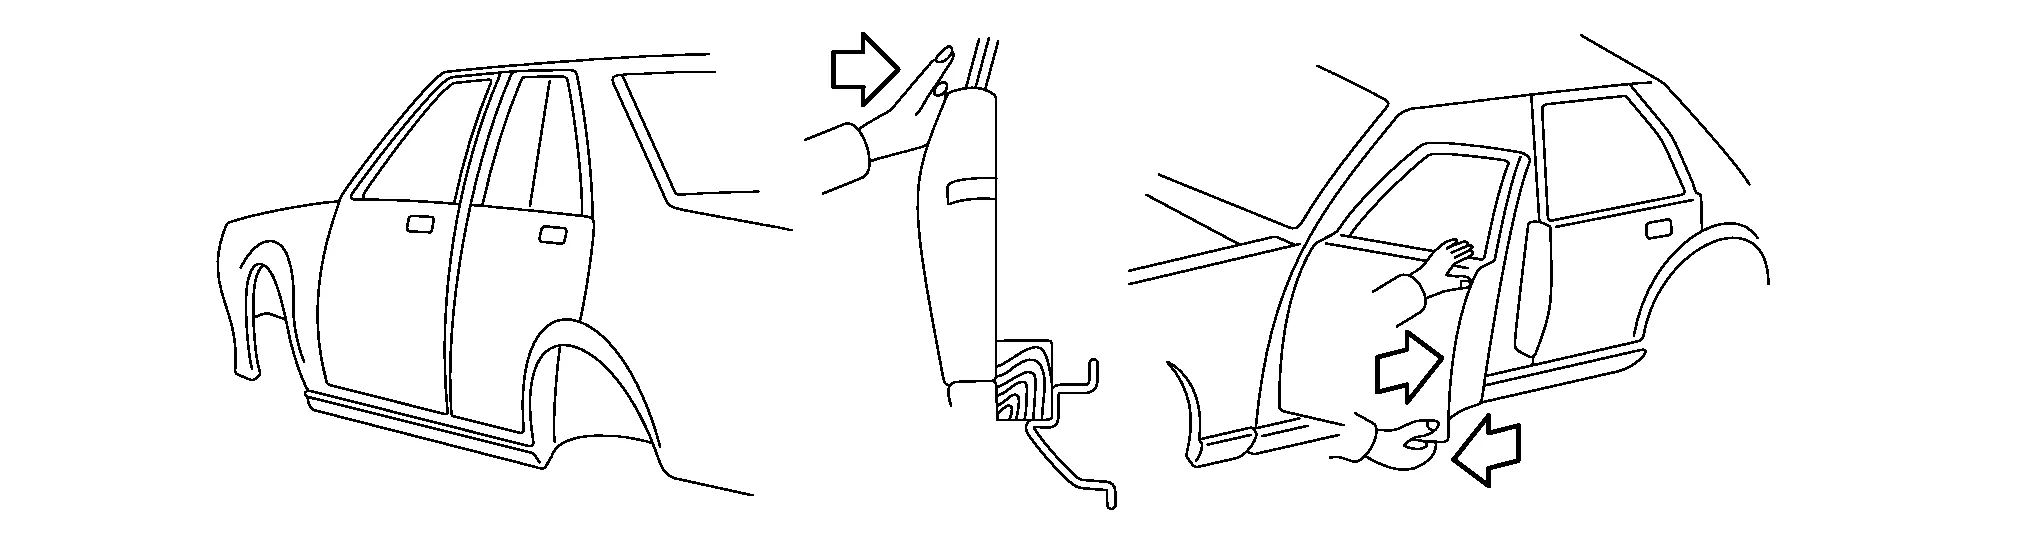
(b) Insert the tip of a sharp-edged tool, such as a chisel, into the clearance at door outer panel. Use a hammer to tap the tool inserted into the clearance from the side to separate the door inner panel and door outer panel.

(c) Remove the adhesive adhering to the door inner panel flange area surface.
(d) Adjust the position where the new door outer panel and door inner panel overlap. Once these are positioned correctly, fix them with clamps to prevent them from being displaced.
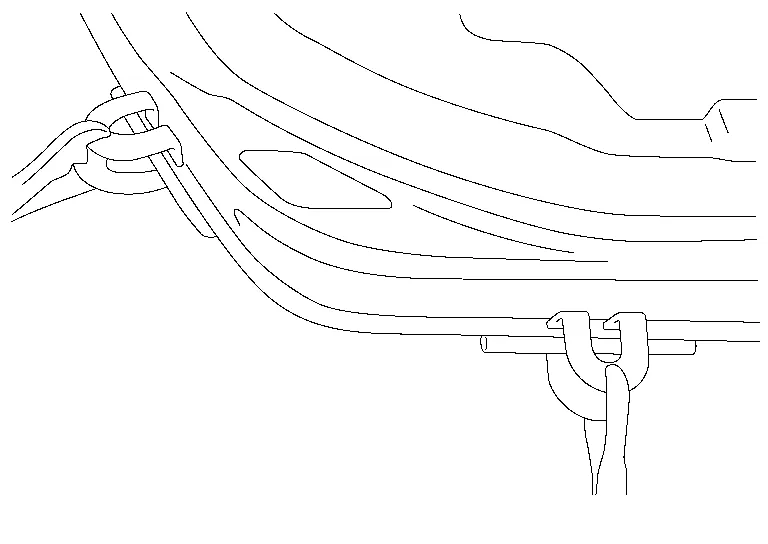
Apply new adhesive to both door outer panel and door inner panel.
(e) Hold the dolly on the corners of the flange at door outer panel. Tap the dolly with a hammer to bend the door outer panel flange area gradually.

(f) Bend with hammer until the angle of the whole circumference of the door outer panel flange area becomes approximately 45°.

(g) Check that the position of the door outer panel and door inner panel is not displaced while tapping it with a hammer to bend it until the angle of whole circumference of the door outer panel flange area becomes approximately 15°.
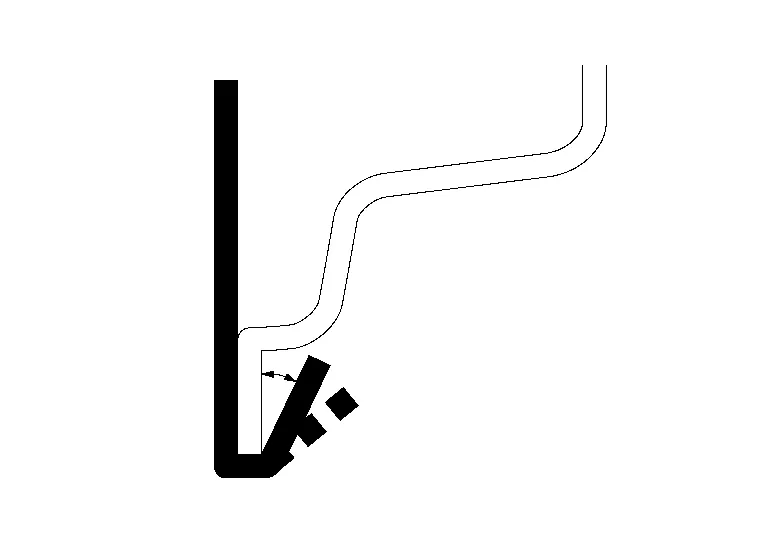
(h) Check that the position of the door outer panel and door inner panel is not displaced while taping it with a hammer to bend it until the angle of the whole circumference of the door outer panel flange area becomes approximately 0°.

(i) Use the hemming tool [SST: KV991-10000] to adjust the shape of the whole circumference of the door outer panel flange area.

(j) Seal up the area around the hemmed end of the flange.

 |
Door inner panel |
 |
Door outer panel |
 |
Adhesive |
 |
Sealant |
Fitting adjustment means adjustment of clearance or gradient of the hood, door, front fender, etc. with respect to its adjacent part, and adjustment of gradient at the press line.
Adjustment of front fender is described as an example.
-
Adjust the fitting at the front fender mounting position. Tighten the front fender mounting bolts loosely, and adjust the fit by moving the front fender sideways or in the up-down direction while observing the clearance with the hood and door.

-
Adjust the front fender bend angle.
If a proper fit cannot be obtained by step (1) above, change the bending angle of the front fender.
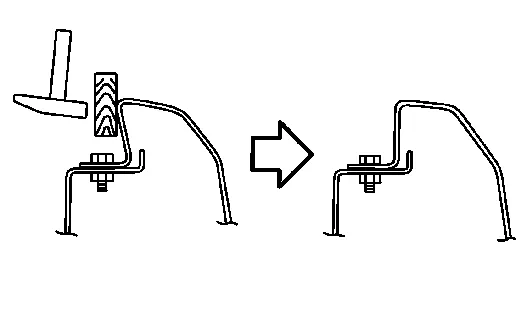
Explanation Condition Correction method When the clearance between the front fender and hood is too small: Apply a flat wood plate to the upper corner of front fender, and correct by hammering. Before hammering, securely tighten the front fender mounting bolts. 
When the clearance between the front fender and hood is too large: Apply a scribing chisel to the bend at the base of the front fender. Tap with a hammer to adjust the clearance. Securely tighten the front fender mounting bolts before tapping. Apply the scribing chisel along the press line. 

When there is excessive clearance on the upper part of door:
-
Apply a wood block between the outer sill and the lower side of door, and push the upper part of door.
-
When there is excessive clearance on the lower part of door.

 Repair Procedure for Pulling
Repair Sequence
In general, no single bend or twist is produced in a collision. Body deformation results from a combination of bending and twisting and other types of damage...
 Partial Replacement of Panel (welded Panel)
Partial Replacement of Panel (Welded Panel)
If damage occurs in a welded panel, it can be entirely replaced by a service panel or partial replacement can be done by cutting and replacing damaged portion with a service panel...
Other information:
Nissan Murano (Z52) 2015-2024 Service Manual: Dash Side Finisher
Removal and Installation REMOVALRemove front kicking plate. Refer to Removal and Installation - Front Kicking Plate. Release metal clips using a suitable tool (A) as shown and remove dash side finisher (1). : Metal clip : FrontINSTALLATIONInstallation is in the reverse order of removal...
Nissan Murano (Z52) 2015-2024 Service Manual: B1400 Through B1420 Air Bag Diagnosis Sensor Unit
DTC Description DTC DETECTION LOGIC DTC No. CONSULT screen items (Trouble diagnosis content) DTC detecting condition B1400-00 CONTROL UNIT [UNIT MALFUNC] Diagnosis condition When ignition switch is ON. Signal (terminal) — Threshold — Diagnosis delay time — B1401-00 CONTROL UNIT [UNIT MALFUNC] Diagnosis condition When ignition switch is ON...
Categories
- Manuals Home
- Nissan Murano Owners Manual
- Nissan Murano Service Manual
- Power Steering Fluid (PSF)
- Vehicle Dynamic Control (VDC) OFF switch
- All-Wheel Drive (AWD) (if so equipped)
- New on site
- Most important about car
Autolight system
The autolight system allows the headlights to turn on and off automatically. The autolight system can:
Turn on the headlights, front parking, tail, license plate and instrument panel lights automatically when it is dark. Turn off all the lights (except daylight running lights) when it is light. Keep all the lights on for a period of time after you place the ignition switch in the OFF position and all doors are closed.