Nissan Murano: Repairing Procedures and Precautions / Repair Procedure for Pulling
In general, no single bend or twist is produced in a collision. Body deformation results from a combination of bending and twisting and other types of damage.
Repair should start where the damage is most deeply propagated.
If concentrating only on apparent damage while overlooking the propagation of impact to the whole body, it is impossible to obtain correct body alignment.
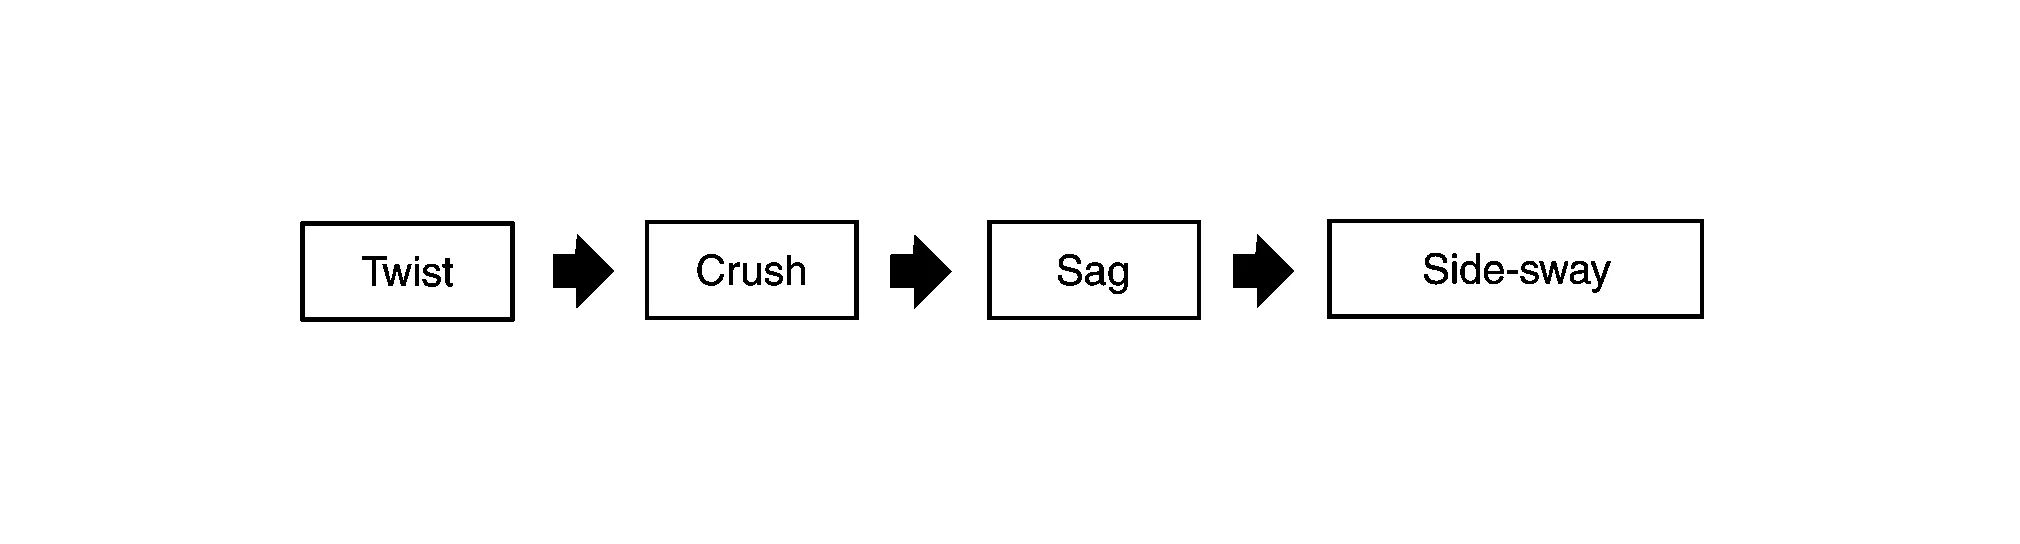
Repair work should basically be performed in this order of damage.
CAUTION:
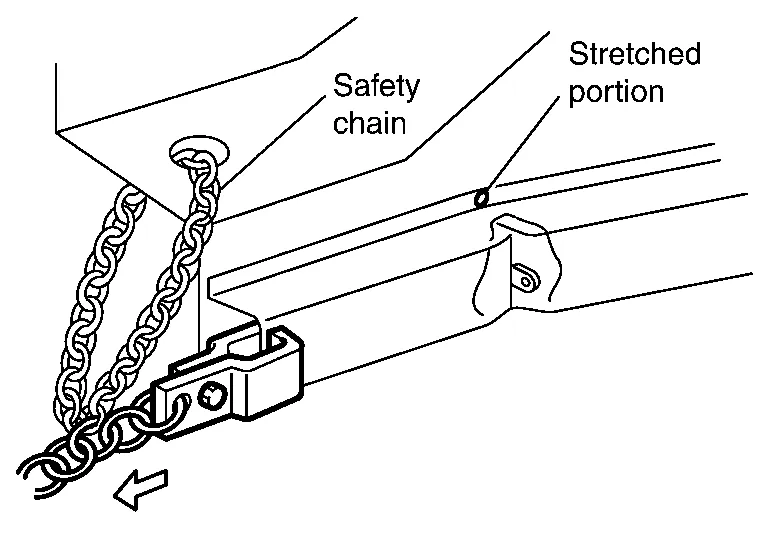
Illustration shows a badly damaged side member for clarity. Badly damaged or kinked side rails must always be replaced.
(1) STRETCHING SHRUNK PORTIONS
-
The repair of a bent closed cross-sectional structure, such as a side member, is done by clamping the surface of the bent-in side and pulling. The pulling direction should be such that force is applied in the direction of an imaginary straight line extending through the original position of the part.
-
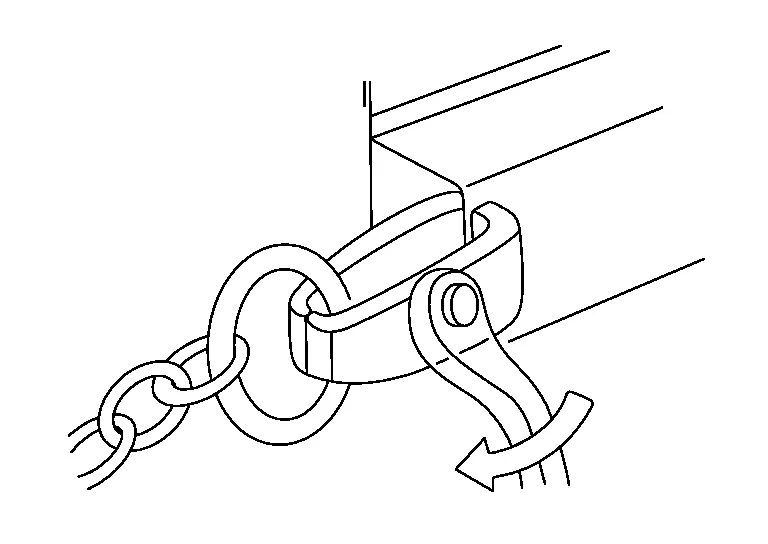
Sometimes a load of approximately 5,000 kg (11,025 lb) is applied during repair work. Accordingly, the clamp must be tightened securely. Be sure to use safety chain.
(2) GRADUAL PULL
-
Pull step by step.
The damaged portion may be work hardened.
Pulling all at once may cause cracking.
-
Reduce the hardness of the work-hardened portion.
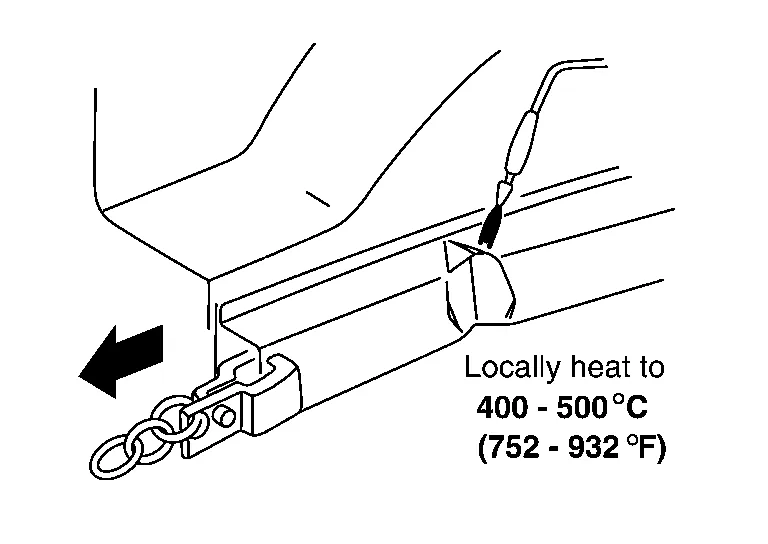
Locally heat the panel to 400°C - 500°C (752°C - 932°F) to the extent that the panel is not colored. Do not heat above 700°C (1,292°F), or strength will be reduced. Do not raise to a temperature of more than 550°C (1,020°F) for HSS parts.
(3) CONSIDER SPRING-BACK
When pulling force is applied to a panel, spring-back is generated by the residual stress.
-
Proper amount of pull
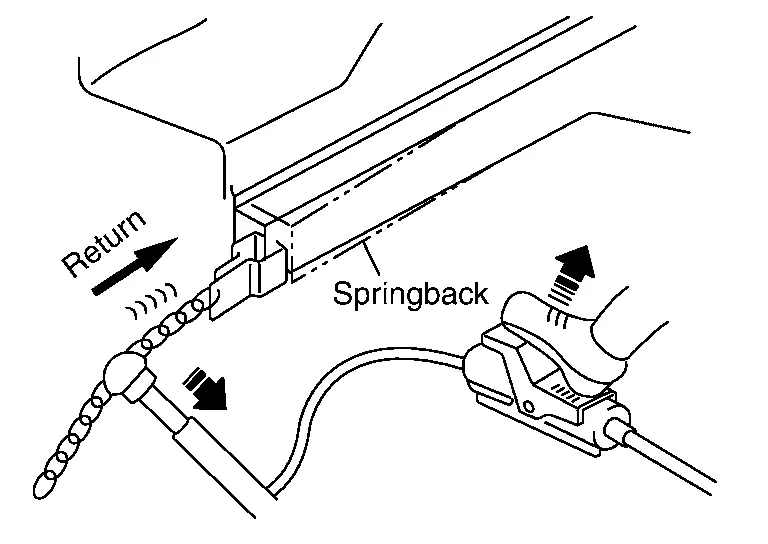
Pull 2 mm - 3 mm (0.08 in - 0.12 in) more than the required dimension. Adjust the amount of pull corresponding to the spring-back.
-
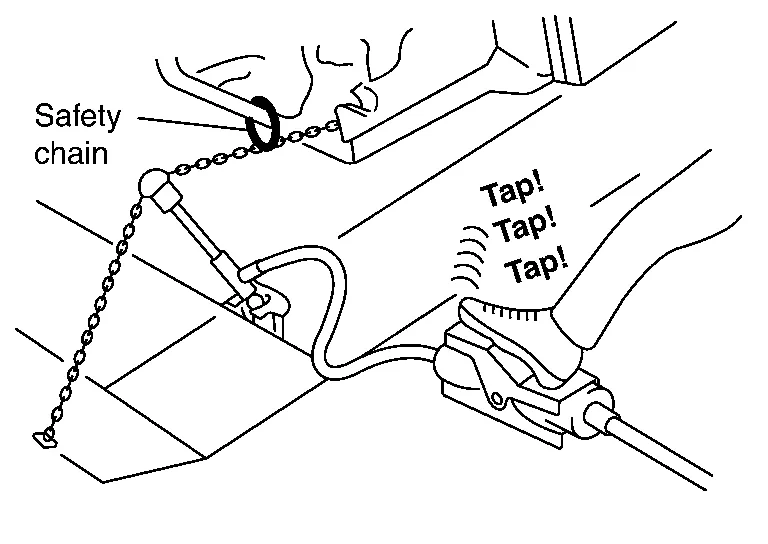
Use of hammer
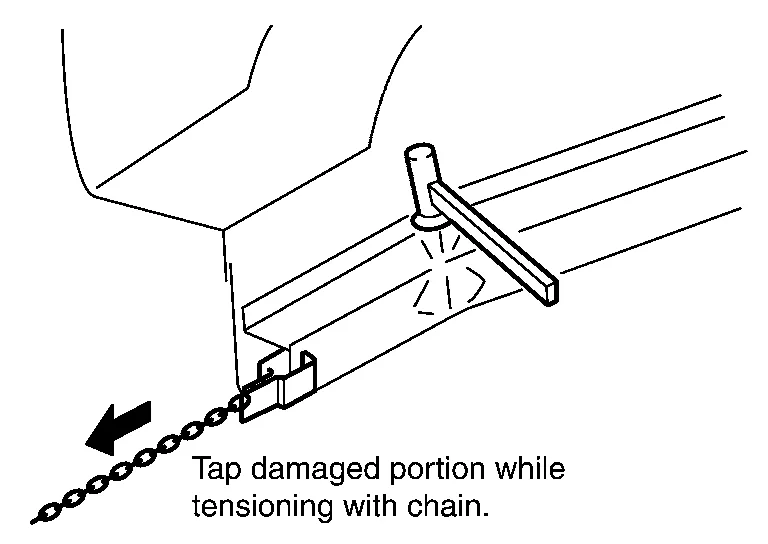
Residual stress caused by kinetic energy of the collision can be removed by hammering.
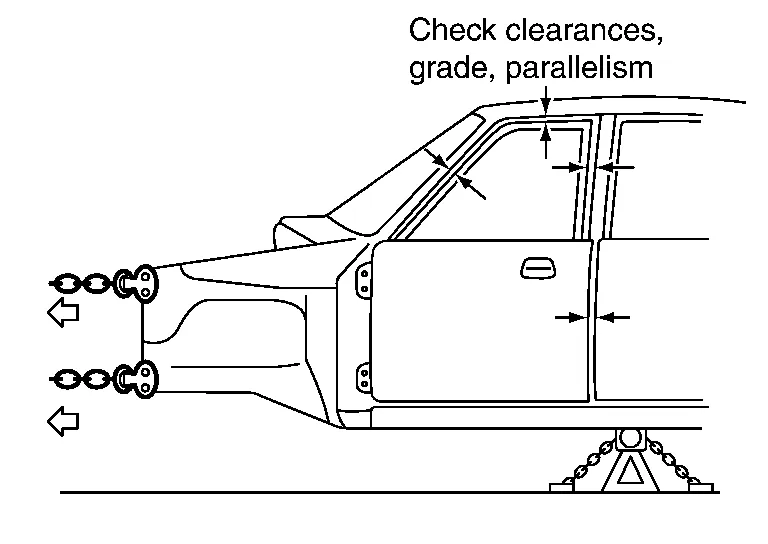
(4) DETERMINING PROPER AMOUNT OF PULL BY OBSERVING DOOR FIT
The proper amount of pull can be determined by observing the clearance at the door or trunk lid.
(5) PULLING UPPER PORTIONS FROM UNDERBODY CLAMP
Note that if there is distance between the pulling point and the underbody clamp, as indicated by (A) in the figure, a moment of rotation is produced.
This may cause secondary damage to the clamped portion.
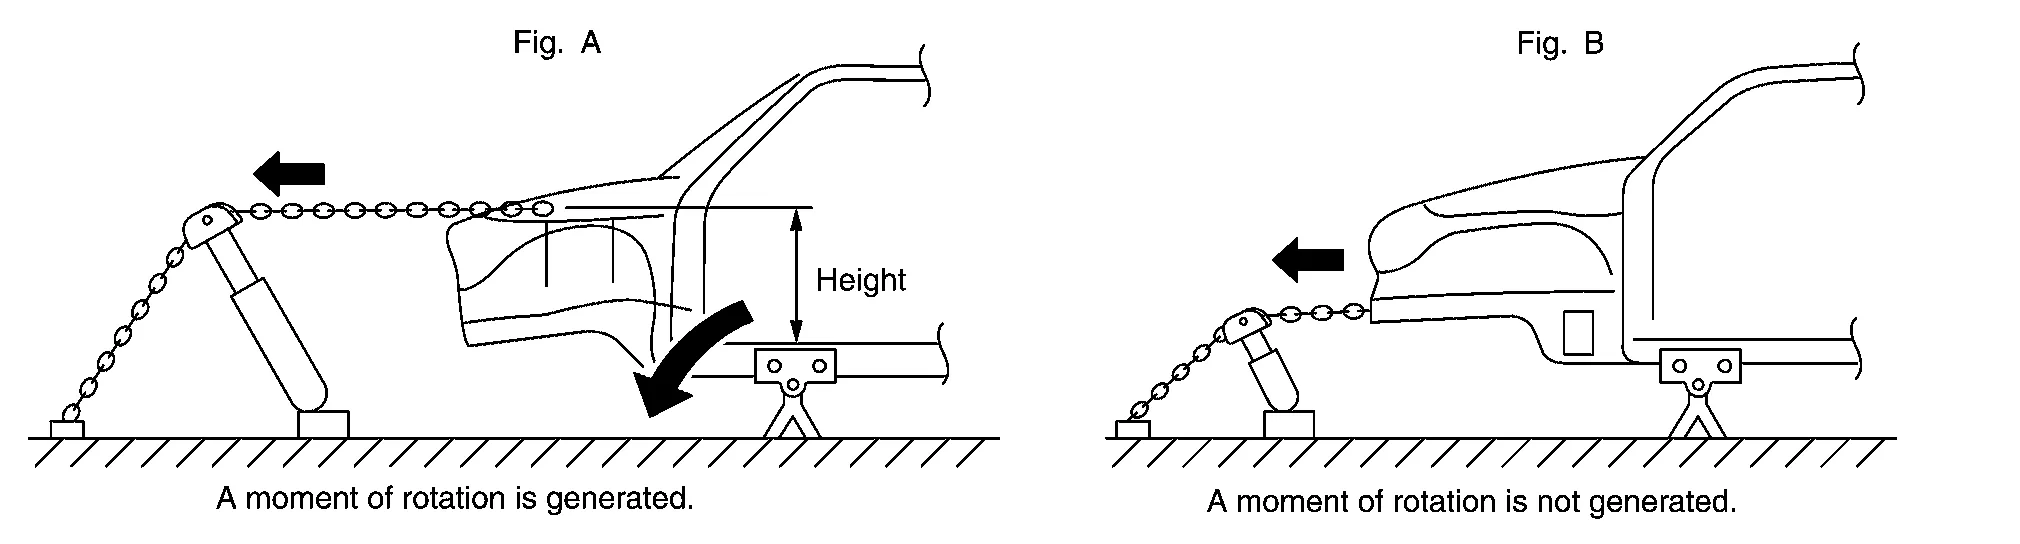
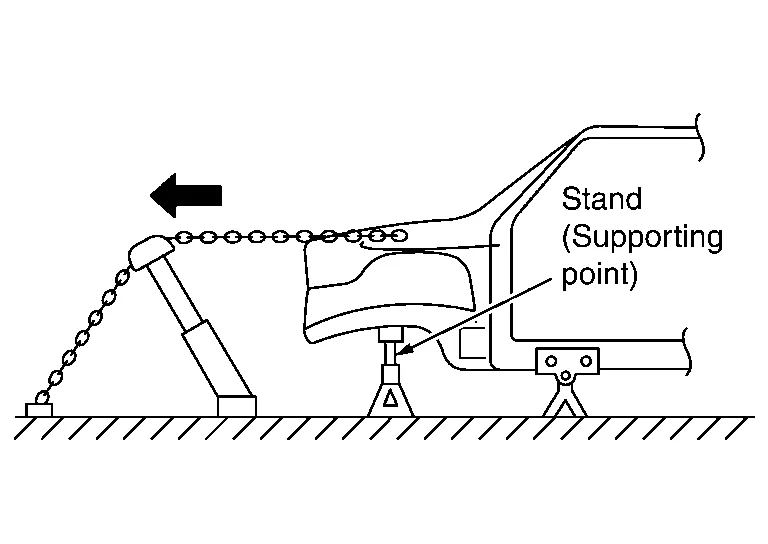
Provide a supporting point under the side member to prevent generation of this moment of rotation.
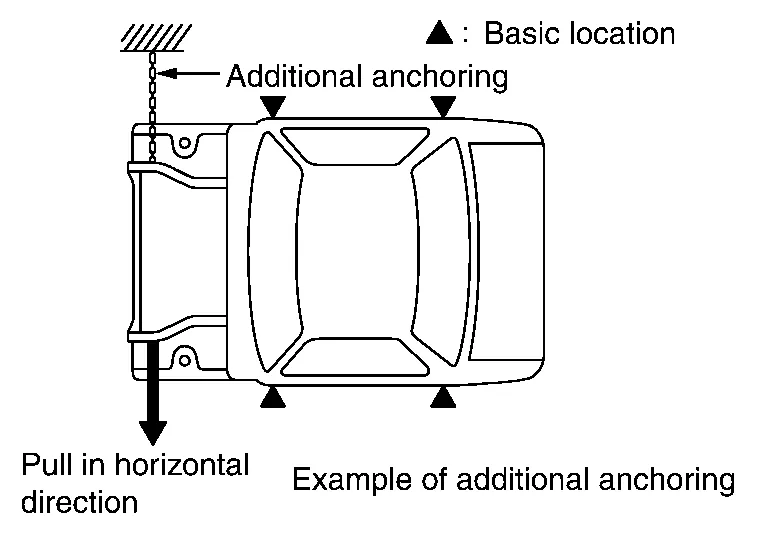
(6) ADDITIONAL ANCHORING
Pulling work must be performed with care taken not to damage the anchoring points or undamaged area of the body. If area not targeted for repair is affected by the excessive pulling force or the direction of pulling, additional anchoring points need to be provided to protect undamaged areas. Side sills are strong enough against longitudinal force, however, they are easily damaged by downward or lateral force. For this reason, additional anchoring should be provided by supporting side members with the port power, or attaching a clamp and chain.
(7) PURPOSE OF BODY ALIGNMENT
This operation is necessary to obtain correct alignment of parts to be used again. Therefore, the damage caused by propagated impact is recovered by pulling out the first input point.
 Repair Techniques Using Body Straightening Equipment
Steps and Process
Each step and process should be described in detail. See below the steps:Details
Repair preparation
Repair method confirmation
Check the contents of the repair sheet and the work procedure...
 Replacement of Panel
Replacement of Panel
Panel replacement work includes replacement of the front fenders and hood which are installed by bolts, and replacement of rear fenders and the roof which are welded...
Other information:
Nissan Murano (Z52) 2015-2024 Service Manual: Precaution. Precautions
Precaution for Supplemental Restraint System (SRS) "AIR BAG" and "SEAT BELT PRE-TENSIONER" The Supplemental Restraint System such as “AIR BAG” and “SEAT BELT PRE-TENSIONER”, used along with a front seat belt, helps to reduce the risk or severity of injury to the driver and front passenger for certain types of collisions...
Nissan Murano (Z52) 2015-2024 Service Manual: P0182 Ftt Sensor
DTC Description DTC DETECTION LOGIC An excessively low voltage from the sensor is sent to ECM. An excessively high voltage from the sensor is sent to ECM. DTC CONSULT screen terms (Trouble diagnosis content) DTC detection condition P0182 FTT_SEN/CIRCUIT (Fuel temperature sensor “A” circuit low) Diagnosis condition Ignition switch ON Signal (terminal) Voltage signal transmitted from fuel tank temperature sensor to ECM Threshold An excessively low voltage from the sensor is sent to ECM Diagnosis delay time — P0183 FTT_SEN/CIRCUIT (Fuel temperature sensor “A” circuit high) Diagnosis condition Ignition switch ON Signal (terminal) Voltage signal transmitted from fuel tank temperature sensor to ECM Threshold An excessively high voltage from the sensor is sent to ECM Diagnosis delay time — POSSIBLE CAUSEP0182 Harness or connectors (The sensor circuit is open or shorted...
Categories
- Manuals Home
- Nissan Murano Owners Manual
- Nissan Murano Service Manual
- High Beam Assist (if so equipped)
- System malfunction
- Warning lights
- New on site
- Most important about car
LATCH (Lower Anchors and Tethers for CHildren) system

LATCH system lower anchor locations - bench seat
Your vehicle is equipped with special anchor points that are used with LATCH system compatible child restraints. This system may also be referred to as the ISOFIX or ISOFIX compatible system. With this system, you do not have to use a vehicle seat belt to secure the child restraint unless the combined weight of the child and child restraint exceeds 65 lbs. (29.5 kg). If the combined weight of the child and child restraint is greater than 65 lbs. (29.5 kg), use the vehicle’s seat belt (not the lower anchors) to install the child restraint. Be sure to follow the child restraint manufacturer’s instructions for installation.