Nissan Murano: Rear Suspension :: Removal and Installation / Rear Shock Absorber
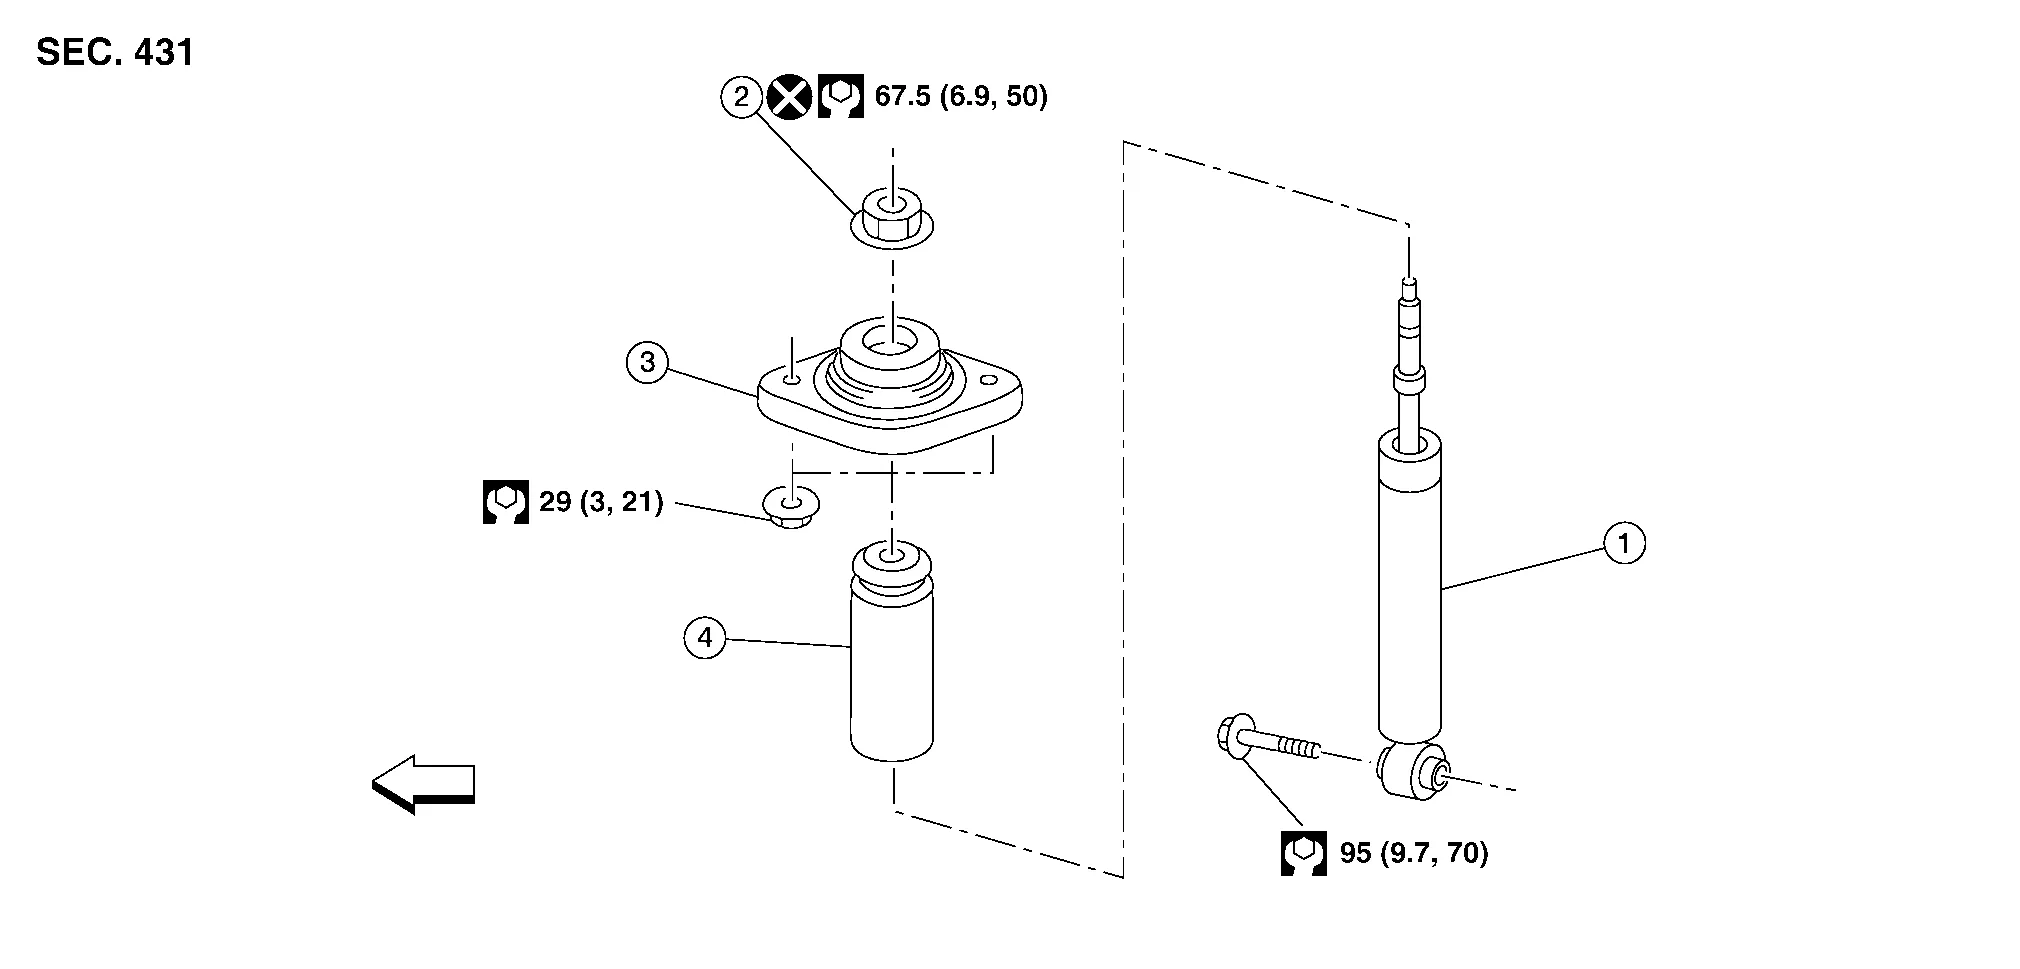
| 1. | Rear shock absorber | 2. | Piston rod lock nut | 3. | Shock absorber insulator |
| 4. | Bound bumper | Front |
REMOVAL
Remove the rear wheel and tire using power tool. Refer to Removal and Installation.
Set a suitable jack under the rear lower link to relieve the coil spring tension.
WARNING:
Place a suitable jack under the outer end of the rear lower link.
CAUTION:
Do not damage the rear lower link with the suitable jack.
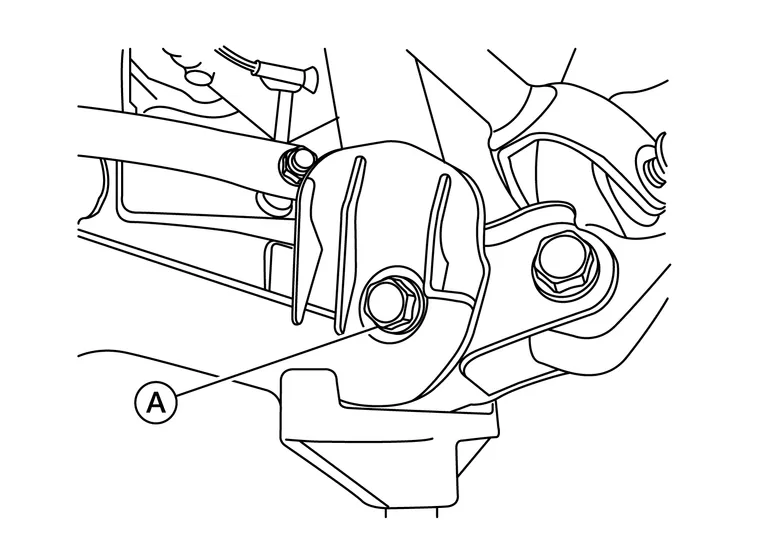
Remove the lower rear shock absorber bolt (A) using power tool.
Gradually lower the suitable jack to separate the rear shock absorber from the rear lower link.
Remove the rear shock absorber nuts ( ).
).
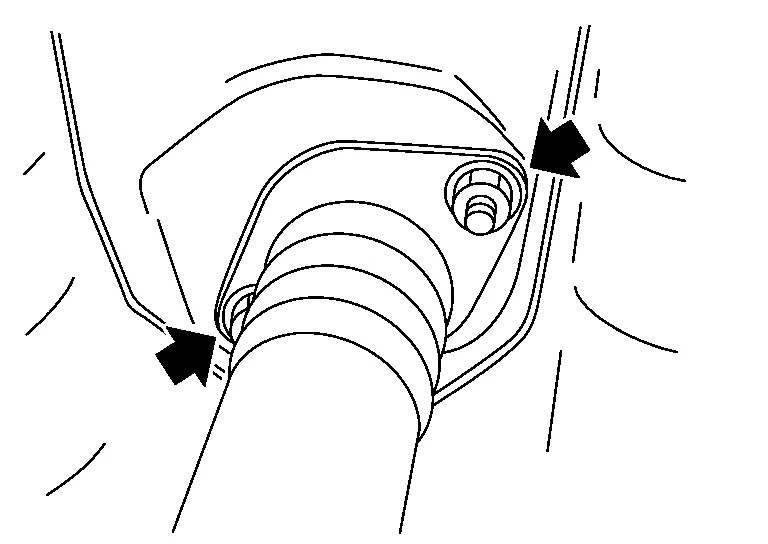
Remove the rear shock absorber.
INSTALLATION
Installation is in the reverse order of removal.
-
Perform the final tightening of the parts under unladen conditions with the tires on level ground.
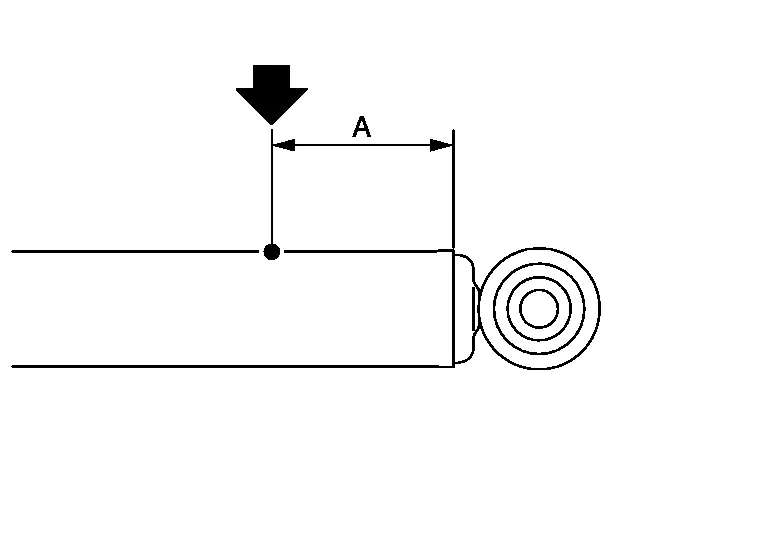
Set the shock absorber horizontally with the piston rod fully extended.
Drill a 2 – 3 mm (0.08 – 0.12 in) hole at the position ( ) as shown to release gas gradually.
CAUTION:
-
Wear eye protection (safety glasses).
-
Wear gloves.
-
Be careful with metal chips or oil blown out by the compressed gas.
 NOTE:
NOTE:
-
Drill vertically in this direction (
) directly into the outer tube avoiding brackets. -
The gas is clear, colorless, odorless, and harmless.
| (A) | : 20 – 30 mm (0.79 – 1.18 in) |
Position the drilled hole downward and drain the oil by moving the piston rod several times.
CAUTION:
Dispose of drained oil according to the law and local regulations.
 Rear Lower Link Coil Spring
Exploded View
1.
Upper seat
2.
Rear suspension member
3.
Coil spring
4.
Lower rubber seat
5.
Rear lower link
6.
Rear knuckle
Front
Removal and Installation
REMOVALRemove the front undercover...
 Radius Rod
Exploded View
1.
Rear suspension member
2.
Radius rod
3.
Rear knuckle
Front
Removal and Installation
REMOVALRemove the rear wheel and tire using power tool...
Other information:
Nissan Murano (Z52) 2015-2024 Service Manual: Steering System :: Preparation. Preparation
..
Nissan Murano (Z52) 2015-2024 Service Manual: P0451 Pressure Sensor
DTC Description DTC DETECTION LOGICAn excessively low voltage from the sensor is sent to ECM. DTC CONSULT screen terms (Trouble diagnosis content) DTC detection condition P0451 EVAP SYS PRES SEN (EVAP control system pressure sensor performance) Diagnosis condition Ignition switch ON Signal (terminal) EVAP control system pressure sensor signal ECM (Built in barometric pressure sensor) Threshold ECM detects a state that the pressure difference remains the threshold value or more for continuously for 5 seconds or more under the condition that the pressure of the EVAP control system pressure sensor and that of the barometric pressure sensor are equal...
Categories
- Manuals Home
- Nissan Murano Owners Manual
- Nissan Murano Service Manual
- Checking engine oil level
- Intelligent Forward Collision Warning (I-FCW)
- High Beam Assist (if so equipped)
- New on site
- Most important about car
Front manual seat adjustment (if so equipped)
Your vehicle seats can be adjusted manually. For additional information about adjusting the seats, refer to the steps outlined in this section.
Forward and backward
