Nissan Murano: Rear Suspension :: Removal and Installation / Radius Rod
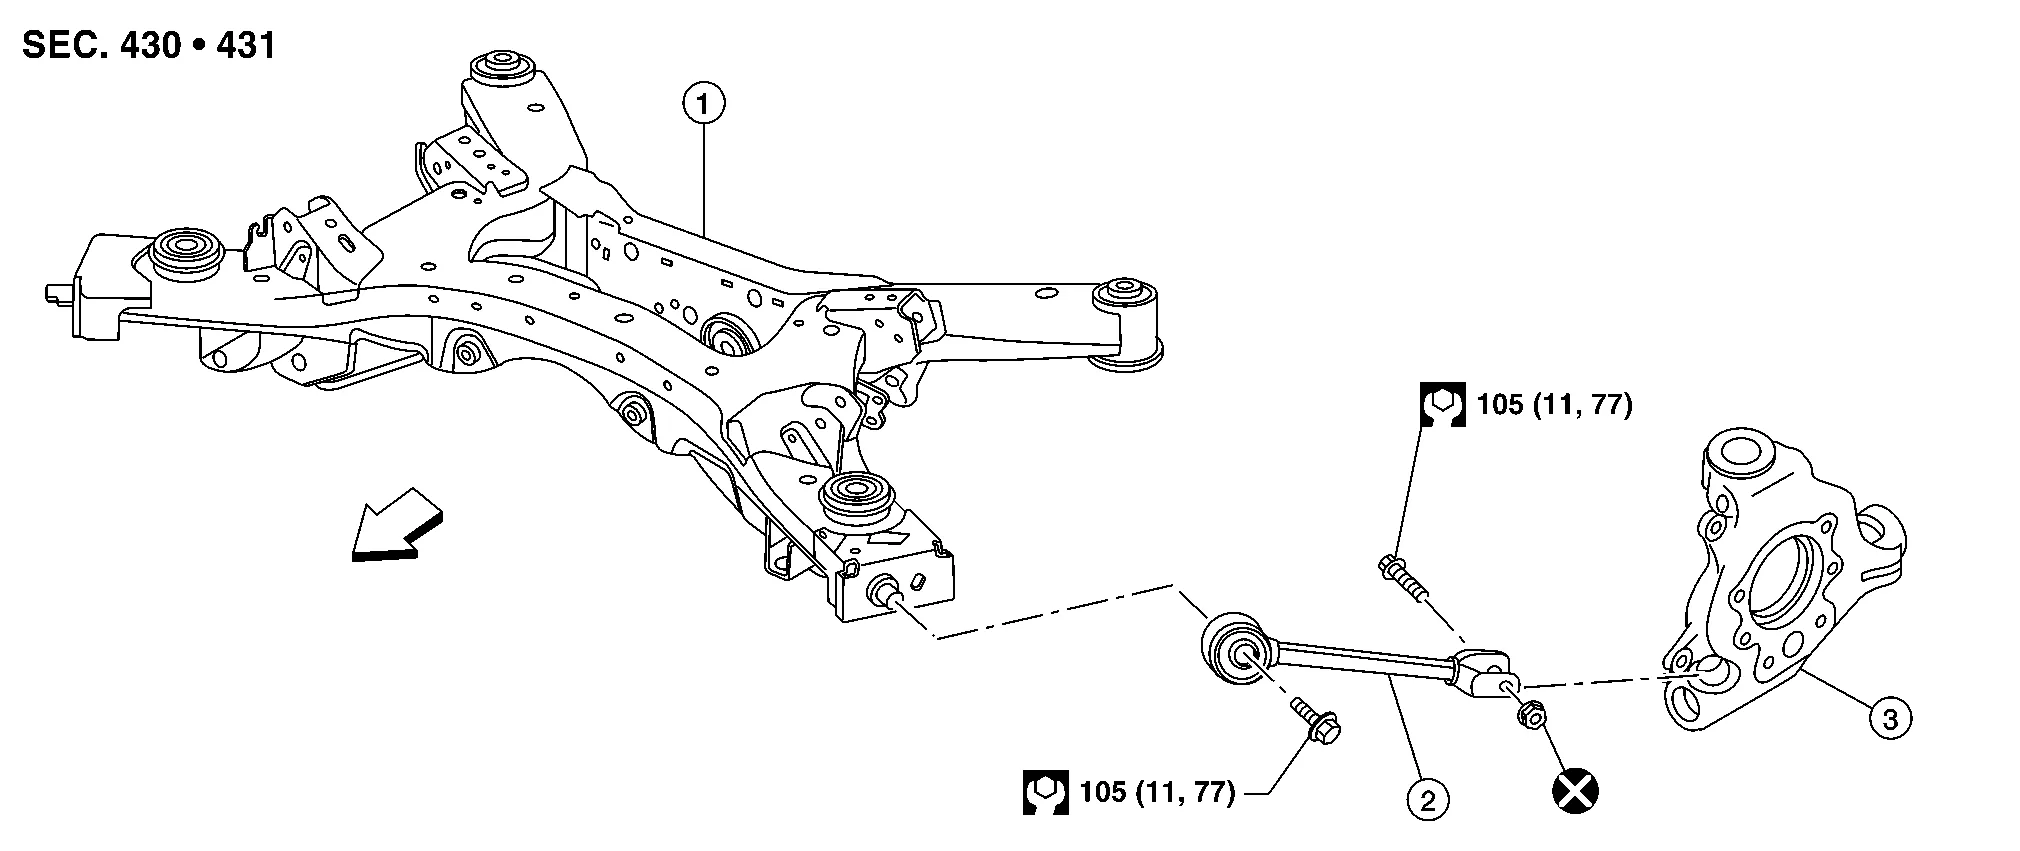
| 1. | Rear suspension member | 2. | Radius rod | 3. | Rear knuckle |
| Front |
REMOVAL
Remove the rear wheel and tire using power tool. Refer to Removal and Installation.
Support the rear knuckle with a suitable jack.
WARNING:
Place a suitable jack under the rear knuckle.
CAUTION:
Do not damage the rear knuckle with the suitable jack.
Remove the radius rod nut and bolt from the rear knuckle using power tool.
Remove the radius rod bolt from the rear suspension member using power tool.
Remove the radius rod.
INSTALLATION
Installation is in the reverse order of removal.
CAUTION:
Do not reuse the radius rod nut.
Perform the final tightening of the parts under unladen conditions with the tires on level ground.
 Rear Shock Absorber
Exploded View
1.
Rear shock absorber
2.
Piston rod lock nut
3.
Shock absorber insulator
4.
Bound bumper
Front
Removal and Installation
REMOVALRemove the rear wheel and tire using power tool...
 Front Lower Link
Exploded View
1.
Rear shock absorber
2.
Rear suspension member
3.
Front lower link
4.
Rear suspension link protector
5.
Rear knuckle
Pawl
Front
Removal and Installation
REMOVALRemove the front under cover...
Other information:
Nissan Murano (Z52) 2015-2024 Owners Manual: Measurement of weights
Secure loose items to prevent weight shifts that could affect the balance of your vehicle.When the vehicle is loaded, drive to a scale and weigh the front and the rear wheels separately to determine axle loads. Individual axle loads should not exceed either of the Gross Axle Weight Ratings (GAWR)...
Nissan Murano (Z52) 2015-2024 Owners Manual: Precautions when starting and driving
WARNING Do not leave children or adults who would normally require the assistance of others alone in your vehicle. Pets should also not be left alone. They could accidentally injure themselves or others through inadvertent operation of the vehicle...
Categories
- Manuals Home
- Nissan Murano Owners Manual
- Nissan Murano Service Manual
- System malfunction
- Turning the AEB system on/off
- All-Wheel Drive (AWD) (if so equipped)
- New on site
- Most important about car
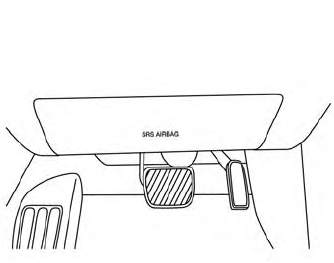
Driver and passenger supplemental knee air bag
Driver’s side
The knee air bag is located in the knee bolster, on the driver’s and passenger’s side. All of the information, cautions and warnings in this manual apply and must be followed. The knee air bag is designed to inflate in higher severity frontal collisions, although it may inflate if the forces in another type of collision are similar to those of a higher severity frontal impact. It may not inflate in certain collisions.
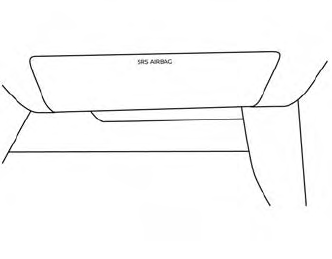
Passenger’s side