Nissan Murano: Engine / Fuel System :: Disassembly and Assembly. Fuel Level Sensor Unit
Fuel Level Sensor Unit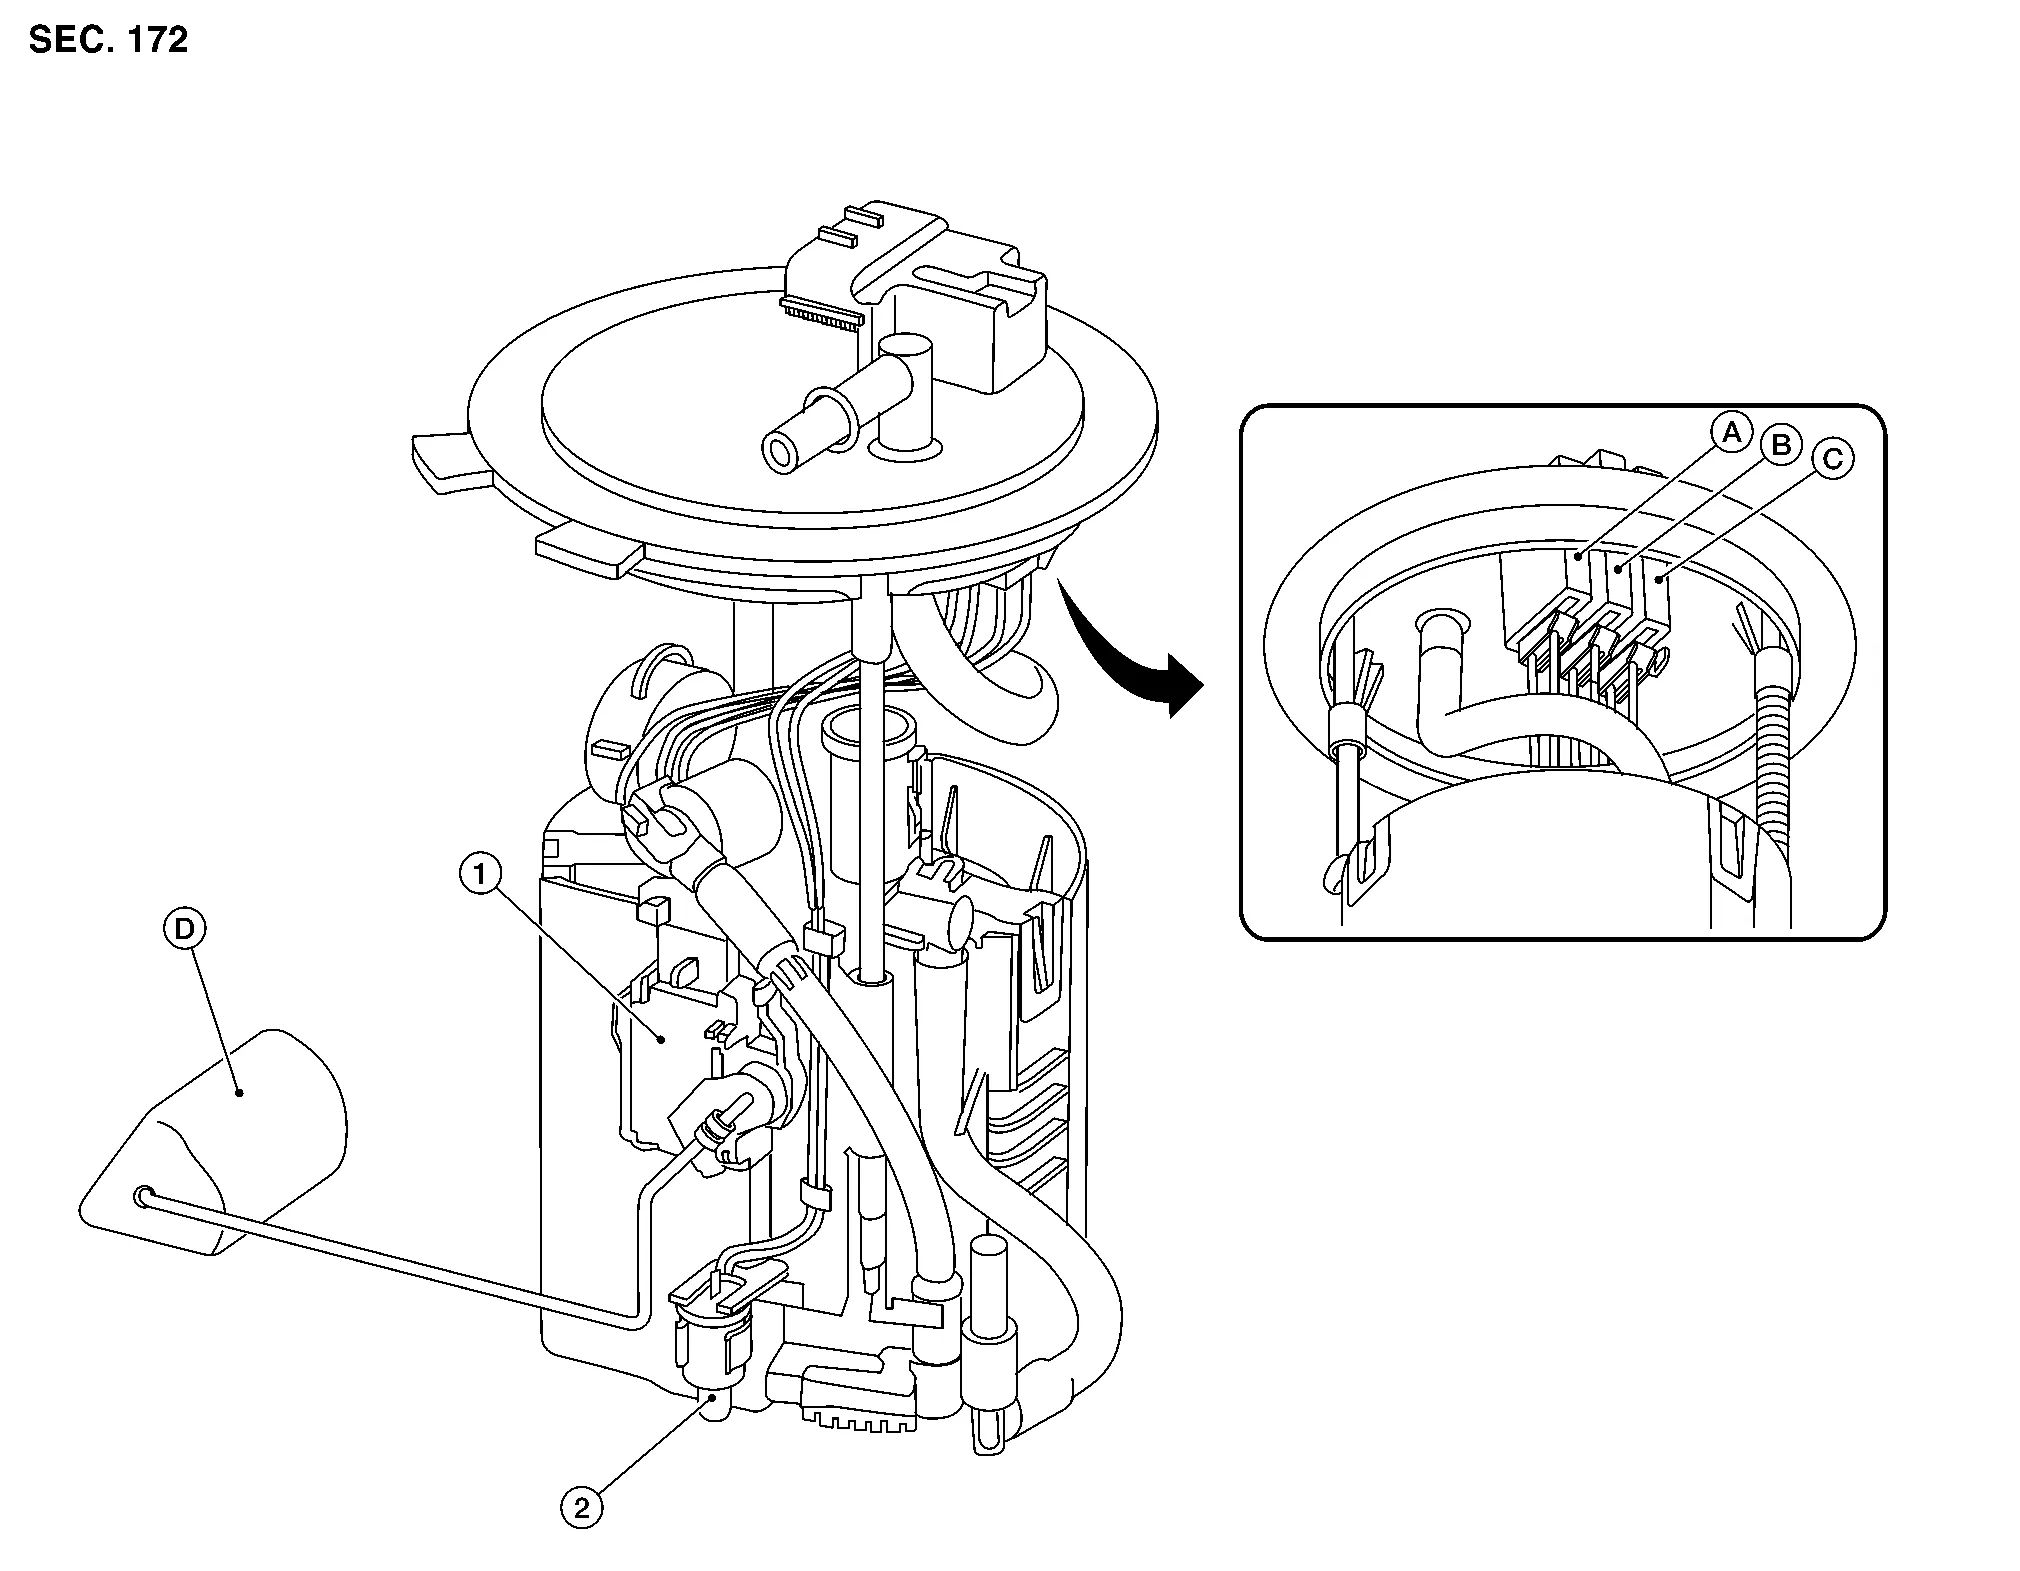
| 1. | Fuel level sensor unit | 2. | Fuel tank temperature sensor | A. | Fuel level sensor unit harness connector |
| B. | Fuel pump harness connector | C. | Fuel tank temperature sensor harness connector | D. | Float arm assembly |
Disassembly
 NOTE:
NOTE:
Before disassembly, note the proper placement of the wires to the correct terminals and correct wire routing to the terminals.
Disconnect fuel level sensor unit (A) and fuel tank temperature sensor (C) harness connectors. Press the tabs on the terminals to release the locking tabs.
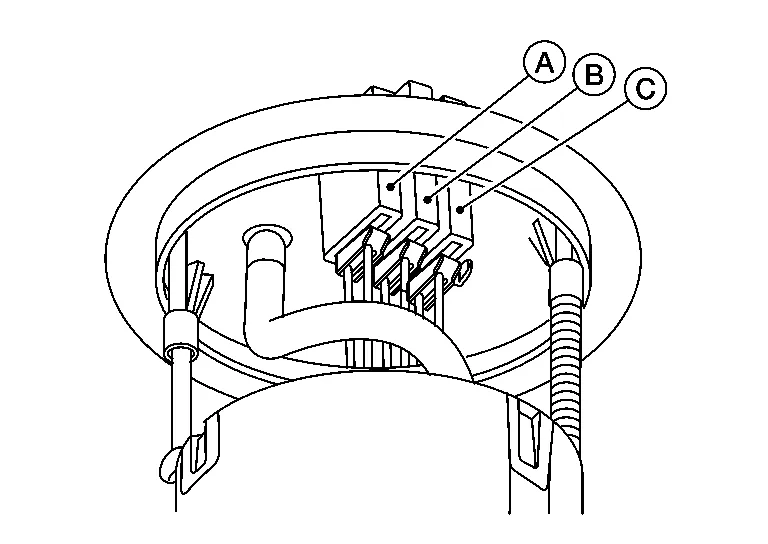
| (B) | : Fuel pump harness connector |
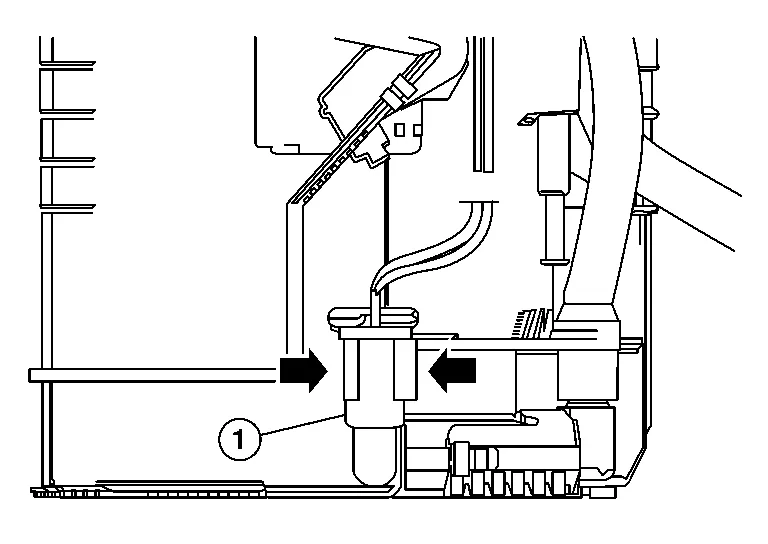
Release two clips and remove fuel tank temperature sensor (1) from pump assembly.
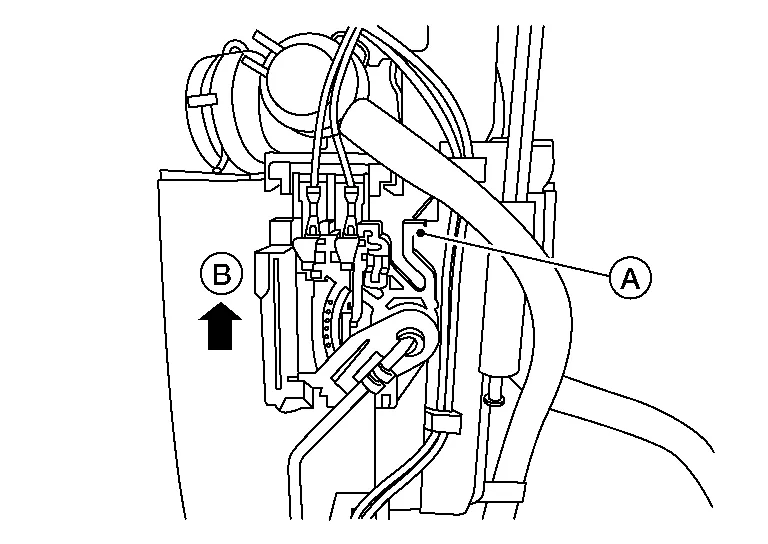
Release tab (A) and slide fuel level sensor unit and float arm assembly up (B) to remove.
Assembly
Assembly is in the reverse order of disassembly.
NOTE:
-
Ensure proper placement of the wires to the correct terminals and correct wire routing to the terminals.
-
After connecting terminals, ensure they are securely locked and cannot be pulled out.
-
When installing the fuel level sensor unit, push down until the tab is locked into place.
 Evap Canister Purge Volume Control Solenoid Valve
Exploded View
1.
EVAP canister purge volume control solenoid valve
2.
EVAP hose C
3.
Clamp
4.
EVAP hose B
5.
Vacuum delay valve
6...

Other information:
Nissan Murano (Z52) 2015-2024 Owners Manual: Weight distribution hitch
This type of hitch is also called a “loadleveling” or “equalizing” hitch. A set of bars attach to the ball mount and to the trailer to distribute the tongue weight (hitch weight) of your trailer. Many vehicles can’t carry the full tongue weight of a given trailer, and need some of the tongue weight transferred through the frame and pushing down on the front wheels...
Nissan Murano (Z52) 2015-2024 Owners Manual: Rapid air pressure loss
Rapid air pressure loss or a “blow-out” can occur if the tire is punctured or is damaged due to hitting a curb or pothole. Rapid air pressure loss can also be caused by driving on under-inflated tires. Rapid air pressure loss can affect the handling and stability of the vehicle, especially at highway speeds...
Categories
- Manuals Home
- Nissan Murano Owners Manual
- Nissan Murano Service Manual
- High Beam Assist (if so equipped)
- Settings
- Vehicle Dynamic Control (VDC) OFF switch
- New on site
- Most important about car
LATCH (Lower Anchors and Tethers for CHildren) system

LATCH system lower anchor locations - bench seat
Your vehicle is equipped with special anchor points that are used with LATCH system compatible child restraints. This system may also be referred to as the ISOFIX or ISOFIX compatible system. With this system, you do not have to use a vehicle seat belt to secure the child restraint unless the combined weight of the child and child restraint exceeds 65 lbs. (29.5 kg). If the combined weight of the child and child restraint is greater than 65 lbs. (29.5 kg), use the vehicle’s seat belt (not the lower anchors) to install the child restraint. Be sure to follow the child restraint manufacturer’s instructions for installation.