Nissan Murano: Wiper & Washer :: Removal and Installation / Front Wiper Arm
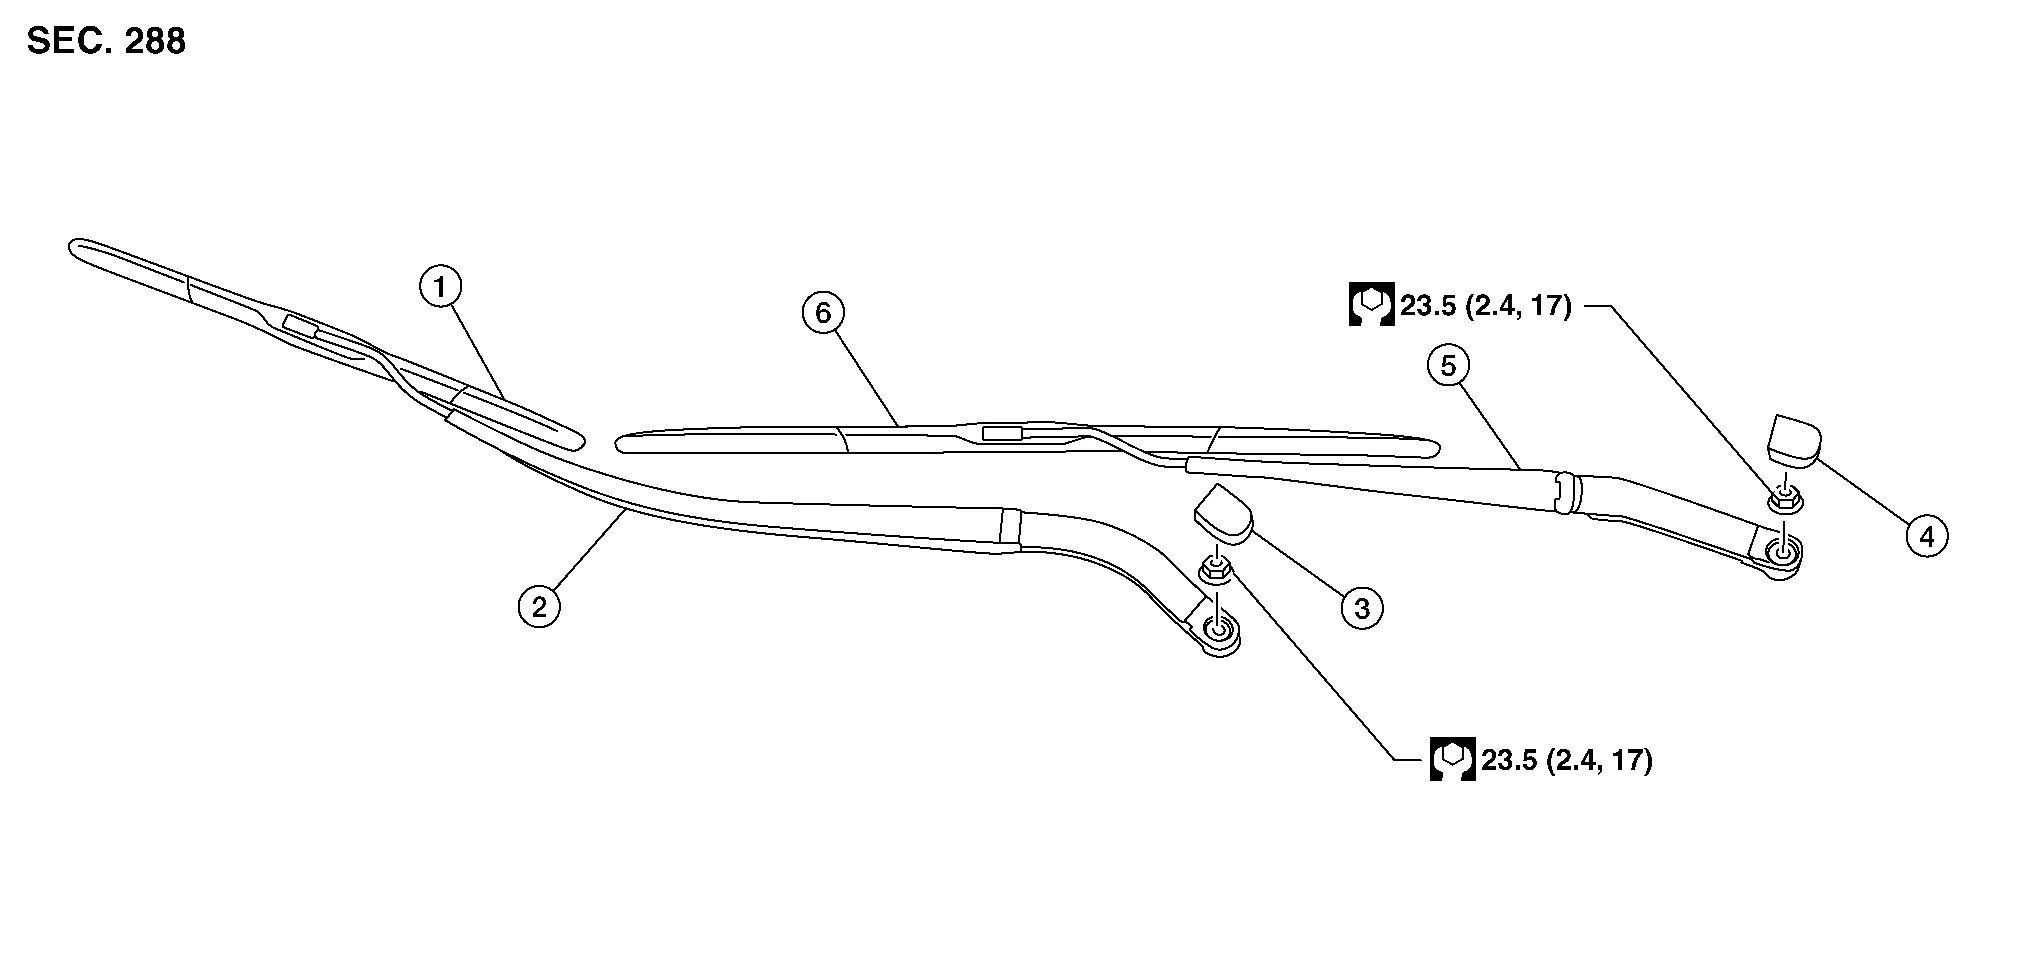
| 1. | Front wiper blade (RH) | 2. | Front wiper arm (RH) | 3. | Front wiper arm cover (RH) |
| 4. | Front wiper arm cover (LH) | 5. | Front wiper arm (LH) | 6. | Front wiper blade (LH) |
REMOVAL
Operate the front wiper arms into the auto stop position.
Open the hood.
Remove the front wiper arm cover.
Remove the front wiper arm nut.
Raise the front wiper arm, then remove the front wiper arm.
INSTALLATION
Clean the front wiper arm mount as shown.
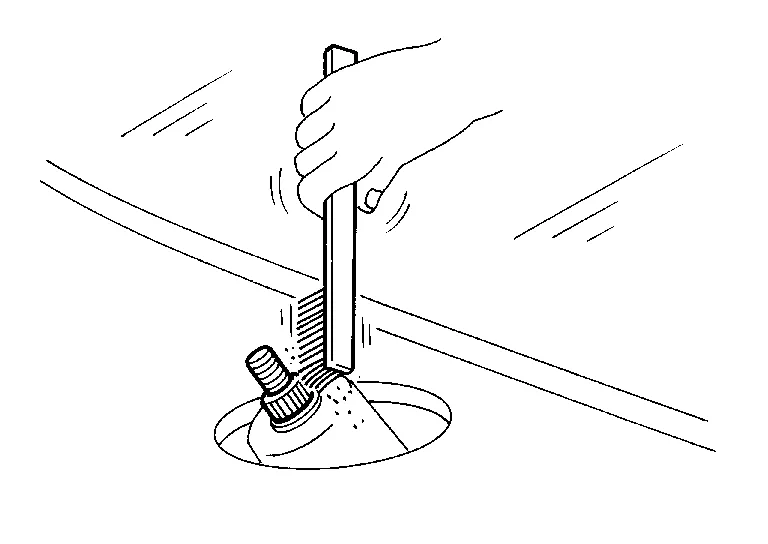
 NOTE:
NOTE:
This will reduce the possibility of wiper arm looseness.
Operate front wiper motor to move the front wiper to the auto stop position.
Adjust the front wiper blade position. Refer to Adjustment.
Install the front wiper arm and the front wiper arm nut.
Install the front wiper arm cover.
Check that the front wiper blades stop at the specified position. Refer to Adjustment.
Clearance between the end of cowl top cover/ front fender cover and the top of front wiper blade center.
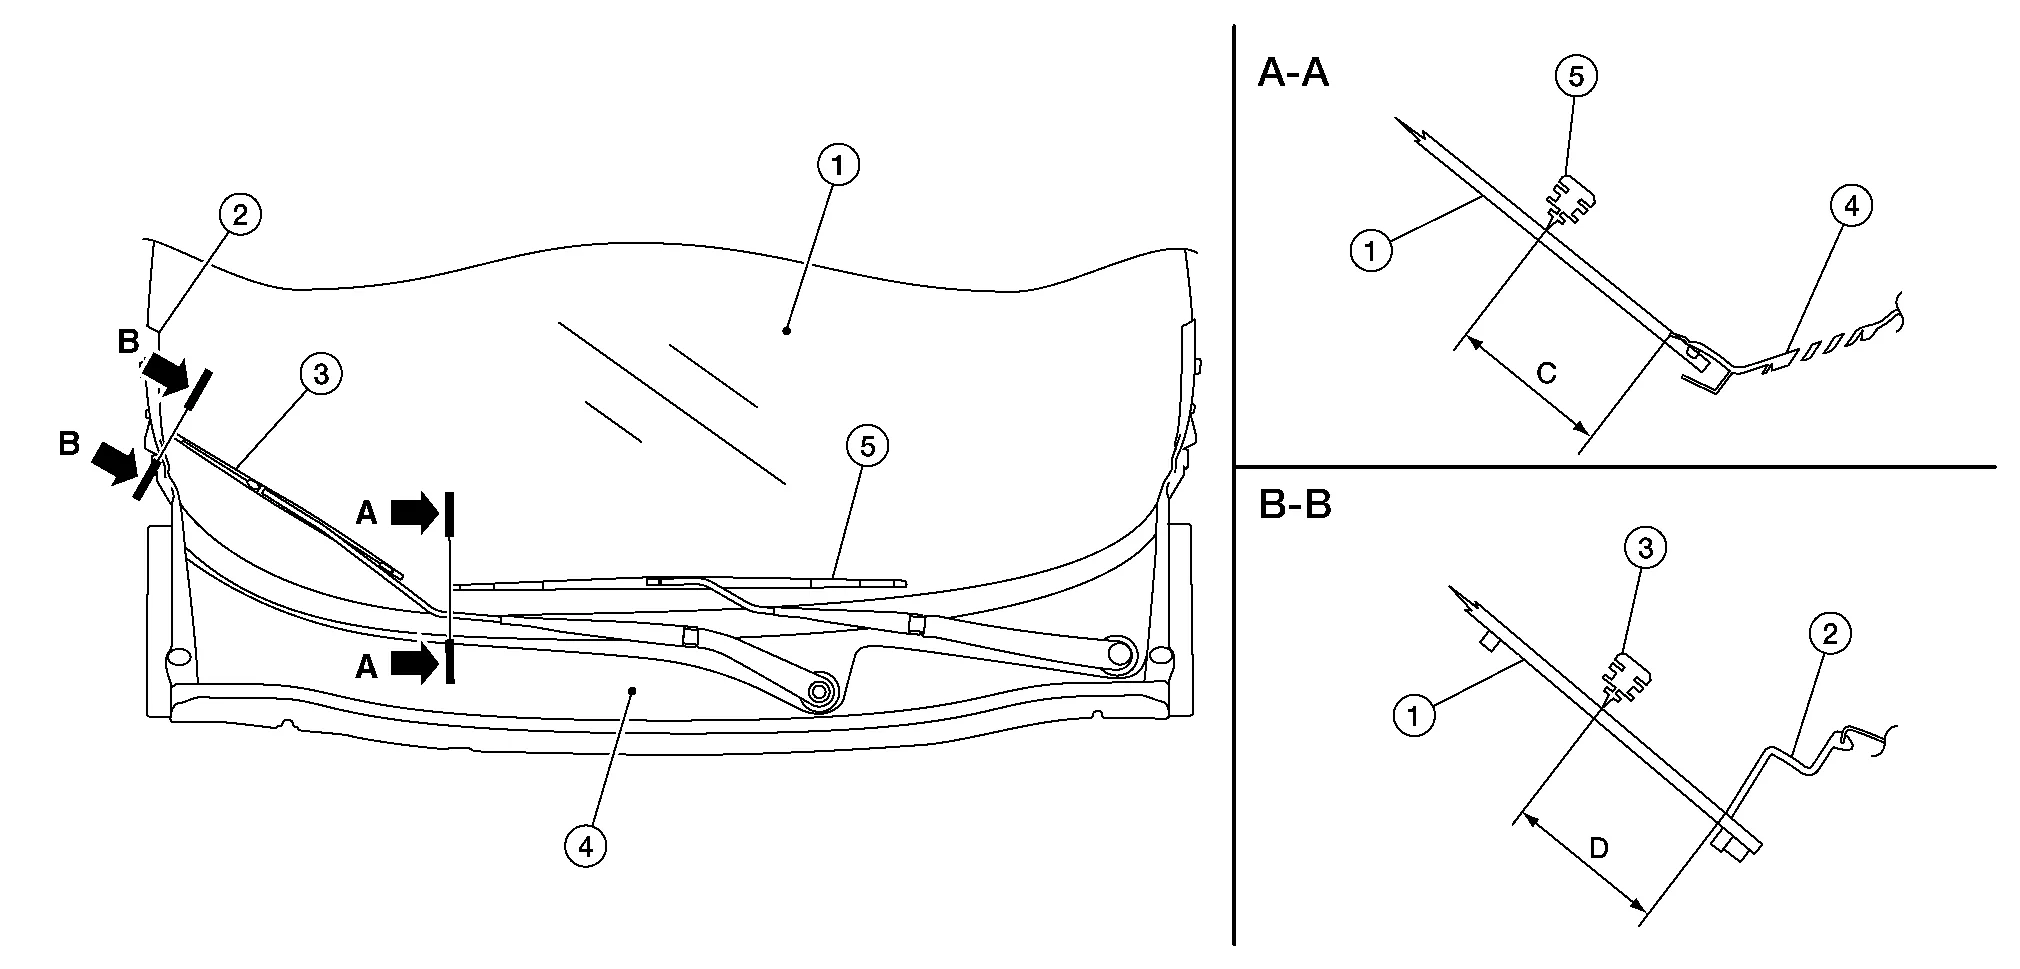
| 1. | Windshield glass | 2. | Front fender cover | 3. | Front wiper blade (RH) |
| 4. | Cowl top cover | 5. | Front wiper blade (LH) | C. | 41.6 mm ± 7. 5 mm (1.64 in ± 0.30 in) |
| D. | 44.2 mm ±7.5 mm (1.74 in ± 0.30 in) |
 Front Washer Tube
Removal and Installation
REMOVALRemove the hood insulator. Refer to Exploded View.
Remove the hoodledge cover (RH). Refer to Removal and Installation.
Disconnect the front washer tube from the front washer nozzle...

Other information:
Nissan Murano (Z52) 2015-2024 Owners Manual: Motion-Activated Liftgate (if so equipped)
The liftgate can be operated using a quick kicking motion under the center of the rear bumper. To operate, the Intelligent Key must be within 31.5 in (80 cm) of the liftgate. NOTE: Tow hitches are available as an accessory for this vehicle. If a tow hitch is installed, the liftgate electronic control unit (ECU) needs to be replaced with an ECU programmed with towing logic for the Motion-Activated Liftgate to function properly...
Nissan Murano (Z52) 2015-2024 Service Manual: Driving Force Is Hunting
Diagnosis Procedure The vehicle causes hunting when the ICC system is active.PERFORM SELF DIAGNOSTIC RESULT OF ECM Perform “Self Diagnostic Result” with CONSULT. Check if DTC is detected in “Self Diagnostic Result” of “ENGINE”. Refer to DTC Index...
Categories
- Manuals Home
- Nissan Murano Owners Manual
- Nissan Murano Service Manual
- Shift lock release
- Tire rotation
- Checking engine oil level
- New on site
- Most important about car
LATCH (Lower Anchors and Tethers for CHildren) system

LATCH system lower anchor locations - bench seat
Your vehicle is equipped with special anchor points that are used with LATCH system compatible child restraints. This system may also be referred to as the ISOFIX or ISOFIX compatible system. With this system, you do not have to use a vehicle seat belt to secure the child restraint unless the combined weight of the child and child restraint exceeds 65 lbs. (29.5 kg). If the combined weight of the child and child restraint is greater than 65 lbs. (29.5 kg), use the vehicle’s seat belt (not the lower anchors) to install the child restraint. Be sure to follow the child restraint manufacturer’s instructions for installation.