Nissan Murano: Front Axle :: Removal and Installation / Front Wheel Hub

| 1. | Cotter pin | 2. | Nut retainer | 3. | Disc brake rotor |
| 4. | Wheel hub and bearing | 5. | Wheel stud | 6. | Splash guard |
| 7. | Steering knuckle | Front |
REMOVAL
Remove disc brake rotor. Refer to Removal and Installation.
Remove wheel sensor bolt (A) and position wheel sensor aside. Refer to Exploded View.

CAUTION:
-
Failure to separate front wheel sensor from steering knuckle may result in damage to front wheel sensor.
-
Pull out front wheel sensor being careful to turn it as little as possible. Do not pull on wheel sensor harness.
Remove cotter pin.
Remove nut retainer.
Loosen wheel hub lock nut from drive shaft using power tool.
Using a piece of wood and a suitable tool, tap on wheel hub lock nut to disengage drive shaft from wheel hub and bearing.

CAUTION:
-
Do not place drive shaft joint at an extreme angle. Be careful not to over-extend slide joint.
-
Do not allow drive shaft to hang without support.
 NOTE:
NOTE:
Use suitable puller if drive shaft cannot be separated from wheel hub and bearing.
Remove wheel hub lock nut.
Remove wheel hub and bearing bolts using power tool.
Remove splash guard and wheel hub and bearing from steering knuckle.
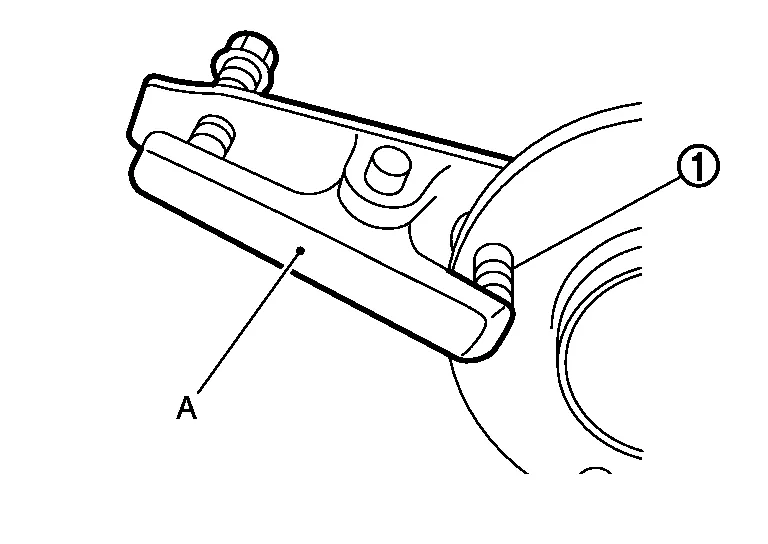
If necessary, remove wheel studs (1) using a suitable tool (A).
INSPECTION AFTER REMOVAL
Check components for deformation, cracks, and other damage. Replace if necessary.
INSTALLATION
Installation is in reverse order of the removal.
-
Place a washer (A) as shown to install wheel studs (1) by using tightening force of nut (B).

CAUTION:
-
Check that there is no clearance between wheel stud and wheel hub and bearing.
-
Do not reuse wheel studs.
-
-
Clean mating surfaces of wheel hub lock nut and wheel hub and bearing.
CAUTION:
Do not apply lubricating oil to these mating surfaces.
-
Hold wheel hub and bearing using a suitable tool. Tighten wheel hub lock nut.
CAUTION:
-
Since drive shaft is assembled by press-fitting, use a torque wrench to tighten wheel hub lock nut. Do not use a power tool.
-
Too much torque causes axle noise. Too little torque causes wheel bearing looseness. Tighten wheel hub lock nut to specification.
-
Do not reuse wheel hub lock nut.
-
-
When installing cotter pin (1) and nut retainer (2), securely bend cotter pin to prevent rattles.

CAUTION:
Do not reuse cotter pin.

 Front Drive Shaft Boot
Exploded View
LH 1.
Shaft with damper
2.
Circular clip
3.
Dust shield
4.
Housing
5.
Snap ring
6.
Spider assembly
7.
Stopper ring
8...
Other information:
Nissan Murano (Z52) 2015-2024 Service Manual: Operation. Intelligent Cruise Control
Switch Name and Function No. Switch name Description 1. CANCEL switch Deactivates the system without erasing the set speed 2. RES/+ switch Resumes set speed or increases speed incrementally Push and hold the switch to increase the set speed by 5km/h (3...
Nissan Murano (Z52) 2015-2024 Owners Manual: Readiness for Inspection/Maintenance (I/M) test
WARNING A vehicle equipped with All -Wheel Drive (AWD) should never be tested using a two wheel dynamometer (such as the dynamometers used bysomestates for emissions testing), or similar equipment. Make sure you inform the test facility personnel that your vehicle is equipped with AWD before it is placed on a dynamometer...
Categories
- Manuals Home
- Nissan Murano Owners Manual
- Nissan Murano Service Manual
- Passenger compartment
- Fuel recommendation
- Checking engine oil level
- New on site
- Most important about car