Nissan Murano: Suspension / Front Suspension :: Unit Disassembly and Assembly. Front Coil Spring and Strut
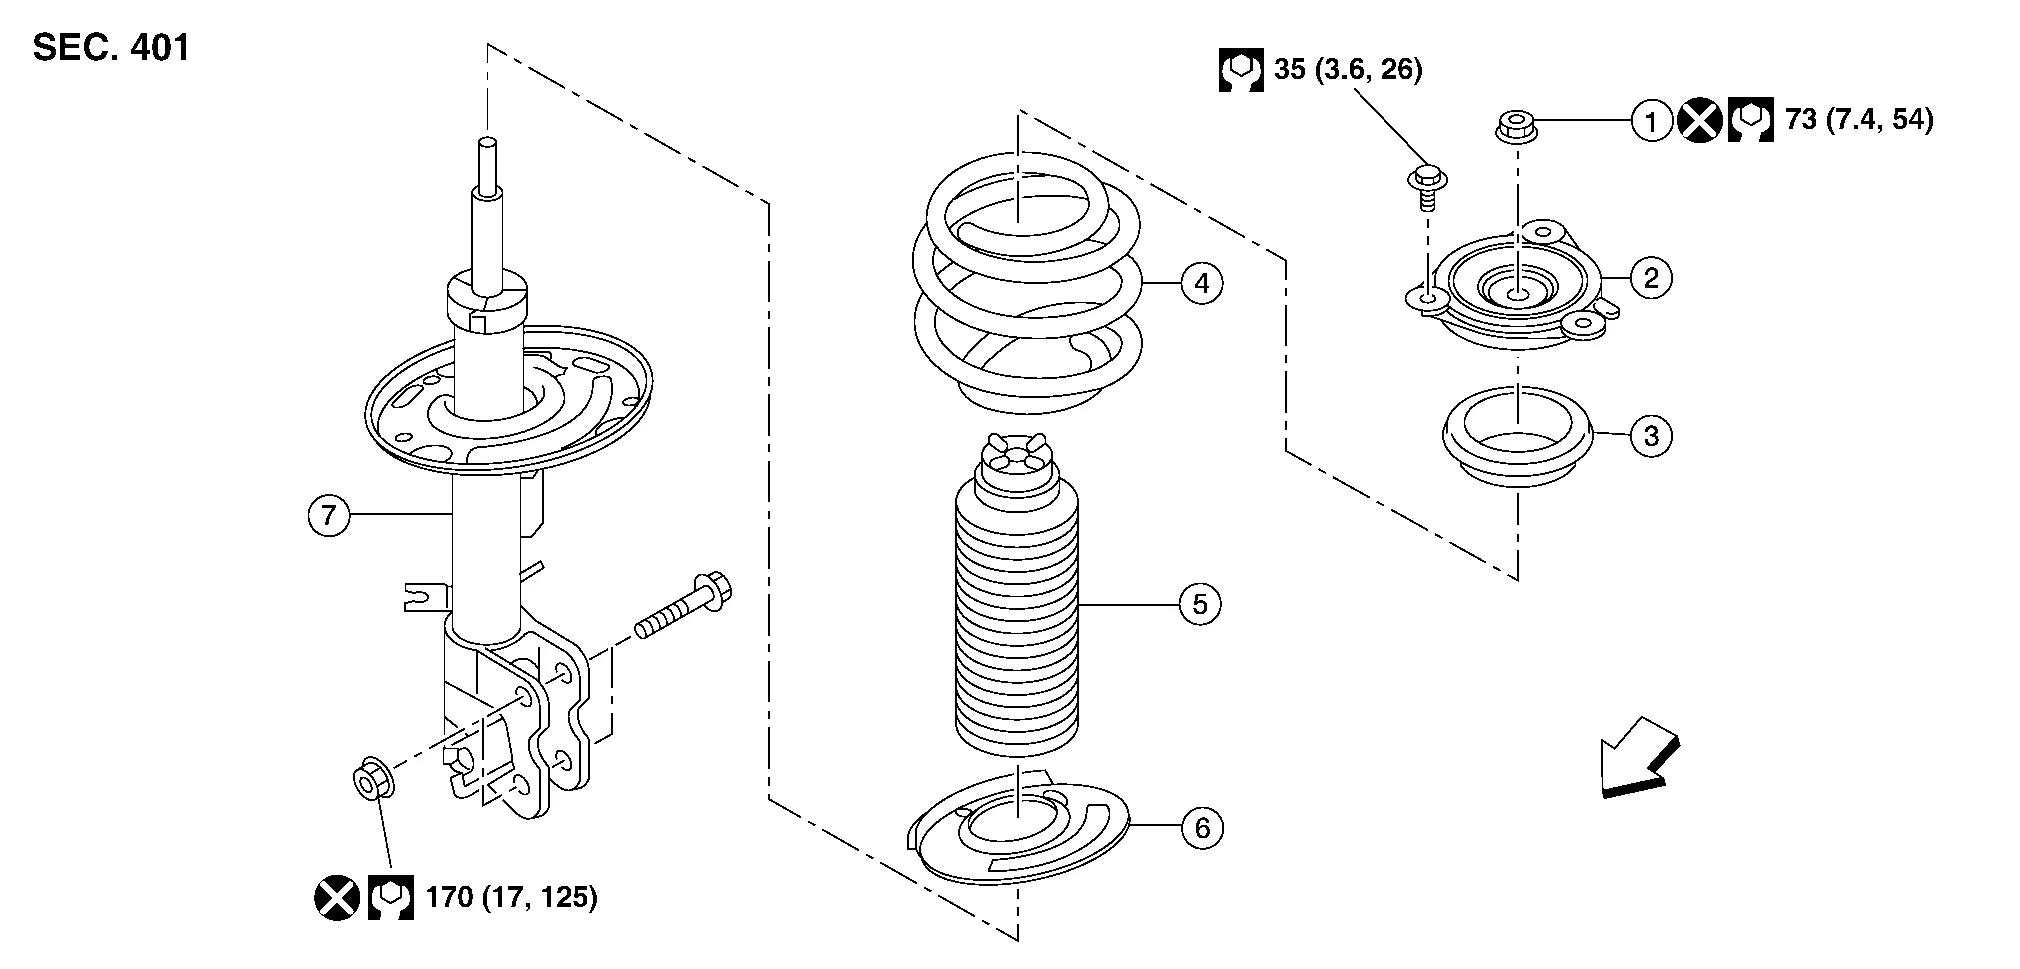
| 1. | Piston rod lock nut | 2. | Strut mount insulator | 3. | Strut mount bearing |
| 4. | Front coil spring | 5. | Bound bumper | 6. | Lower rubber seat |
| 7. | Strut | Front |
DISASSEMBLY
CAUTION:
Do not damage piston rod when removing components from front coil spring and strut.
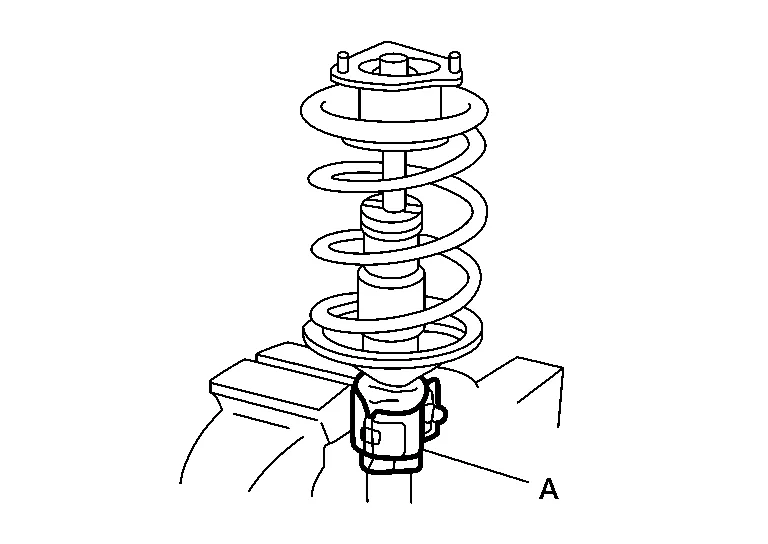
Install Tool (A) to front coil spring and strut.
CAUTION:
When installing Tool (A), wrap a shop cloth around front coil spring and strut to protect parts from damage.
| Tool number | : ST35652000 ( – ) |
Secure Tool (A) in a vise.
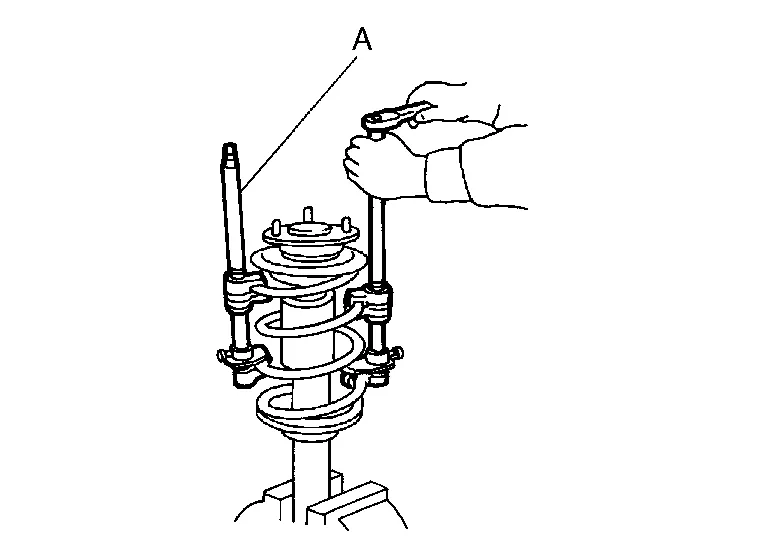
Install Tool to strut rod.
| Tool number | : — (J-49029) |
Slightly loosen piston rod lock nut.
WARNING:
Do not remove piston rod lock nut completely. If it is removed completely, front coil spring can jump out and may cause serious damage or injury.
Compress front coil spring using suitable tool (A).
WARNING:
Make sure that pawls of suitable tool are firmly hooked on front coil spring. Suitable tool must be tightened alternately so as not to tilt front coil spring.
Make sure front coil spring is free between strut mount insulator and lower rubber seat.
Hold piston rod and remove piston rod lock nut.
Remove strut mount insulator, strut mount bearing, and bound bumper from strut.
Gradually release suitable tool and remove front coil spring.
CAUTION:
Release suitable tool while making sure position of suitable tool on front coil spring does not move.
Remove lower rubber seat.
INSPECTION AFTER DISASSEMBLY
Strut
-
Check strut for deformation, cracks, and damage. Replace strut if necessary.
-
Check piston rod for damage, uneven wear, and distortion. Replace strut if necessary.
-
Check welded and sealed areas for oil leaks. Replace strut if necessary.
Insulator and Rubber Parts
Check strut mount insulator for cracks. Check rubber parts for wear. Replace parts if necessary.
Front Coil Spring
Check front coil spring for cracks, wear, and damage. Replace front coil spring if necessary.
ASSEMBLY
CAUTION:
Do not damage piston rod when installing components to front coil spring and strut.
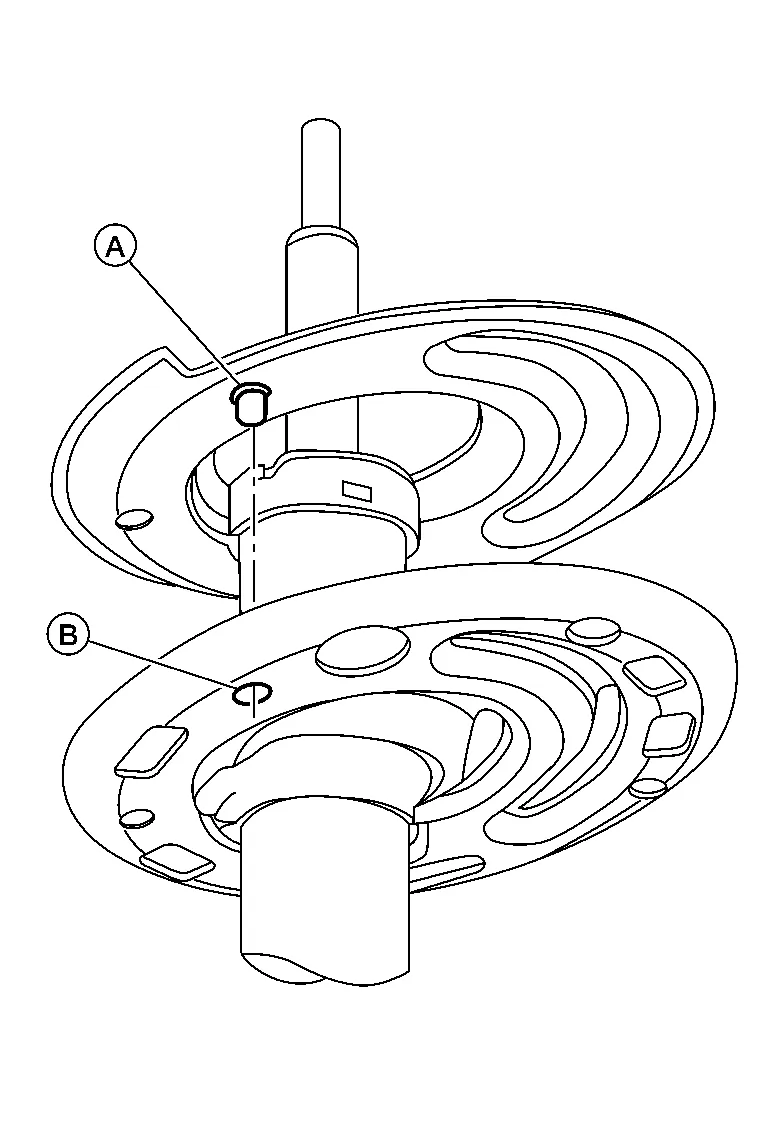
Install lower rubber seat to strut. Make sure that pin (A) on lower rubber seat is positioned into hole (B) on strut.
Compress front coil spring using suitable tool.
WARNING:
Make sure that pawls of suitable tool are firmly hooked on front coil spring. Suitable tool must be tightened alternately so as not to tilt front coil spring.
Align lower end of front coil spring (1) with lower rubber seat (2) as shown.

| Maximum Gap (A) | : 5 mm (0.2 in) |
Connect bound bumper to strut mount bearing.
CAUTION:
-
Be sure to install bound bumper to strut mount bearing securely.
-
When installing bound bumper, use soapy water. Do not use machine oil or other lubricants.
Install strut mount bearing and strut mount insulator.
Temporarily install piston rod lock nut.
CAUTION:
Do not reuse piston rod lock nut.
Be sure that tab (A) on strut mount insulator is positioned on outboard side of Nissan Murano vehicle.
| : Front |
Gradually release suitable tool (A) and remove suitable tool from front coil spring.
CAUTION:
Release suitable tool while making sure position of suitable tool on front coil spring does not move.
Tighten piston rod lock nut to specified torque. Refer to Exploded View.
Remove Tool from strut rod.
| Tool number | : — (J-49029) |
Remove Tool (A) from vise.
Remove Tool (A) from front coil spring and strut.
| Tool number | : ST35652000 ( – ) |
After replacing strut, always follow disposal procedure to discard old strut. Refer to Disposal.
 Front Suspension :: Unit Removal and Installation. Front Suspension Member
Exploded View
1.
Front suspension member
2.
Rebound stopper
3.
Front suspension member stay
Front
Removal and Installation
REMOVALRemove engine and transmission with front suspension member...
 Front Suspension :: Service Data and Specifications (sds). Service Data and Specifications (sds)
Wheel Alignment (Unladen)
Measurement wheel
(LH) side
(RH) side
Camber
Degree minute (Decimal degree)
Minimum
–1° 04′ 30″ (–1.075°)
Nominal
–0° 15′ 00″ (–0...
Other information:
Nissan Murano (Z52) 2015-2024 Owners Manual: Automatic anti-glare rearview mirror (if so equipped)
The inside mirror is designed so that it automatically dims during night time conditions and according to the intensity of the headlights of the vehicle following you. The automatic anti-glare feature is activated when the ignition switch is in the ON position...
Nissan Murano (Z52) 2015-2024 Service Manual: Av Control Unit
Exploded View 1. AV control unit bracket (RH) 2. AV control unit 3. AV control unit bracket (LH) 4. A/C auto amp. Removal and Installation REMOVALCAUTION: Before disconnecting the AV control unit and battery terminals, turn the ignition switch OFF and wait at least 30 seconds...
Categories
- Manuals Home
- Nissan Murano Owners Manual
- Nissan Murano Service Manual
- Shift lock release
- Jacking up vehicle and removing the damaged tire
- How to enable/disable the LDW system
- New on site
- Most important about car
Autolight system
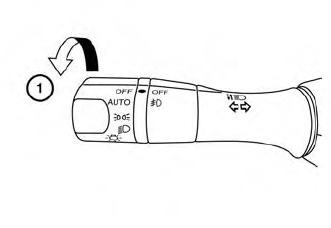
The autolight system allows the headlights to turn on and off automatically. The autolight system can:
Turn on the headlights, front parking, tail, license plate and instrument panel lights automatically when it is dark. Turn off all the lights (except daylight running lights) when it is light. Keep all the lights on for a period of time after you place the ignition switch in the OFF position and all doors are closed.