Nissan Murano: Interior :: Removal and Installation / Floor Trim
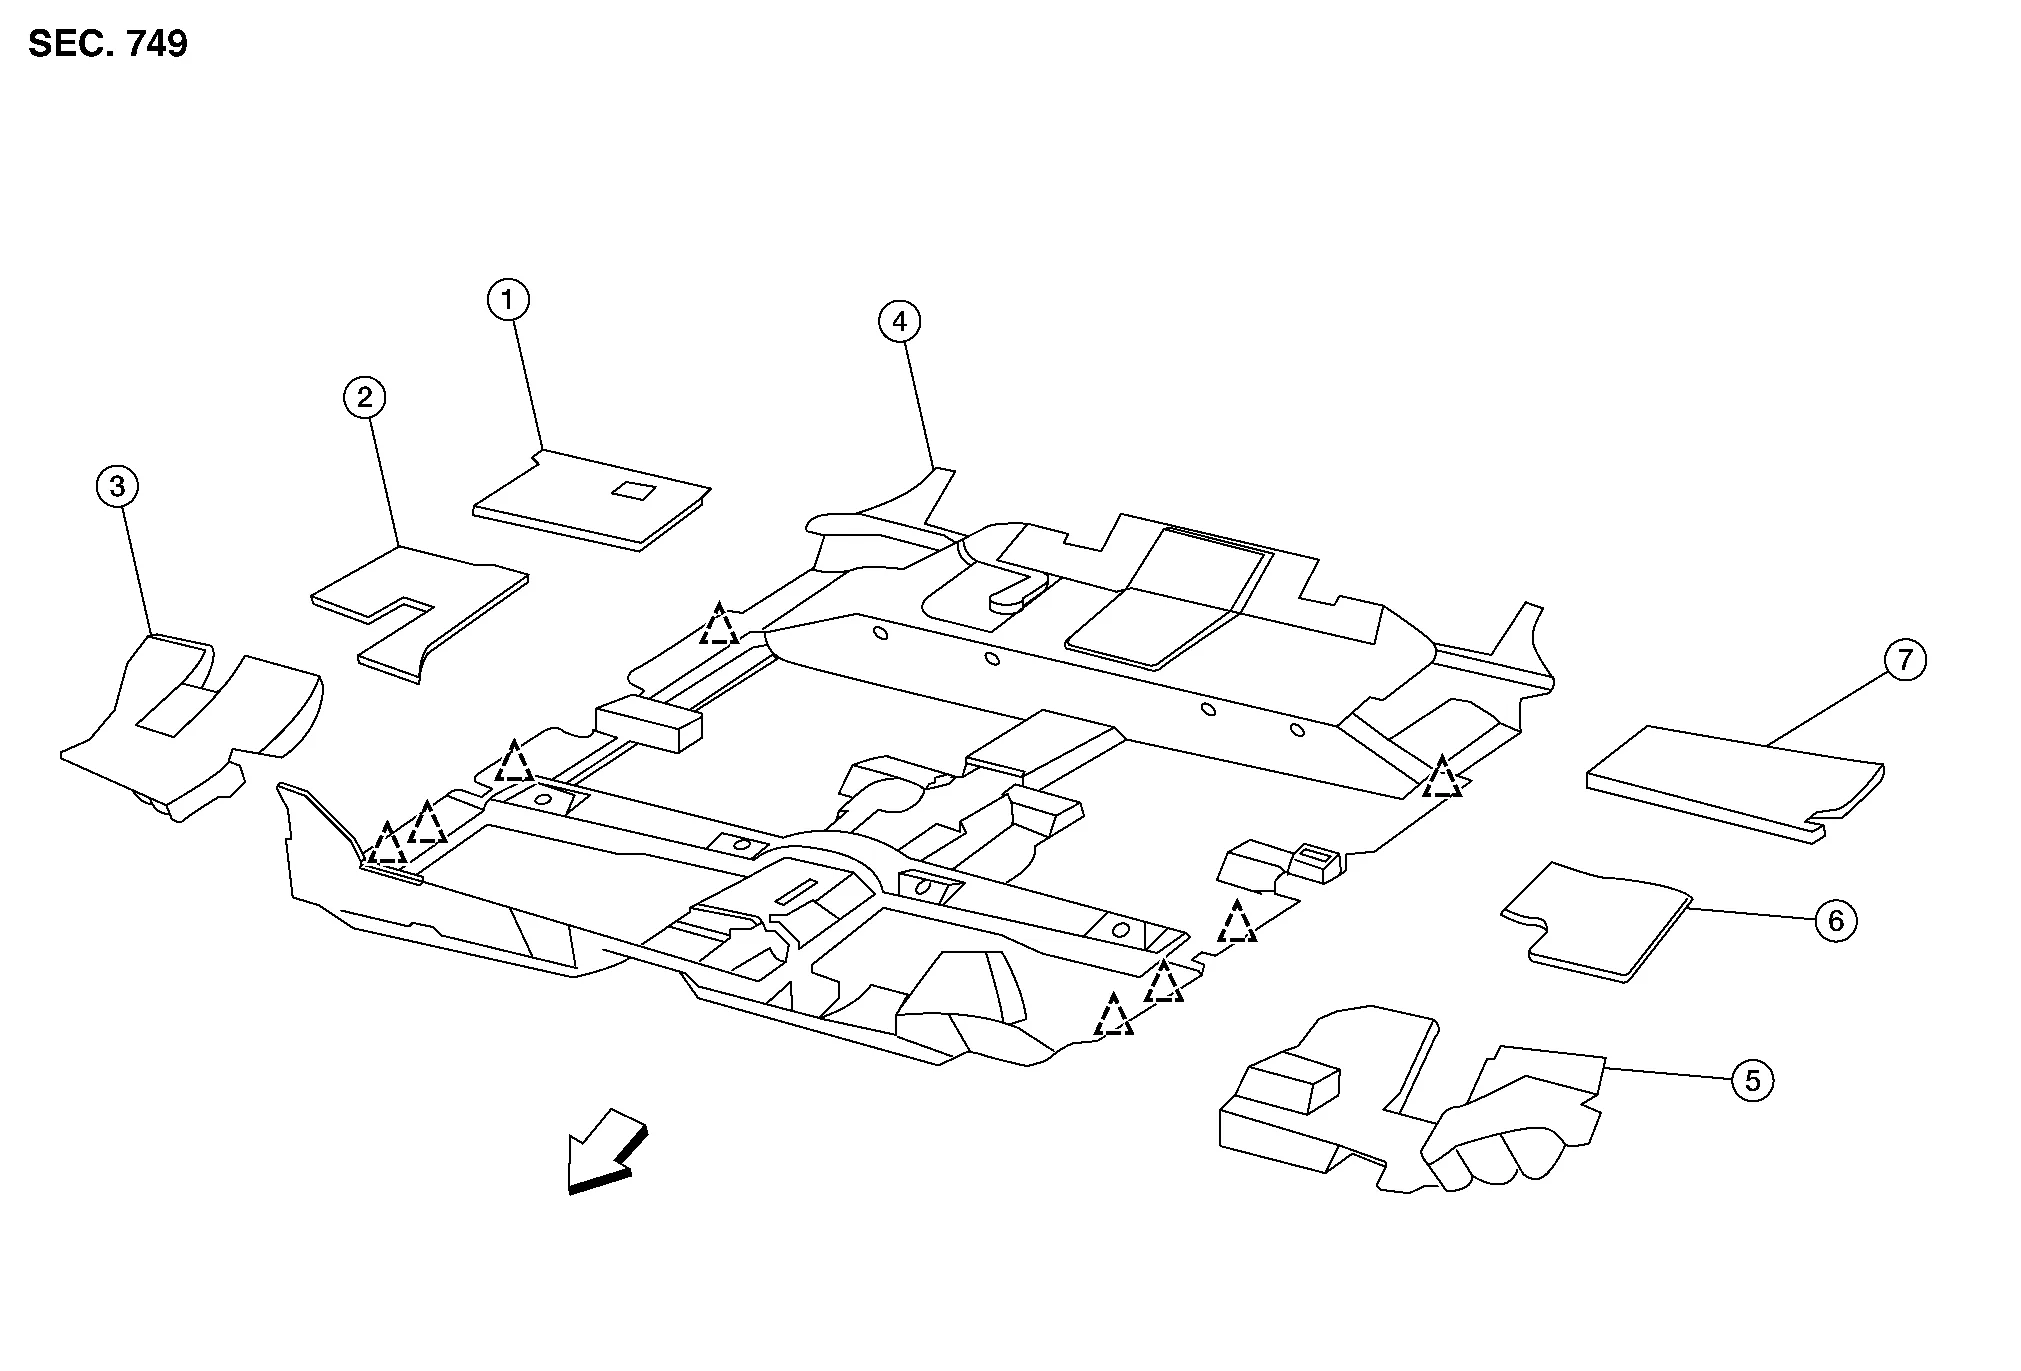
| 1. | Floor rear spacer (RH) | 2. | Floor center spacer (RH) | 3. | Floor front spacer (RH) |
| 4. | Floor trim | 5. | Floor front spacer (LH) | 6. | Floor center spacer (LH) |
| 7. | Floor rear spacer (LH) |  |
Clip |  |
Front |
REMOVAL
CAUTION:
Before servicing, turn ignition switch off, disconnect both battery cables and wait at least three minutes.
Disconnect negative and positive battery terminals then wait at least three minutes. Refer to Removal and Installation.
Remove luggage side upper finishers (LH/RH). Refer to Removal and Installation.
Remove front seats (LH/RH). Refer to Removal and Installation.
Remove second row seats. Refer to Removal and Installation.
Remove center console assembly. Refer to Removal and Installation.
Remove shift selector bracket.
Remove rear floor connecting duct. Refer to Exploded View.
Remove instrument stay bracket (RH). Refer to Exploded View.
Using a suitable tool release harness clips.
Using a suitable tool release front seat belt anchor bolt finisher (LH only) and remove front floor trim.
INSTALLATION
Installation is in the reverse order of removal.
 Dash Side Finisher
Removal and Installation
REMOVALRemove front kicking plate. Refer to Removal and Installation - Front Kicking Plate.
Release metal clips using a suitable tool (A) as shown and remove dash side finisher (1)...
 Headlining
Exploded View
WITH PANORAMIC ROOF GLASS 1.
Headlining
2.
Assist grip (without coat hanger)
3.
Sun visor holder (LH/RH)
4.
Sun visor (RH)
5...
Other information:
Nissan Murano (Z52) 2015-2024 Service Manual: Back Door Request Switch
Component Function Check CHECK FUNCTION CONSULT Select “REQ SW-BD/TR” in “Data Monitor” mode of “BCM(INTELLIGENT KEY)”. Check that the function operates normally according to the following conditions: Monitor Item Condition Status REQ SW-BD/TR Back door request switch Pressed On Released Off Is the inspection result normal? YES>> Back door request switch is OK...
Nissan Murano (Z52) 2015-2024 Owners Manual: Tire equipment
SUMMER tires have a tread designed to provide superior performance on dry pavement. However, the performance of these tires will be substantially reduced in snowy and icy conditions. If you operate your vehicle on snowy or icy roads, NISSAN recommends the use of MUD & SNOW or ALL SEASON TIRES on all four wheels...
Categories
- Manuals Home
- Nissan Murano Owners Manual
- Nissan Murano Service Manual
- All-Wheel Drive (AWD) (if so equipped)
- Passenger compartment
- Rear bench seat adjustment
- New on site
- Most important about car
Fuel gauge
The gauge indicates the approximate fuel level in the tank.
The gauge may move slightly during braking, turning, acceleration, or going up or down hills.
The gauge needle returns to 0 (Empty) after the ignition switch is placed in the OFF position.