Nissan Murano: Fuel System :: Removal and Installation / Evap Canister Vent Control Valve
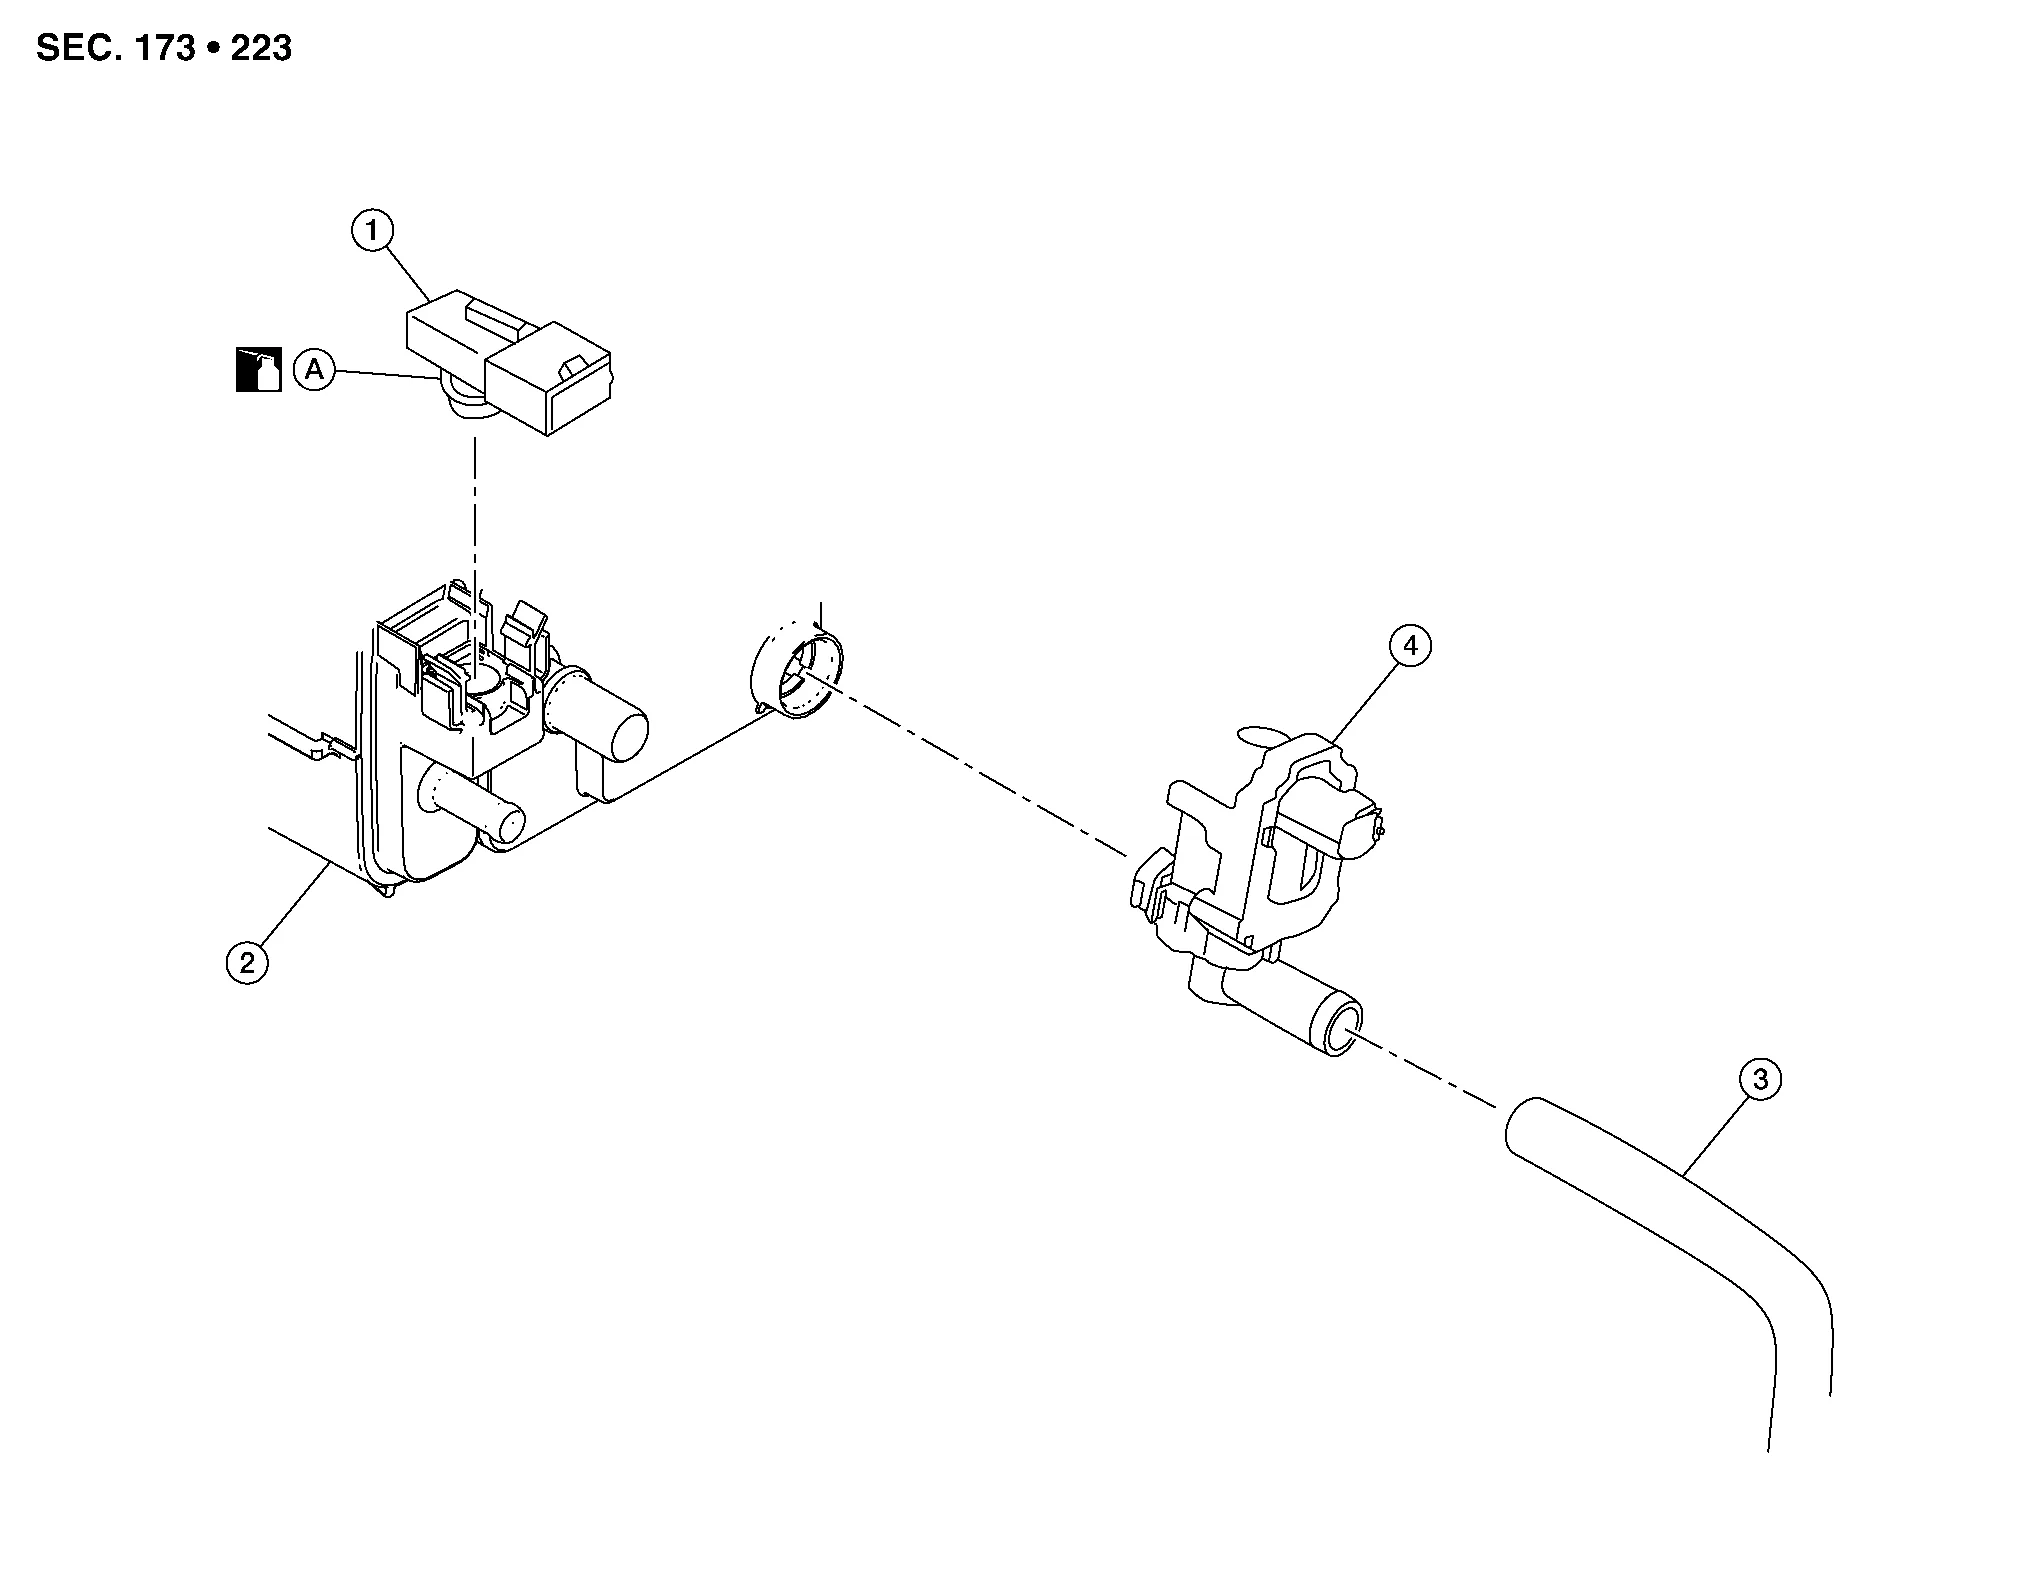
| 1. | EVAP canister control pressure sensor | 2. | EVAP canister | 3. | EVAP canister purge hose |
| 4. | EVAP canister vent control valve | A. | O-ring |
 NOTE:
NOTE:
The EVAP canister vent control valve can be removed without removing the EVAP canister.
REMOVAL
Disconnect EVAP canister vent control valve hose from EVAP canister vent control valve.
Disconnect the harness connector from EVAP canister vent control valve.
Turn EVAP canister vent control valve counterclockwise.
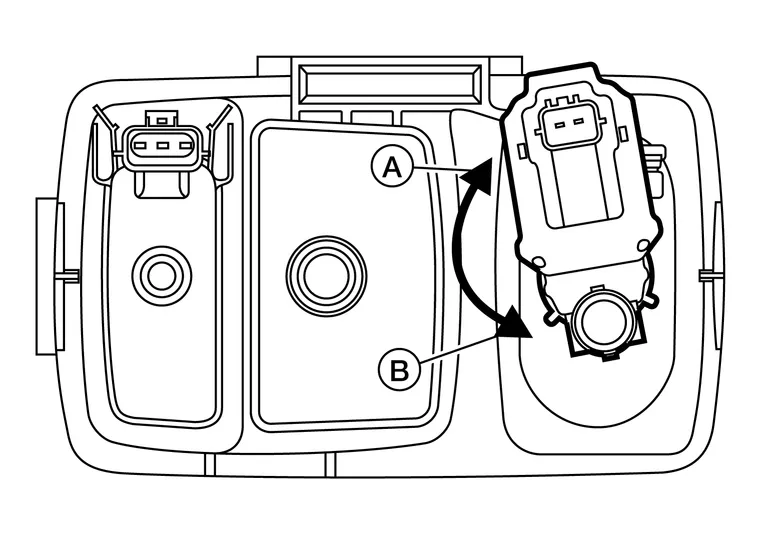
| (A) | : Lock |
| (B) | : Unlock |
Remove EVAP canister vent control valve and O-ring.
CAUTION:
Do not reuse O-ring.
INSTALLATION
Installation is in the reverse order of removal.
CAUTION:
-
Do not reuse O-ring for EVAP canister vent control valve.
-
Do not add lubrication to the O-ring.
-
Make sure the surfaces that the O-ring comes in contact with are clean.
-
Make sure the O-ring is not twisted or rolled over.
-
Make sure the O-ring (1) is seated all the way down with no gap as shown.

 Evap Canister Filter
Exploded View
1.
Fitting
2.
EVAP canister drain hose
3.
EVAP canister vent control valve hose
4.
EVAP canister filter bracket
5.
EVAP canister filter
A...
 Evap Canister Control Pressure Sensor
Exploded View
1.
EVAP canister control pressure sensor
2.
EVAP canister
3.
EVAP canister purge hose
4.
EVAP canister vent control valve
A...
Other information:
Nissan Murano (Z52) 2015-2024 Service Manual: Seat Belt Retractor
Removal and Installation WARNING: Before servicing the SRS, turn the ignition switch OFF, disconnect both battery terminals then wait at least three minutes. Do not drop the seat belt retractor. Always handle it with care. Always point pre-tensioner cylinder away from body when handling...
Nissan Murano (Z52) 2015-2024 Service Manual: Lifting Point
Special Service Tool The actual shapes of Kent-Moore tools may differ from those of special service tools illustrated here. Tool number (Kent-Moore No.) Tool name Description LM4086-0200 ( - ) Board on attachment LM4519-0000 ( - ) Safety stand attachment CAUTION: Every time the vehicle is lifted up, maintain the complete vehicle curb condition...
Categories
- Manuals Home
- Nissan Murano Owners Manual
- Nissan Murano Service Manual
- Passenger compartment
- System malfunction
- Fuel recommendation
- New on site
- Most important about car
Driver and passenger supplemental knee air bag
Driver’s side
The knee air bag is located in the knee bolster, on the driver’s and passenger’s side. All of the information, cautions and warnings in this manual apply and must be followed. The knee air bag is designed to inflate in higher severity frontal collisions, although it may inflate if the forces in another type of collision are similar to those of a higher severity frontal impact. It may not inflate in certain collisions.
Passenger’s side