Nissan Murano: Front Door / Door Assembly
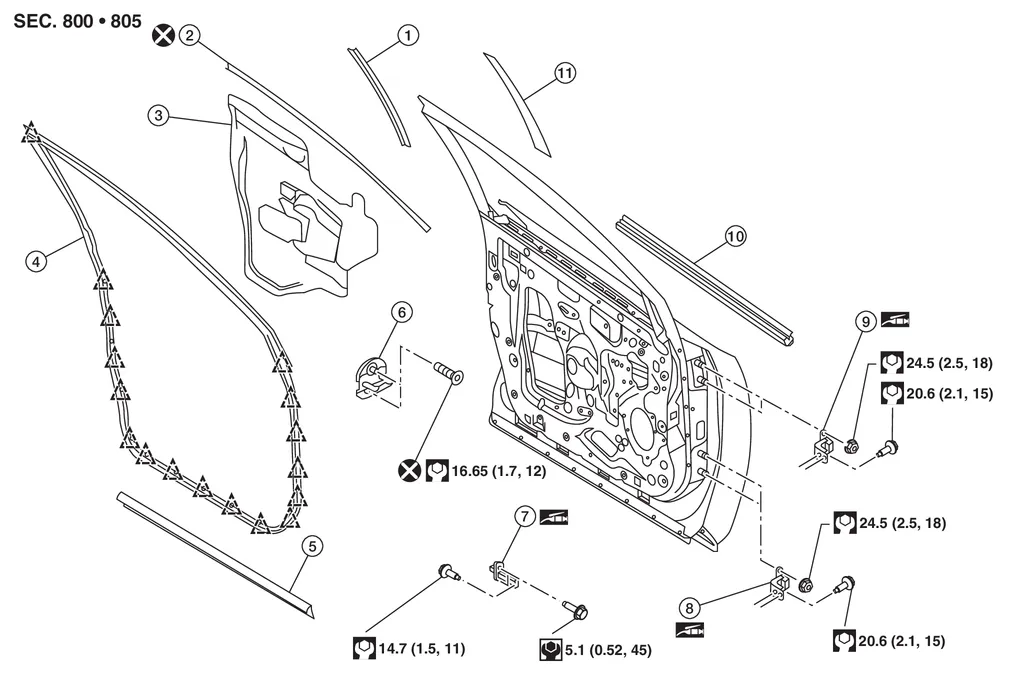
| 1. | Front door sash rear tape | 2. | Front door sash | 3. | Vapor barrier |
| 4. | Front door weather strip | 5. | Front door seal | 6. | Front door striker |
| 7. | Front door check link | 8. | Front door lower hinge | 9. | Front door upper hinge |
| 10. | Front door inside seal | 11. | Front door outside tape |  |
Clip |
CAUTION:
-
Use two people when removing or installing front door due to its heavy weight.
-
When removing and installing front door assembly, support front door with a suitable tool.
REMOVAL
Remove front door finisher. Refer to Removal and Installation.
Remove front door vapor barrier.
Disconnect the front door harness connector (body side).
Remove front door check link bolt (body side).
Remove front door hinge nuts (door side) and front door assembly.
INSTALLATION
Installation is in the reverse order of removal.
CAUTION:
-
Tighten nuts/bolts to specified torque. Refer to Exploded View.
-
Apply anticorrosive agent where necessary.
-
After installation, check front door open/close and lock/unlock operation.
-
After installation, perform front door adjustment procedure. Refer to Adjustment.
-
Perform camera image calibration (with around view monitor). Refer to Description (WITH DISPLAY AUDIO) or Description (WITH NAVIGATION).
ADJUSTMENT
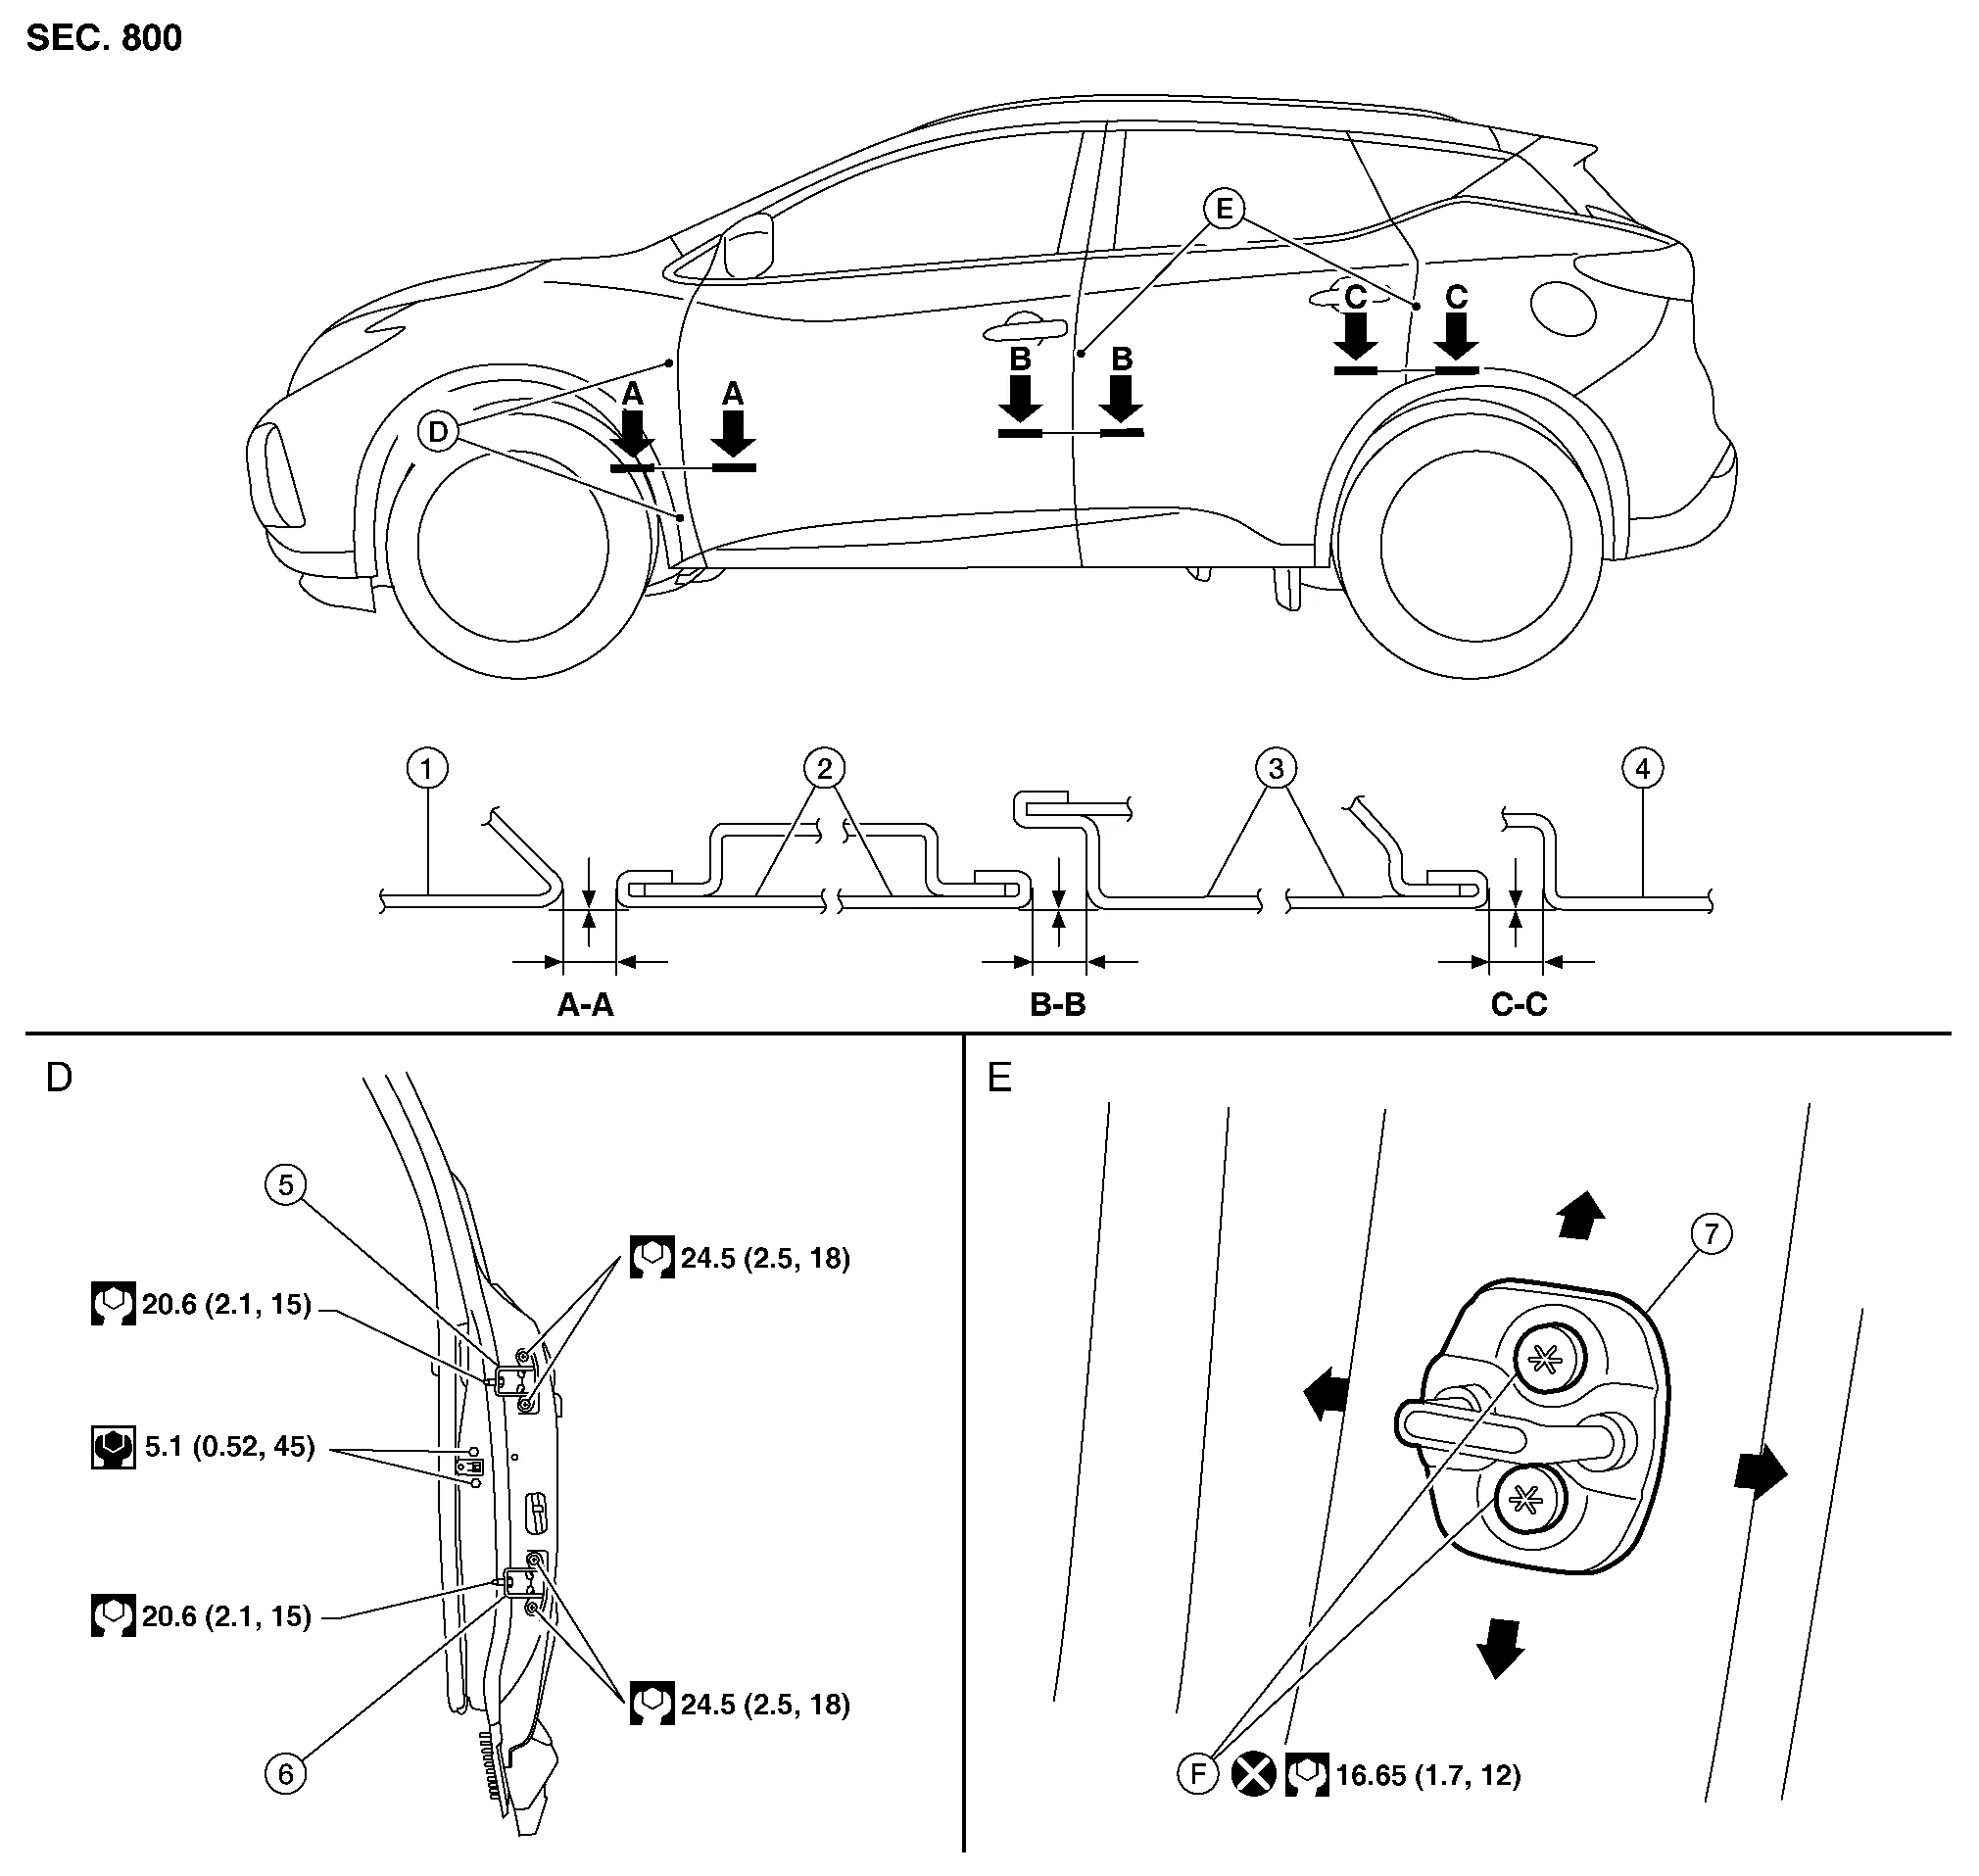
| 1. | Front fender | 2. | Front door | 3. | Rear door |
| 4. | Body side outer | 5. | Front door upper hinge | 6. | Front door lower hinge |
| 7. | Door striker | F. | Front door striker bolts |
Check clearance and surface height between front door and each part by visual inspection and tactile feel.
If clearance and surface height are out of specification, adjust them according to adjustment procedure.
Unit: mm (in)
| Portion | Section | Measurement | Standard |
|---|---|---|---|
| Front fender - Front door | A – A | Clearance | 3.5 ± 1.0 (0.14 ± 0.04) |
| Surface height | ± 1.0 (± 0.04) | ||
| Front door - Rear door | B – B | Clearance | 4.0 ± 1.0 (0.16 ± 0.04) |
| Surface height | ± 1.0 (± 0.04) | ||
| Rear door - Body side outer | C – C | Clearance | 3.2 ± 1.0 (0.13 ± 0.04) |
| Surface height | ± 1.0 (± 0.04) |
Remove front fender. Refer to Removal and Installation.
Loosen front door hinge nuts (door side).
Adjust surface height of front door according to specifications provided.
Temporarily tighten front door hinge nuts (door side).
Loosen front door hinge bolts (body side).
Raise front door at rear end to adjust clearance of front door according to specifications provided.
After adjustment, tighten bolts and nuts to specified torque.
CAUTION:
-
Check door hinge rotating point for poor lubrication. If necessary, apply a suitable multi-purpose grease.
-
After adjusting, apply touch-up paint (body color) to heads of front door hinge bolts and nuts.
Install front fender. Refer to Removal and Installation.
 Front Door
..
 Door Striker
Removal and Installation
REMOVALRemove bolts and front door striker.INSTALLATIONInstallation is in the reverse order of removal.CAUTION:
Do not reuse front door striker bolts...
Other information:
Nissan Murano (Z52) 2015-2024 Service Manual: Service Information for Electrical Incident
Work Flow WORK FLOW STEP DESCRIPTION STEP 1 Get detailed information about the conditions and the environment when the incident occurred. The following are key pieces of information required to make a good analysis: WHAT Nissan Murano Vehicle Model, Engine, Transmission/Transaxle and the System (i...
Nissan Murano (Z52) 2015-2024 Owners Manual: Recommended fluids/lubricants and capacities
T..
Categories
- Manuals Home
- Nissan Murano Owners Manual
- Nissan Murano Service Manual
- System malfunction
- Rear bench seat adjustment
- Settings
- New on site
- Most important about car
Luggage hooks
When securing items using luggage hooks located on the back of the seat or side finisher do not apply a load over more than 6.5 lbs. (29 N) to a single hook.
The luggage hooks that are located on the floor should have loads less than 110 lbs. (490 N) to a single hook.