Nissan Murano: Basic Inspection / Diagnosis and Repair Workflow
OVERALL SEQUENCE
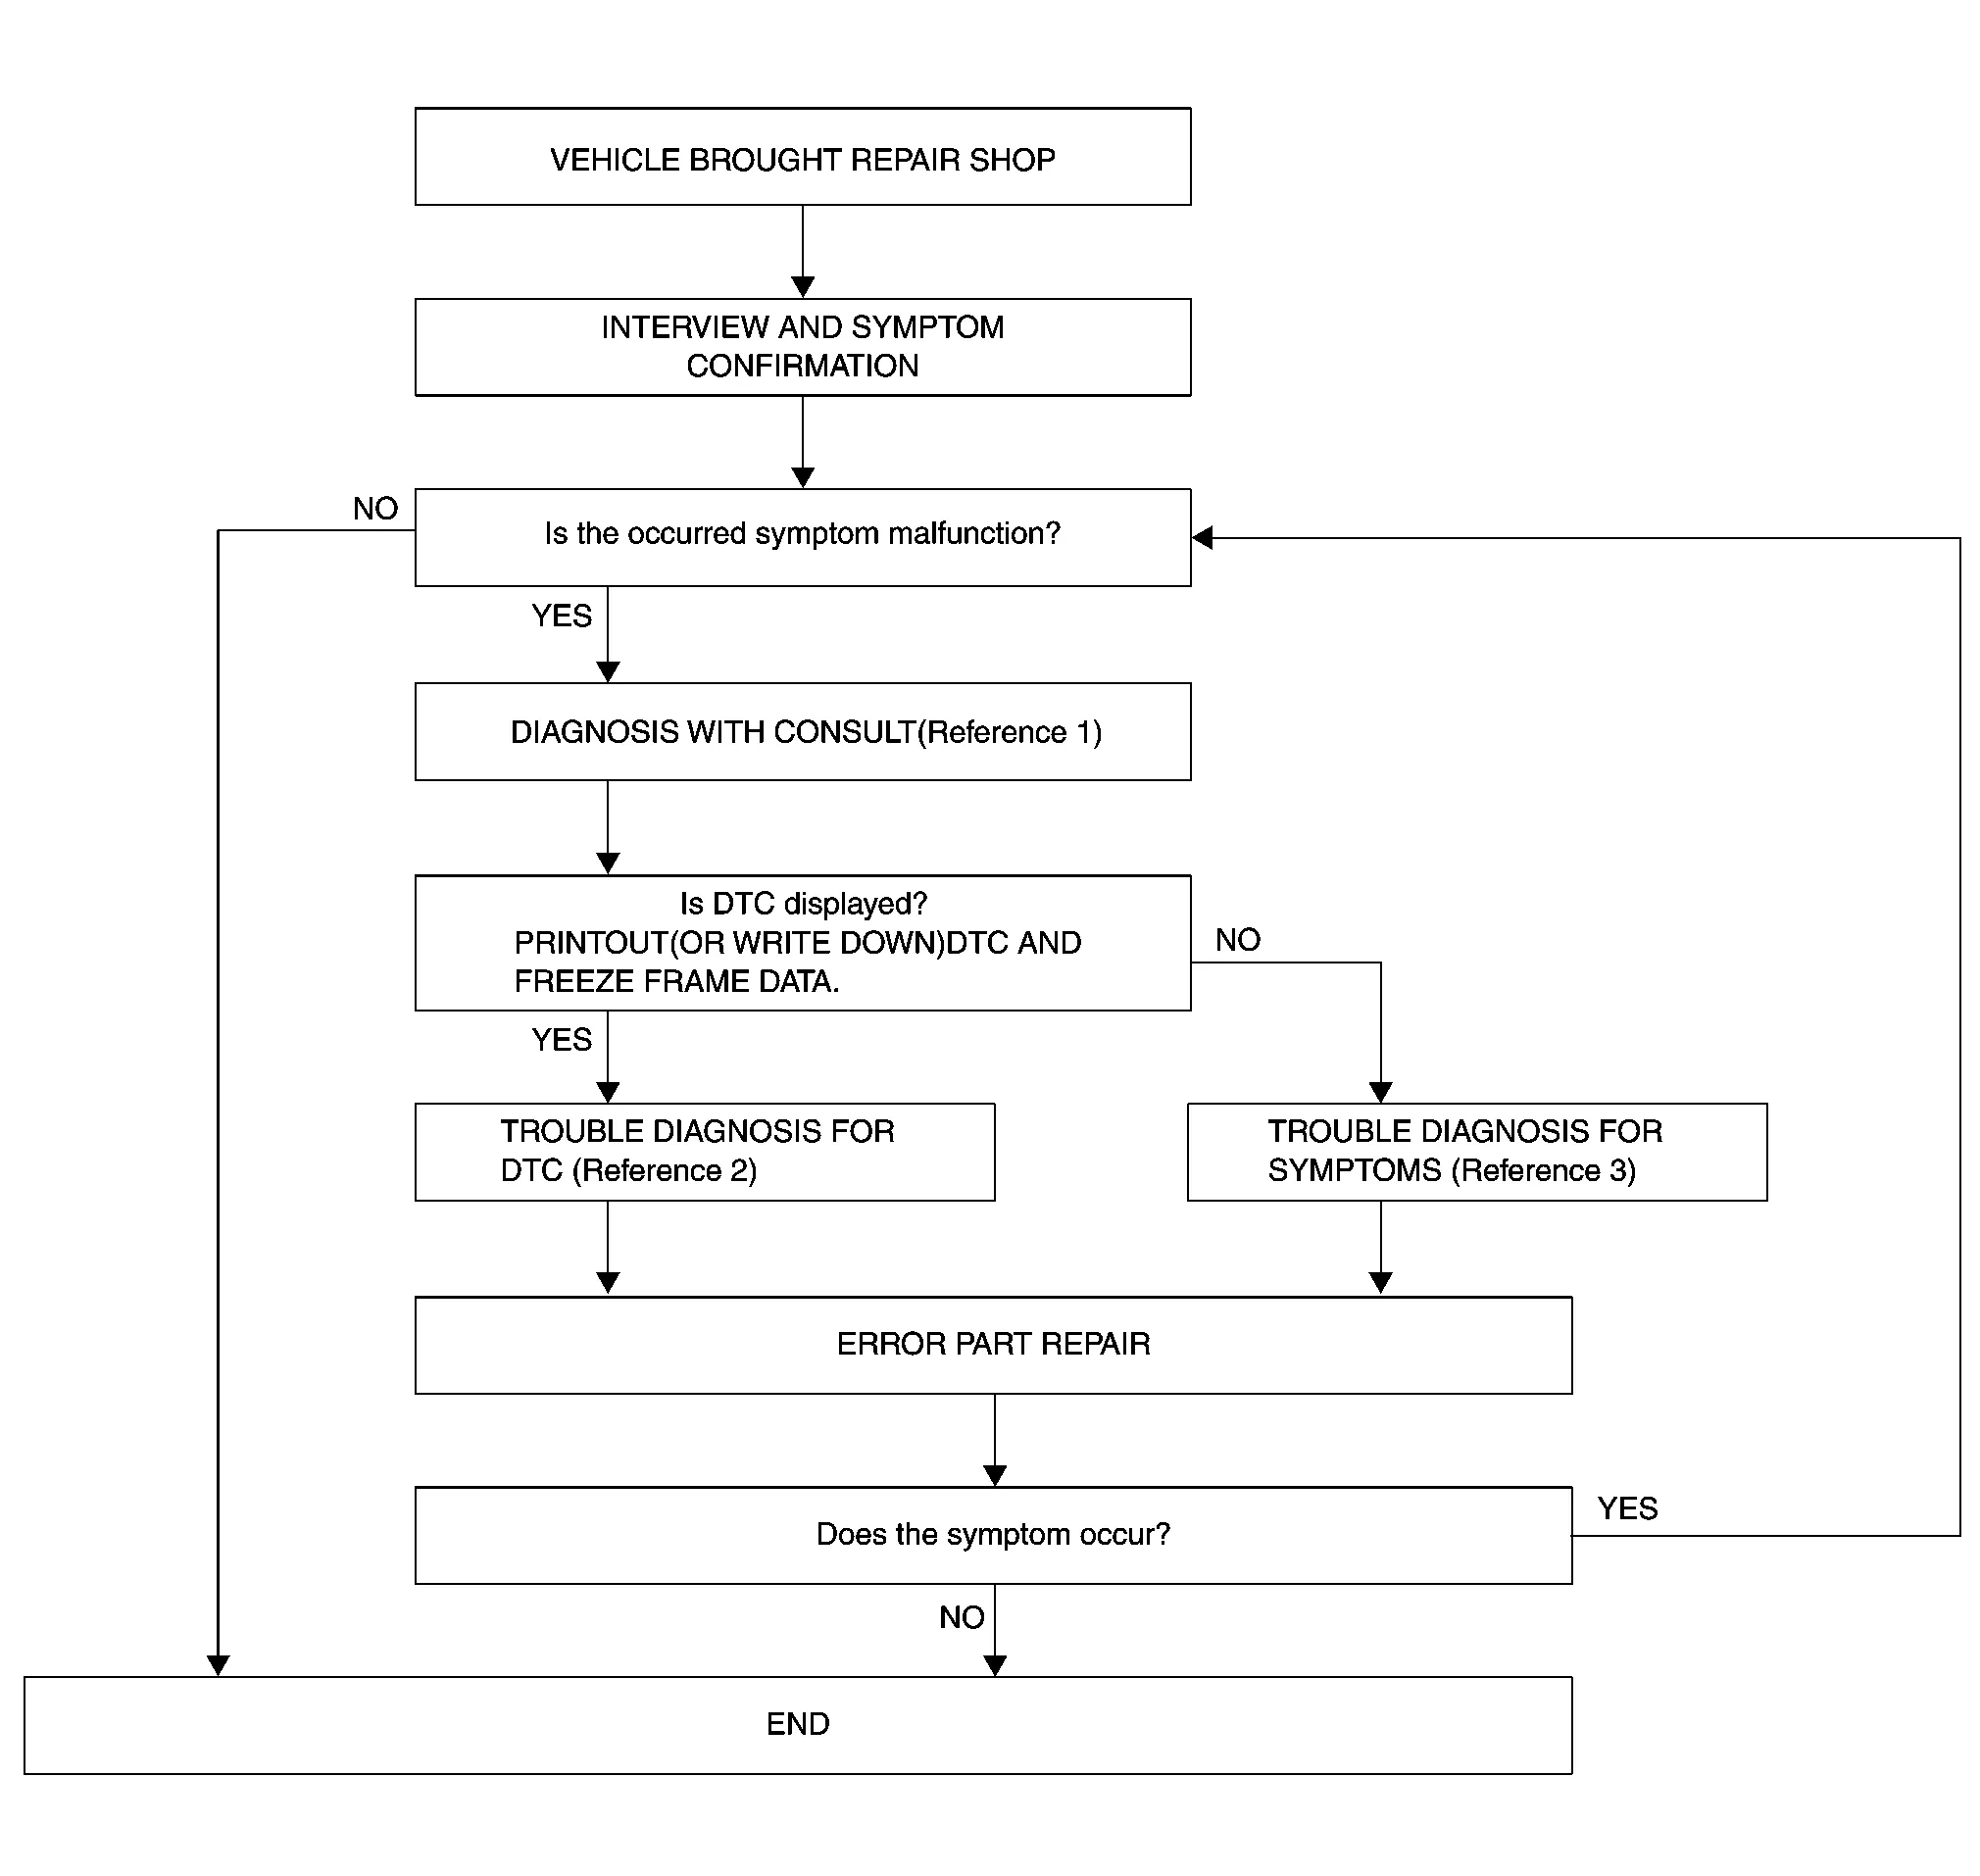
-
Reference 1: Refer to CONSULT Function (Around View Monitor Control Unit) or CONSULT Function (Sonar Control Unit).
-
Reference 2: Refer to DTC Index (Around View Monitor Control Unit) or DTC Index (Sonar Control Unit).
-
Reference 3: Refer to Symptom Table (Around View Monitor Control Unit) or Symptom Table (Sonar Control Unit).
DETAILED FLOW
INTERVIEW AND SYMPTOM CONFIRMATION
Check the malfunction symptoms by performing the following items:
-
Interview the customer to obtain the malfunction information (conditions and environment when the malfunction occurred).
-
Check the symptom.
Is the occurred symptom a malfunction?
YES>>GO TO 2.
NO>>Inspection End.
DIAGNOSIS WITH CONSULT
 CONSULT
-
Select “Self Diagnostic Result” mode of “AVM” and “SONAR”. Refer to CONSULT Function (Around View Monitor Control Unit) or CONSULT Function (Sonar Control Unit).
 NOTE:
NOTE:
Skip to step 4 of the diagnosis procedure if “AVM” or “SONAR” is not displayed.
-
When DTC is detected, follow the instructions below:
-
Record DTC and Freeze Frame Data (FFD).
-
Is DTC displayed?
YES>>GO TO 3.
NO>>GO TO 4.
TROUBLE DIAGNOSIS FOR DTC
CONSULT
-
Check the DTC indicated in the “Self Diagnostic Result”.
-
Perform the relevant diagnosis referring to the DTC Index. Refer to DTC Index (Around View Monitor Control Unit) or DTC Index (Sonar Control Unit).
>>
GO TO 5.
TROUBLE DIAGNOSIS FOR SYMPTOMS
Perform the relevant diagnosis referring to the diagnosis chart by symptom. Refer to Symptom Table (Around View Monitor Control Unit) or Symptom Table (Sonar Control Unit).
>>
GO TO 5.
ERROR PART REPAIR
CONSULT
-
Repair or replace the identified malfunctioning parts.
-
Select “Self Diagnostic Result” mode of “AVM” and “SONAR”.
NOTE:
Erase the stored self-diagnosis results after repairing or replacing the relevant components if any DTC has been indicated in the “Self Diagnostic Result”.
-
Check that the symptom does not occur.
Does the symptom occur?
YES>>GO TO 1.
NO>>Inspection End.

 Additional Service When Replacing Around View Monitor Control Unit
Description
BEFORE REPLACEMENTWhen replacing around view monitor control unit, save or print current vehicle specification with CONSULT configuration before replacement...
Other information:
Nissan Murano (Z52) 2015-2024 Service Manual: B261a Push-Btn Ign Sw
DTC Description DTC DETECTION LOGIC DTC No. CONSULT screen terms (Trouble diagnosis content) DTC Detection Condition B261A PUSH-BTN IGN SW (Push-button ignition switch) Diagnosis condition When push-button ignition switch is ON. Signal (terminal) Engine start switch signal (Terminal 1) Threshold Less than 8...
Nissan Murano (Z52) 2015-2024 Service Manual: Center Ventilator Grille
Removal and Installation REMOVALRemove the cluster lid D. Refer to Removal and Installation. Remove the center ventilator screws. Refer to Exploded View. Release the pawls using a suitable tool and remove the center ventilator grille from the instrument panel...
Categories
- Manuals Home
- Nissan Murano Owners Manual
- Nissan Murano Service Manual
- Tire rotation
- Fuel recommendation
- Power Steering Fluid (PSF)
- New on site
- Most important about car
LATCH (Lower Anchors and Tethers for CHildren) system

LATCH system lower anchor locations - bench seat
Your vehicle is equipped with special anchor points that are used with LATCH system compatible child restraints. This system may also be referred to as the ISOFIX or ISOFIX compatible system. With this system, you do not have to use a vehicle seat belt to secure the child restraint unless the combined weight of the child and child restraint exceeds 65 lbs. (29.5 kg). If the combined weight of the child and child restraint is greater than 65 lbs. (29.5 kg), use the vehicle’s seat belt (not the lower anchors) to install the child restraint. Be sure to follow the child restraint manufacturer’s instructions for installation.