Nissan Murano: Removal and Installation / Blind Spot Warning Indicator
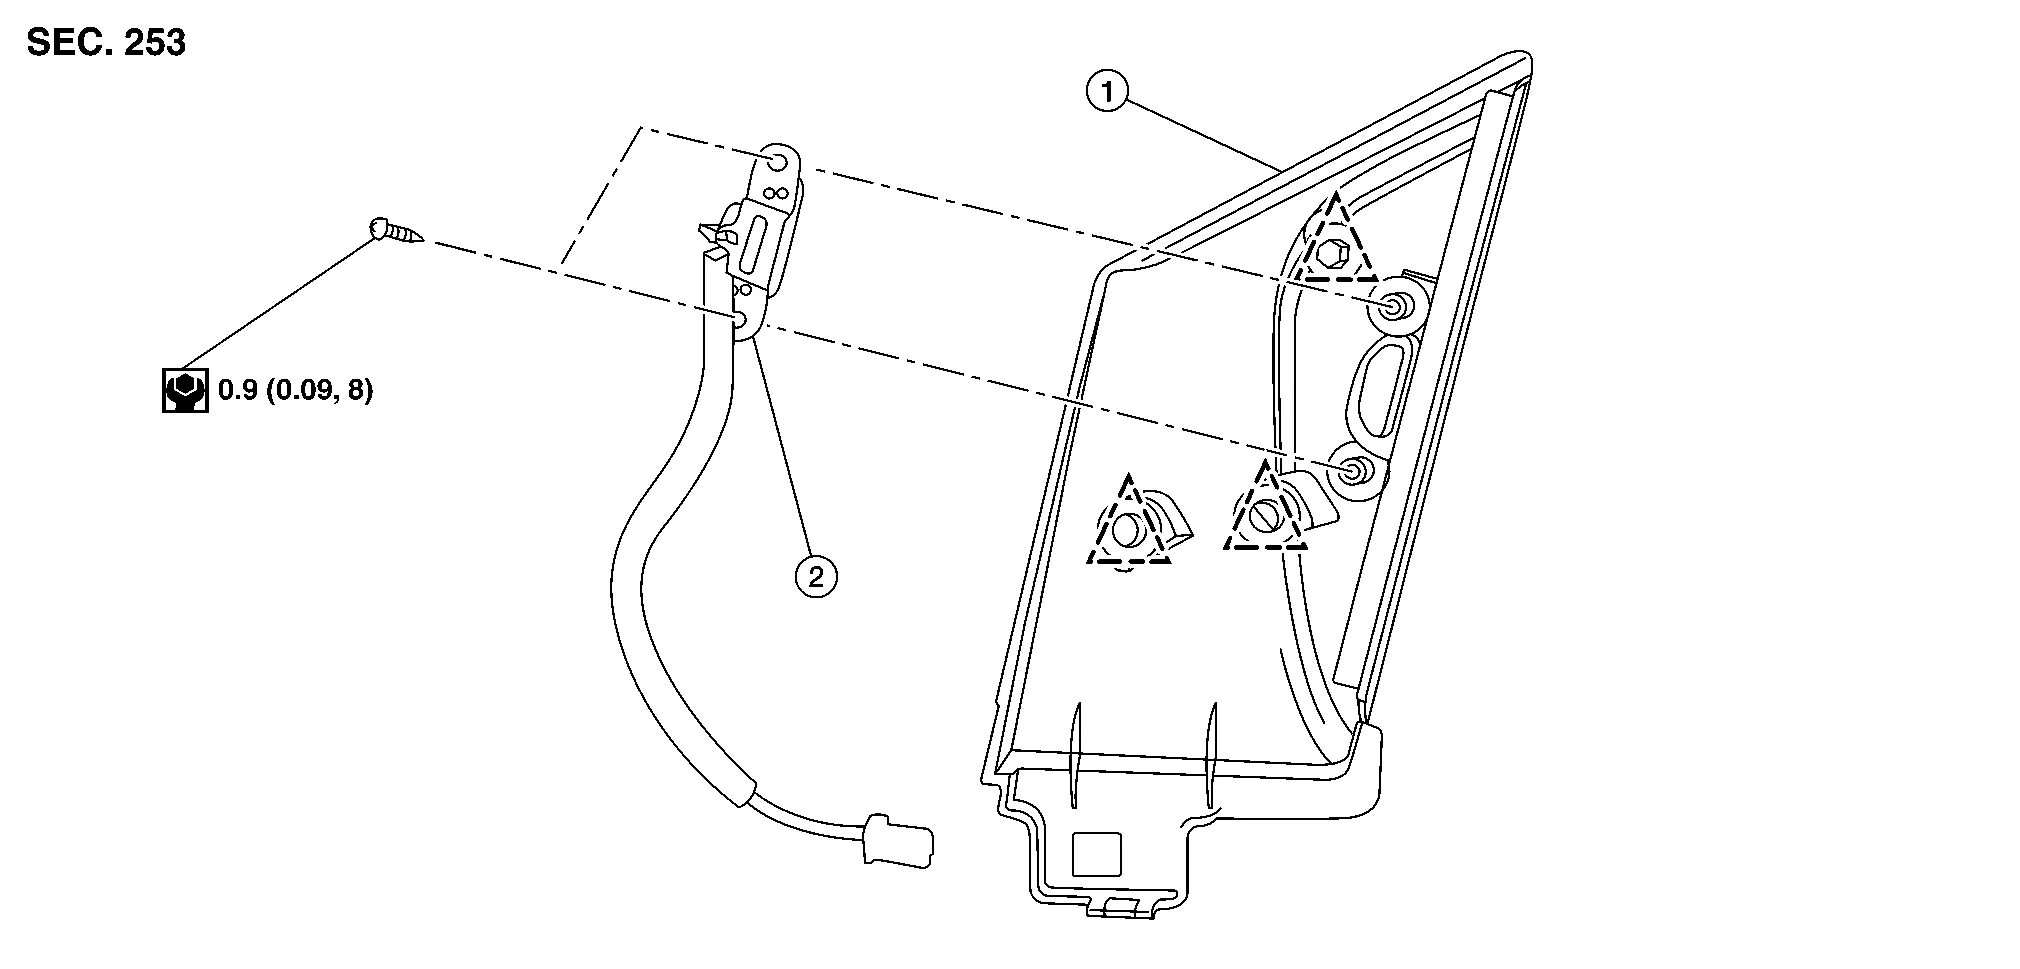
| 1. | Door mirror corner finisher | 2. | Blind spot warning indicator |  |
Clip |
REMOVAL
Remove the front door finisher. Refer to Removal and Installation.
Remove the door mirror corner finisher.
Disconnect harness connector from blind spot warning indicator.
Remove screws and remove blind spot warning indicator.
INSTALLATION
Installation is in the reverse order of removal.
 Side Radar
Exploded View
1.
Side radar
2.
Rear fender
Front
NOTE:
LH shown, RH similar.
Removal and Installation
REMOVALRemove the rear bumper fascia...
 Warning Buzzer
Removal and Installation
REMOVALRemove the glove box assembly and housing. Refer to Removal and Installation.
Disconnect harness connector (B) from the warning buzzer...
Other information:
Nissan Murano (Z52) 2015-2024 Service Manual: Anti-Pinch Function Does Not Operate
Diagnosis Procedure CHECK POWER WINDOW AUTO OPERATION Check AUTO operation of the door when anti-pinch function does not operate. Is the inspection result normal? YES>> GO TO 2. NO>> Refer to Diagnosis Procedure (front LH), Diagnosis Procedure (front RH)...
Nissan Murano (Z52) 2015-2024 Service Manual: B2601 Shift Position
DTC Description DTC DETECTION LOGICNOTE: If DTC B2601 is displayed with DTC U1000, first perform the trouble diagnosis for DTC U1000. Refer to DTC Description. If DTC B2601 is displayed with DTC U1010, first perform the trouble diagnosis for DTC U1010...
Categories
- Manuals Home
- Nissan Murano Owners Manual
- Nissan Murano Service Manual
- High Beam Assist (if so equipped)
- Passenger compartment
- Indicator lights
- New on site
- Most important about car
Driver and passenger supplemental knee air bag
Driver’s side
The knee air bag is located in the knee bolster, on the driver’s and passenger’s side. All of the information, cautions and warnings in this manual apply and must be followed. The knee air bag is designed to inflate in higher severity frontal collisions, although it may inflate if the forces in another type of collision are similar to those of a higher severity frontal impact. It may not inflate in certain collisions.
Passenger’s side