
Nissan Murano: Automatic Drive Positioner :: Removal and Installation / Automatic Drive Positioner Control Unit
Nissan Murano (Z52) 2015-2024 Service Manual / Body Interior / Automatic Drive Positioner :: Removal and Installation / Automatic Drive Positioner Control Unit
REMOVAL
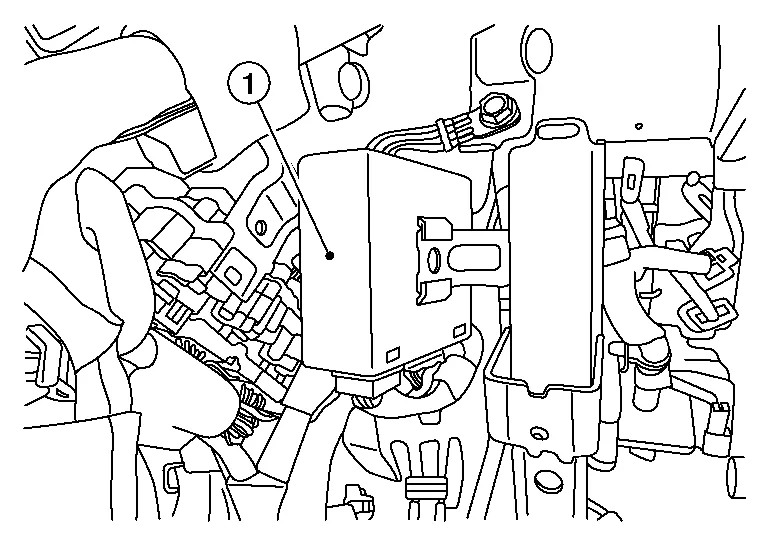
Remove the instrument lower panel LH. Refer to Removal and Installation.
Disconnect the two harness connectors from the automatic drive positioner control unit (1) and remove.
INSTALLATION
Installation is in the reverse order of removal.
CAUTION:
After installing the automatic drive positioner control unit, perform additional service. Refer to Description.
 Driver Seat Control Unit
Removal and Installation
REMOVALRemove the driver seat. Refer to Removal and Installation.
Remove the two driver seat control unit (1) screws (A).
: Front
Disconnect the two harness connectors from driver seat control unit...
 Seat Memory Switch
Removal and Installation
REMOVALRemove front door finisher (LH). Refer to Removal and Installation.
Release the pawls using a suitable tool (A) and remove seat memory switch (2) from switch finisher (1)...
Other information:
Nissan Murano (Z52) 2015-2024 Service Manual: Hood Lock
Exploded View 1. Hood lock 2. Secondary latch 3. Hood lock release cable 4. Hood lock release handle Clip Removal and Installation REMOVALRemove core support cover. Refer to Exploded View. Disconnect hood lock release cable and secondary latch cable from hood lock...
Nissan Murano (Z52) 2015-2024 Owners Manual: Power moonroof (if so equipped)
The sunshade is made from a tricot material. CAUTION To help prevent damaging the moonroof while cleaning: Do not rub the material with a cloth. Doing so can damage the surface of the material or cause a stain to spread. Never use benzine, thinner or any similar chemical to clean the sunshade...
Categories
- Manuals Home
- Nissan Murano Owners Manual
- Nissan Murano Service Manual
- System malfunction
- High Beam Assist (if so equipped)
- Intelligent Forward Collision Warning (I-FCW)
- New on site
- Most important about car
Luggage hooks
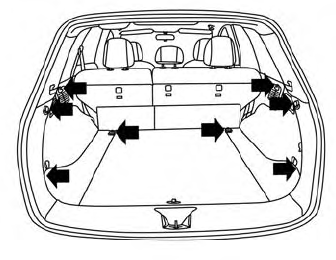
When securing items using luggage hooks located on the back of the seat or side finisher do not apply a load over more than 6.5 lbs. (29 N) to a single hook.
The luggage hooks that are located on the floor should have loads less than 110 lbs. (490 N) to a single hook.

Copyright © 2026 www.nimurano.com