Nissan Murano: Removal and Installation / Abs Actuator and Electric Unit (control Unit)
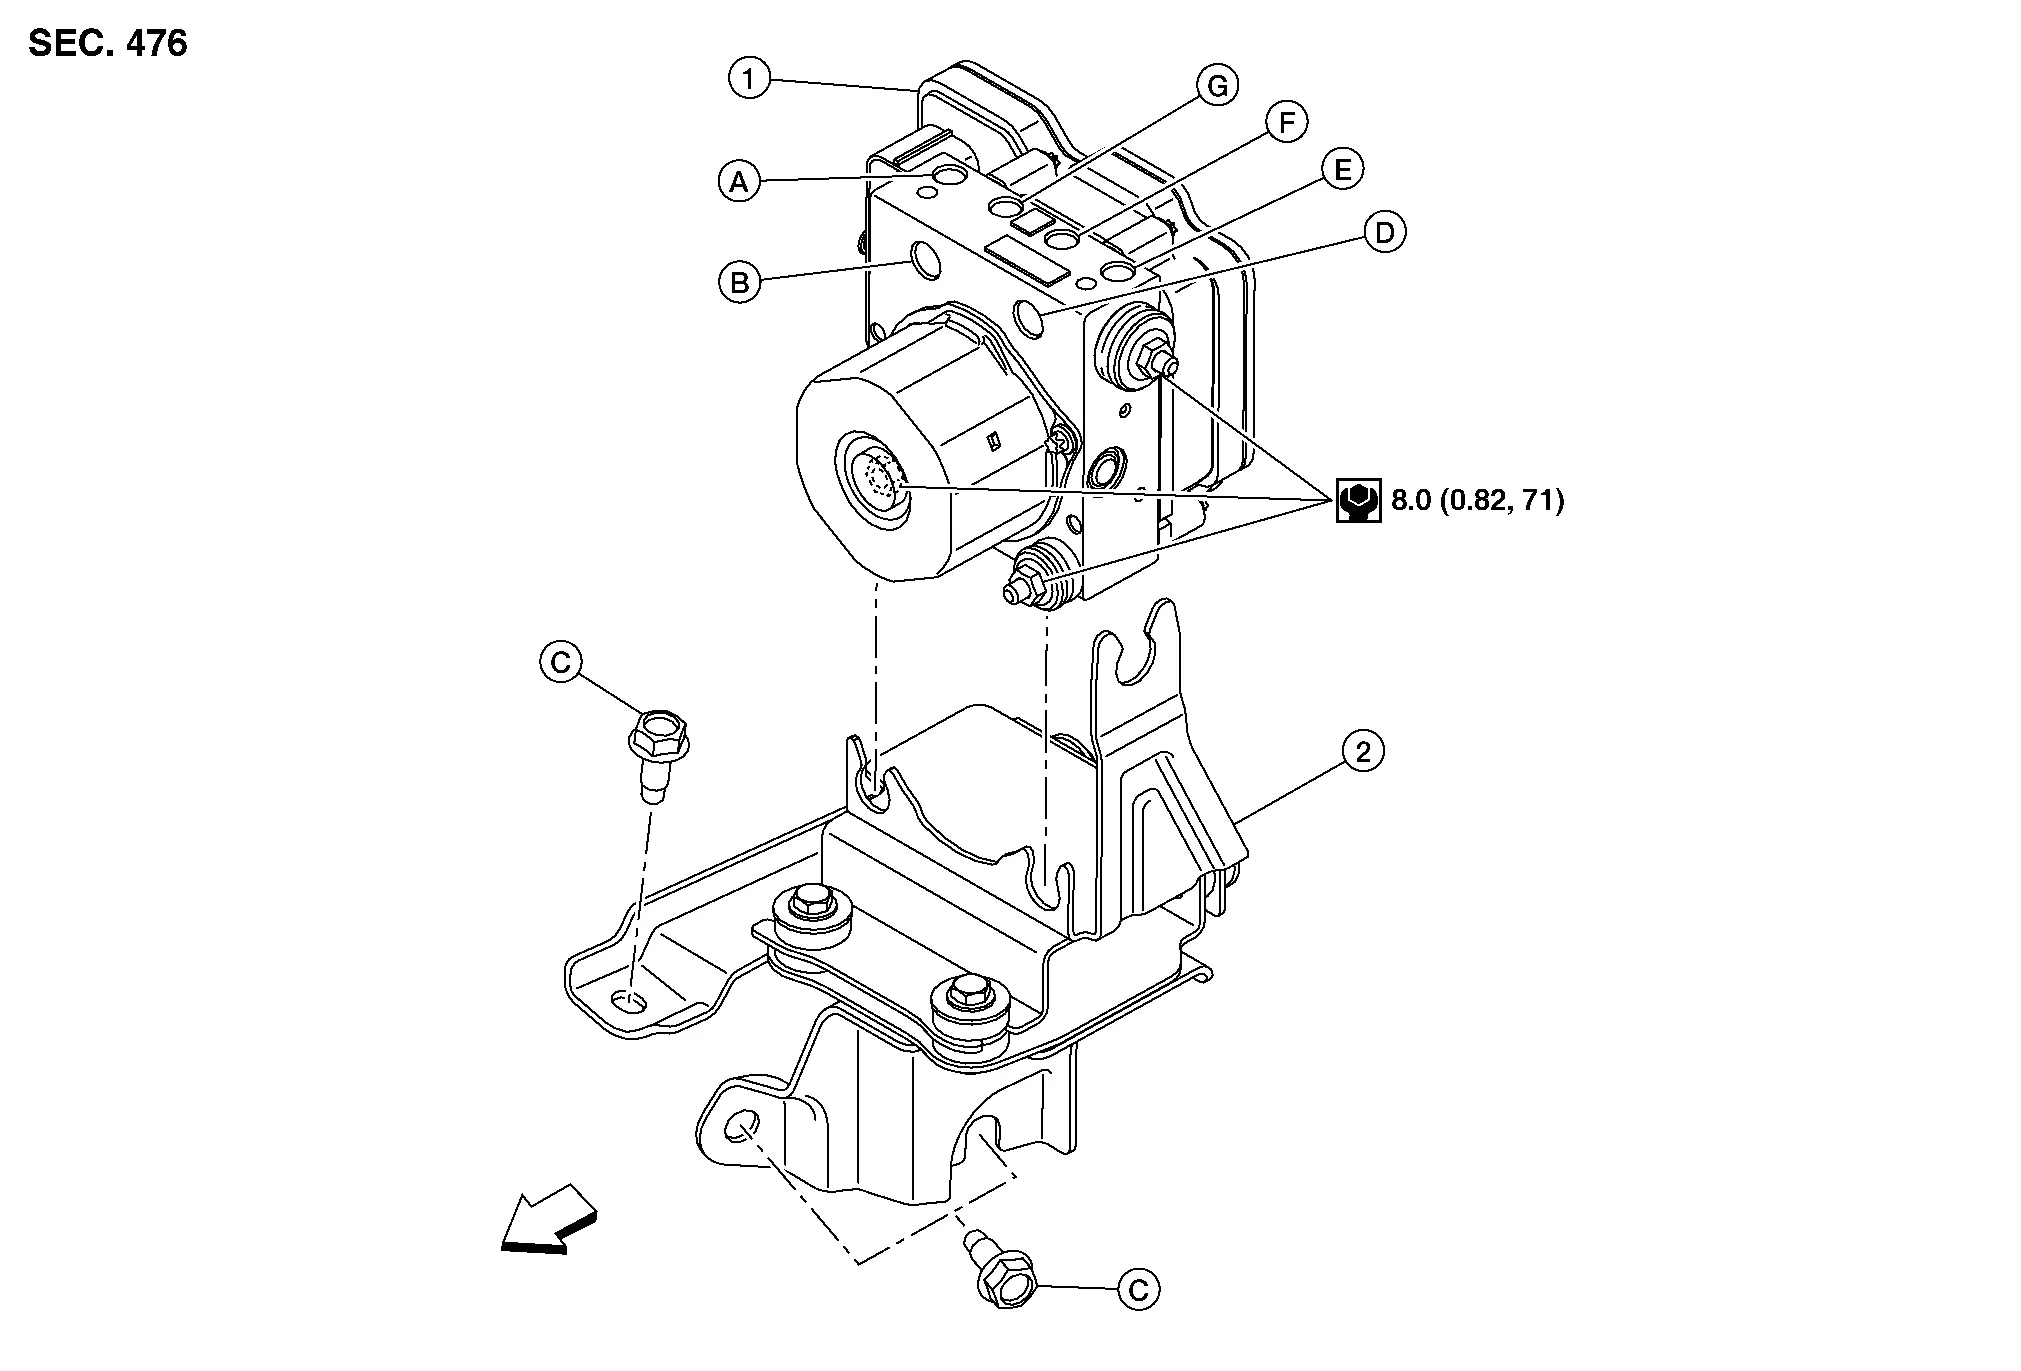
| 1. | ABS actuator and electric unit (control unit) | 2. | Bracket | A. | To rear (RH) brake caliper. Refer to Exploded View. |
| B. | From master cylinder secondary side. Refer to Exploded View. | C. | Refer to Removal and Installation. | D. | From master cylinder primary side. Refer to Exploded View. |
| E. | To rear (LH) brake caliper. Refer to Exploded View. | F. | To front (RH) brake caliper. Refer to Exploded View. | G. | To front (LH) brake caliper. Refer to Exploded View. |
| Front |
REMOVAL
CAUTION:
-
Perform "ADDITIONAL SERVICE WHEN REPLACING ABS ACTUATOR AND ELECTRIC UNIT (CONTROL UNIT)". Refer to Description.
-
To remove brake tube, use a flare nut wrench to prevent flare nuts and brake tube from being damaged.
-
Do not remove actuator by holding harness.
 NOTE:
NOTE:
-
When removing components such as hoses, tubes/lines, etc., cap or plug openings to prevent fluid from spilling.
-
Do not swap ABS actuator and electric unit (control unit) between Nissan Murano vehicles for any reason.
Disconnect negative battery terminal. Refer to Exploded View.
Remove cowl top cover. Refer to Removal and Installation - Cowl Top Cover.
Remove cowl top extension. Refer to Removal and Installation - Cowl Top Extension.
Separate brake tubes from ABS actuator and electric unit (control unit). Refer to Exploded View.
Disconnect harness connector from ABS actuator and electric unit (control unit).
Loosen ABS actuator and electric unit (control unit) grommet nuts. Refer to Exploded View.
Remove ABS actuator and electric unit (control unit) from bracket.
If necessary, remove bolts and bracket.
INSTALLATION
Installation is in the reverse order of removal.
CAUTION:
-
Perform "ADDITIONAL SERVICE WHEN REPLACING ABS ACTUATOR AND ELECTRIC UNIT (CONTROL UNIT)". Refer to Description.
-
To install, use a crowfoot and a torque wrench.
-
Replace the ABS actuator if it has been dropped or sustained an impact.
-
Do not install actuator by holding harness.
-
After installing harness connector in the ABS actuator and electric unit (control unit), make sure connector is securely locked.
NOTE:
Do not swap ABS actuator and electric unit (control unit) between Nissan Murano vehicles for any reason.
-
For tapered bolt (A), tighten bolt to specification.
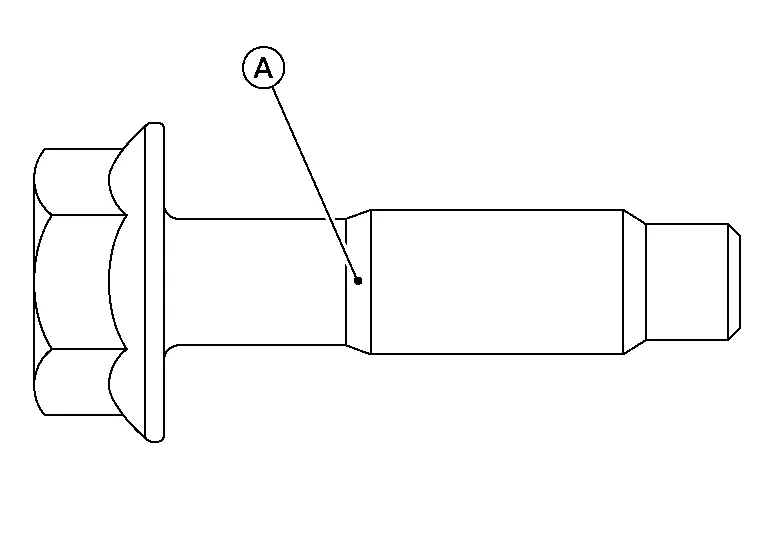
Tightening torque : 26.0 N·m (2.7 kg-m, 19 ft-lb) -
Except for tapered bolt (A), tighten bolt to specification.
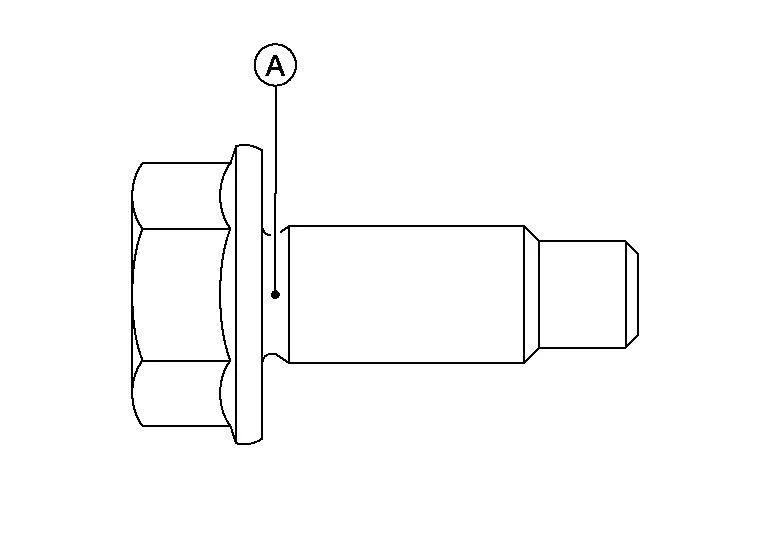
Tightening torque : 25.0 N·m (2.6 kg-m, 18 ft-lb) -
After work is completed, bleed air from brake tube. Refer to Bleeding Brake System.
-
Adjust the neutral position of steering angle sensor. Refer to Description.
-
Perform calibration of the decel G sensor. Refer to Description.
 Rear Sensor Rotor
Removal and Installation - Rear Sensor Rotor
The rear wheel sensor rotor is an integral part of the wheel hub and bearing and cannot be disassembled. Refer to Removal and Installation...
 Vdc Off Switch
Exploded View
1.
Upper switch carrier
2.
Middle switch carrier
3.
Heated steering wheel switch (if equipped)
4.
VDC OFF switch
5.
Automatic back door switch (if equipped)
6...
Other information:
Nissan Murano (Z52) 2015-2024 Service Manual: B210e Starter Rly Off Circ
DTC Description Located in IPDM E/R, it runs the starter motor. The starter relay is turned ON by the BCM when ignition switch is in START position. IPDM E/R transmits the starter relay ON signal to BCM via CAN communication.DTC DETECTION LOGICNOTE: If DTC B210E is displayed with DTC U1000, first perform the trouble diagnosis for DTC U1000...
Nissan Murano (Z52) 2015-2024 Owners Manual: Anti-lock Braking System (ABS)
WARNING The ABS is a sophisticated device, but it cannot prevent accidents resulting from careless or dangerous driving techniques. It can help maintain vehicle control during braking on slippery surfaces. Remember that stopping distances on slippery surfaces will be longer than on normal surfaces even with ABS...
Categories
- Manuals Home
- Nissan Murano Owners Manual
- Nissan Murano Service Manual
- GAS STATION INFORMATION
- Jacking up vehicle and removing the damaged tire
- Fuel recommendation
- New on site
- Most important about car
Autolight system
The autolight system allows the headlights to turn on and off automatically. The autolight system can:
Turn on the headlights, front parking, tail, license plate and instrument panel lights automatically when it is dark. Turn off all the lights (except daylight running lights) when it is light. Keep all the lights on for a period of time after you place the ignition switch in the OFF position and all doors are closed.