Nissan Murano: System / Seat Belt Warning Lamp System
Nissan Murano (Z52) 2015-2024 Service Manual / Restraints / Srs Air Bag Control System :: System Description / System / Seat Belt Warning Lamp System
SYSTEM DIAGRAM
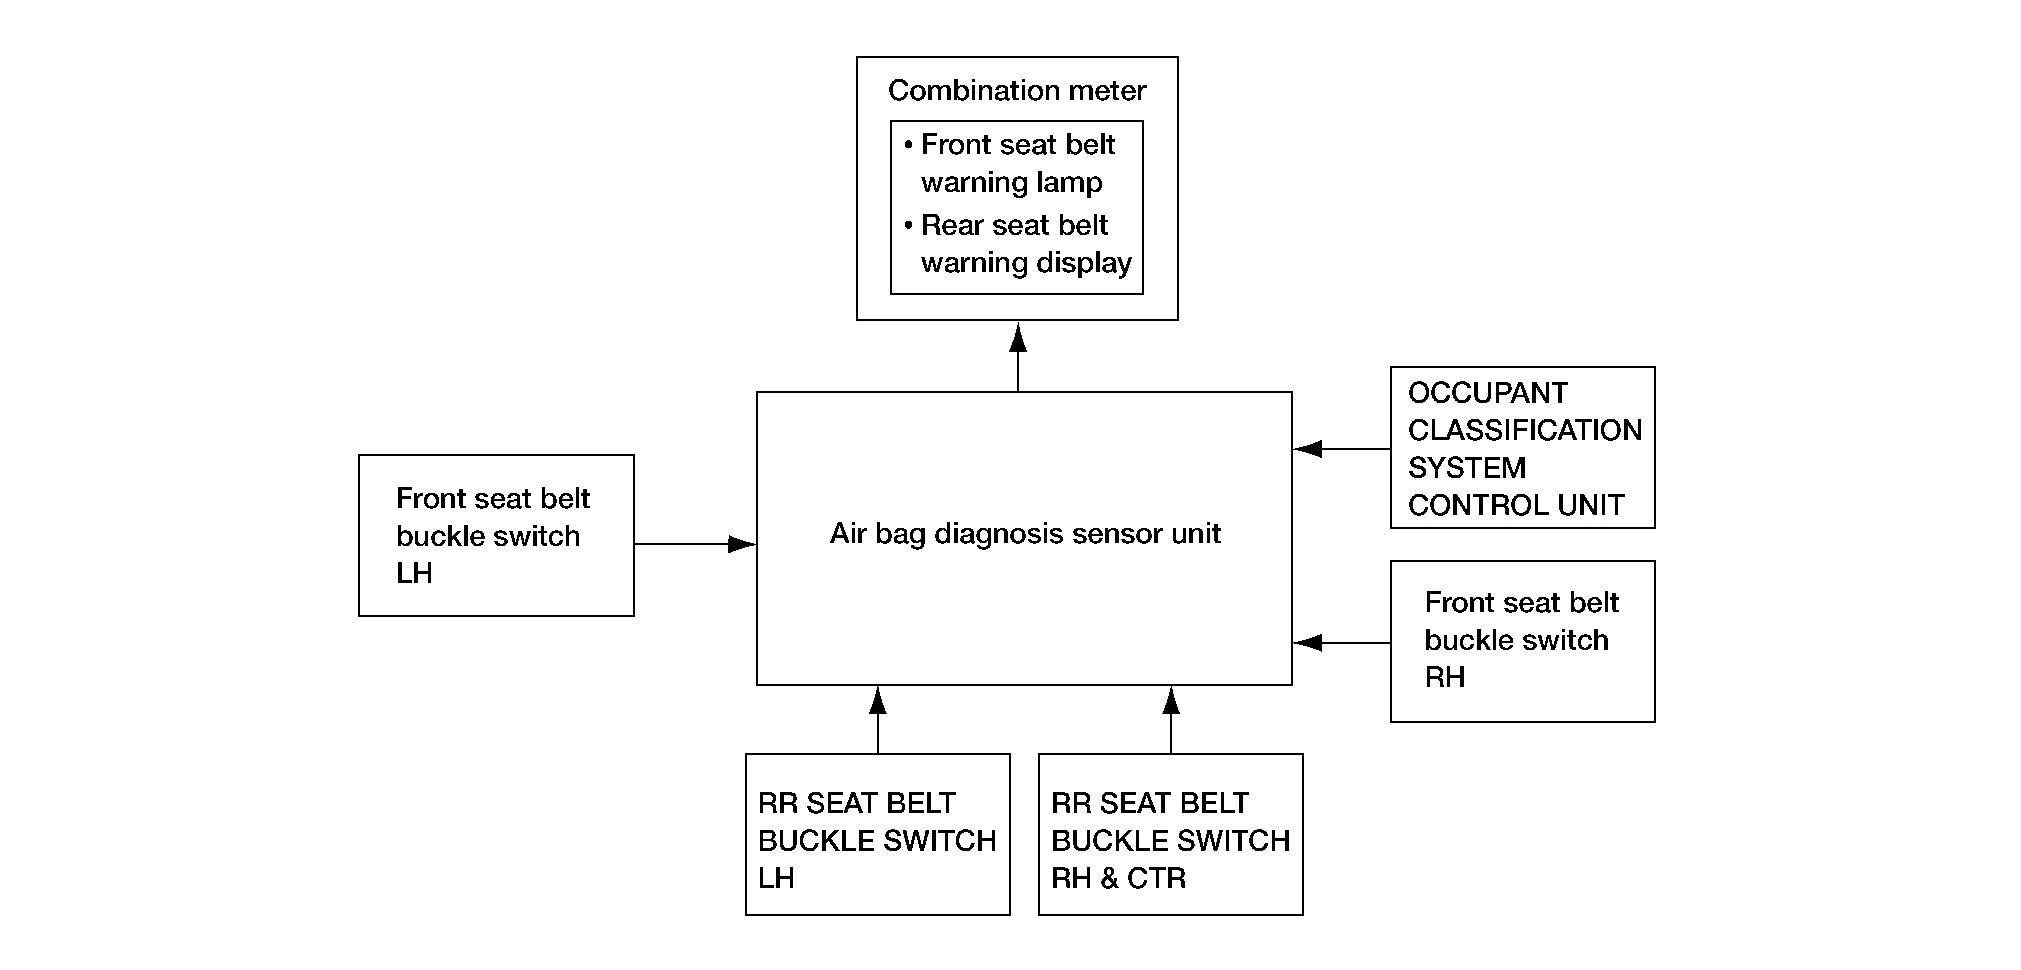
System Description
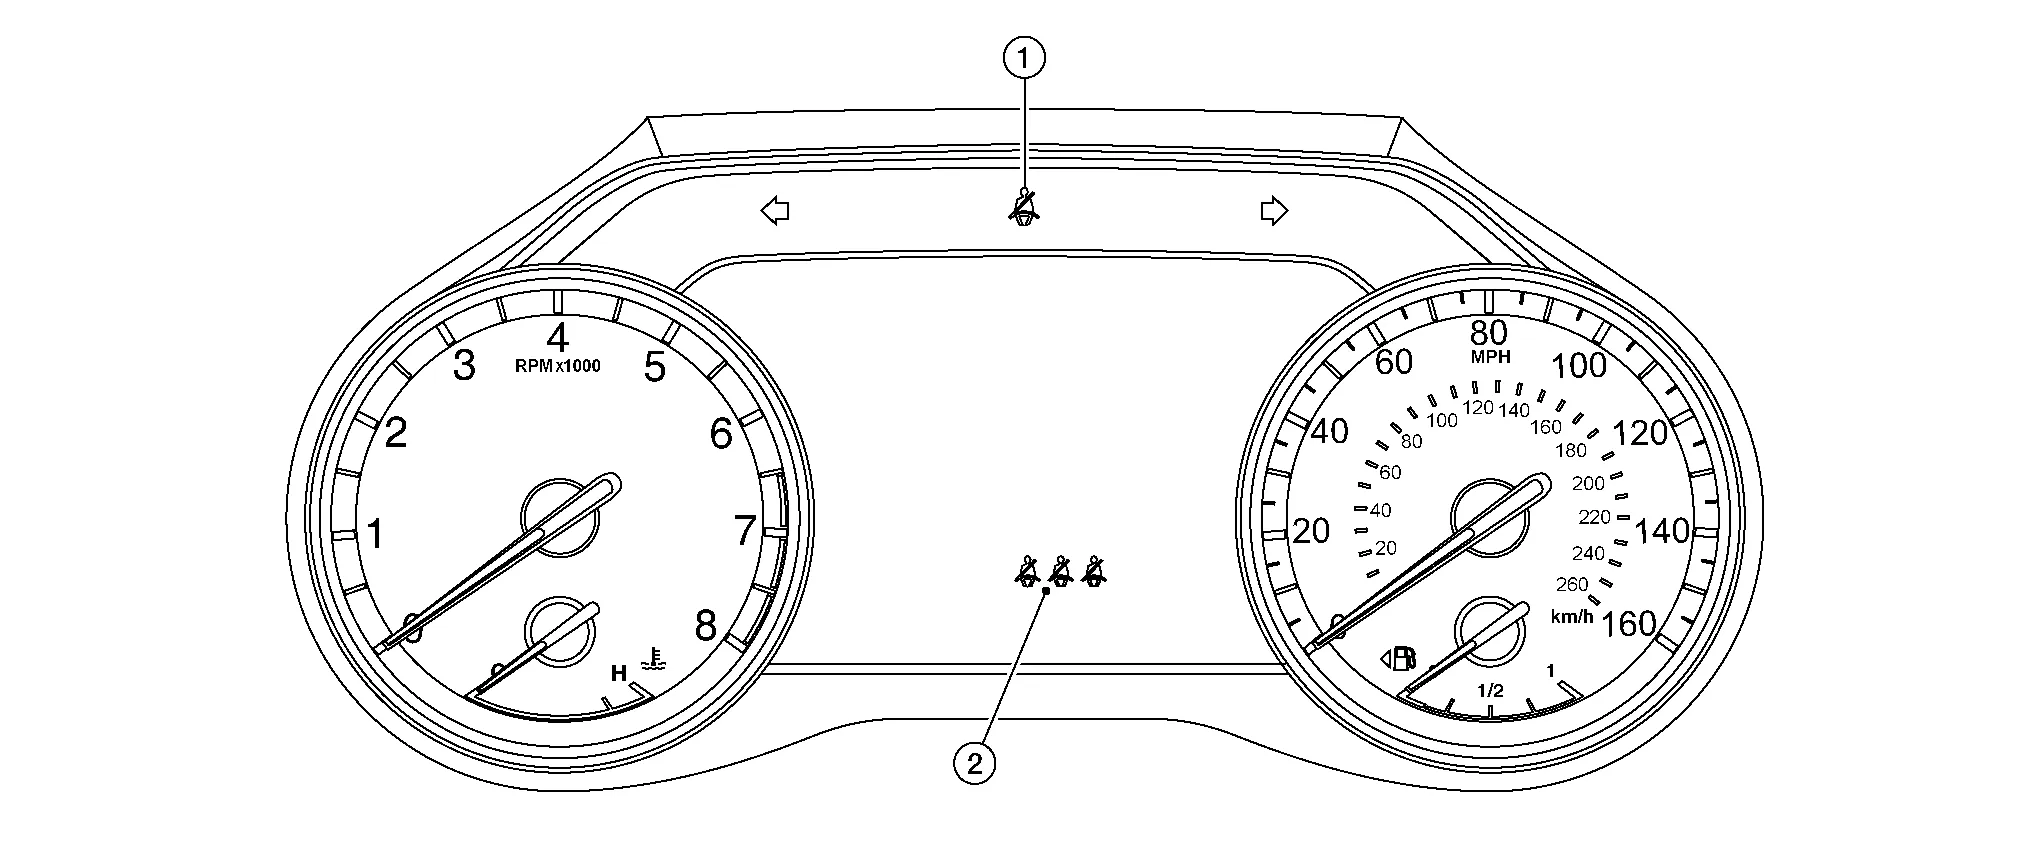
The seat belt warning lamp (1) will remind the driver if the driver or front passenger seat belt should be buckled. The seat belt warning display (2) will remind the driver if the rear seat belt should be buckled. The system works in conjunction with the occupant classification system. Refer to System Description.
|
Driver seat status (ignition switch ON) | Passenger seat status | Front seat belt buckle switch LH status | Front seat belt buckle switch RH status | Seat belt warning lamp |
|---|---|---|---|---|
| Seat occupied | Seat occupied | Buckled | Buckled | Off |
| Unbuckled | On | |||
| Seat unoccupied | — | Off | ||
| — | Unbuckled | On |
| Rear seat status | Rear seat belt buckle switch LH status | Rear seat belt buckle switch RH status | Rear seat belt buckle switch CTR status | Seat belt warning |
|---|---|---|---|---|
| Seat occupied | Buckled | Buckled | Buckled | Off |
| Unbuckled | Unbuckled | Unbuckled | On | |
| Seat unoccupied | Buckled | Buckled | Buckled | Off |
| Unbuckled | Unbuckled | Unbuckled | On |
 Occupant Classification System
System Description
SYSTEM DIAGRAMSystem DescriptionThe occupant classification system (OCS) identifies different size occupants, out of position occupants, and detects if a child seat is present in the front passenger seat...
 Diagnosis System (air Bag)
Diagnosis Description
CAUTION:
Do not use electrical test equipment on any circuit related to the SRS unless instructed to do so in this Service Manual...
Other information:
Nissan Murano (Z52) 2015-2024 Service Manual: Component Parts. Automatic Emergency Braking System
Component Parts Location A. Center of windshield behind the auto anti-dazzling inside mirror B. Center of instrument panel (view with center console removed) C. Engine room right side D. Front bumper (center) E. Engine room left side F...
Nissan Murano (Z52) 2015-2024 Service Manual: B2560 Starter Cont Relay
DTC Description Starter control relay, integrated in IPDM E/R, permits the starter relay operation when in N (Neutral) or P (Park) position.DTC DETECTION LOGICNOTE: If DTC B2560 is displayed with DTC U1000, first perform the trouble diagnosis for DTC U1000...
Categories
- Manuals Home
- Nissan Murano Owners Manual
- Nissan Murano Service Manual
- Warning lights
- All-Wheel Drive (AWD) (if so equipped)
- Passenger compartment
- New on site
- Most important about car
Front manual seat adjustment (if so equipped)
Your vehicle seats can be adjusted manually. For additional information about adjusting the seats, refer to the steps outlined in this section.
Forward and backward

Copyright © 2026 www.nimurano.com