Nissan Murano: Heater & Air Conditioning System :: Removal and Installation / Refrigerant Pressure Sensor
REMOVAL
Discharge the refrigerant. Refer to Recycle Refrigerant.
Remove the front bumper fascia assembly. Refer to Removal and Installation.
Remove horn assembly. Refer to Removal and Installation.
Remove the air guide (RH). Refer to Exploded View.
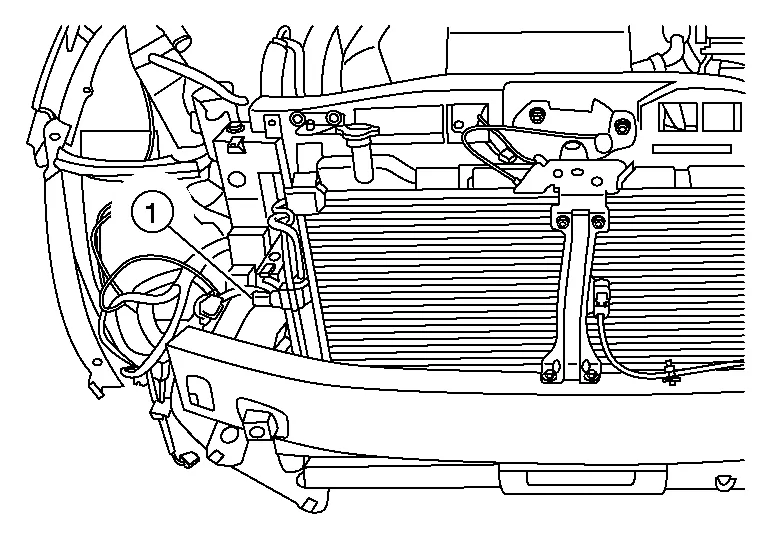
Disconnect the harness connector from the refrigerant pressure sensor.
Remove refrigerant pressure sensor (1).
CAUTION:
Cap or wrap the opening of the refrigerant pressure sensor with suitable material such as vinyl tape to avoid the entry of air.
INSTALLATION
Installation is in the reverse order of removal.
CAUTION:
-
Do not reuse the O-ring.
-
Apply A/C oil to the O-ring of the refrigerant pressure sensor for installation.
-
After charging the refrigerant, check for leaks. Refer to Leak Test.
 Liquid Tank
R..
 Heating and Cooling Unit Assembly
Exploded View
1.
Heating and cooling unit assembly
2.
Steering member
3.
Steering member brace (LH)
4.
Steering member brace (RH)
A.
Steering member caps
Pawl
Front
1...
Other information:
Nissan Murano (Z52) 2015-2024 Owners Manual: Towing a trailer
WARNING Overloading or improper loading of a trailer and its cargo can adversely affect vehicle handling, braking and performance and may lead to accidents. CAUTION Do not tow a trailer or haul a heavy load for the first 500 miles (805 km). Your engine, axle or other parts could be damaged...
Nissan Murano (Z52) 2015-2024 Service Manual: Additional Service When Replacing Can Gateway. 3ch Can Gateway
Description For work procedure, refer to Work Procedure.BEFORE REPLACEMENTWhen replacing 3CH CAN gateway, save or print current vehicle specification (Type ID) with CONSULT configuration before replacement.NOTE: If “Before Replace ECU” of “Read / Write Configuration” can not be used, use the “Manual Configuration” after replacing 3CH CAN gateway...
Categories
- Manuals Home
- Nissan Murano Owners Manual
- Nissan Murano Service Manual
- How to enable/disable the LDW system
- Intelligent Forward Collision Warning (I-FCW)
- High Beam Assist (if so equipped)
- New on site
- Most important about car