Nissan Murano: Heater & Air Conditioning System :: Removal and Installation / Heating and Cooling Unit Assembly
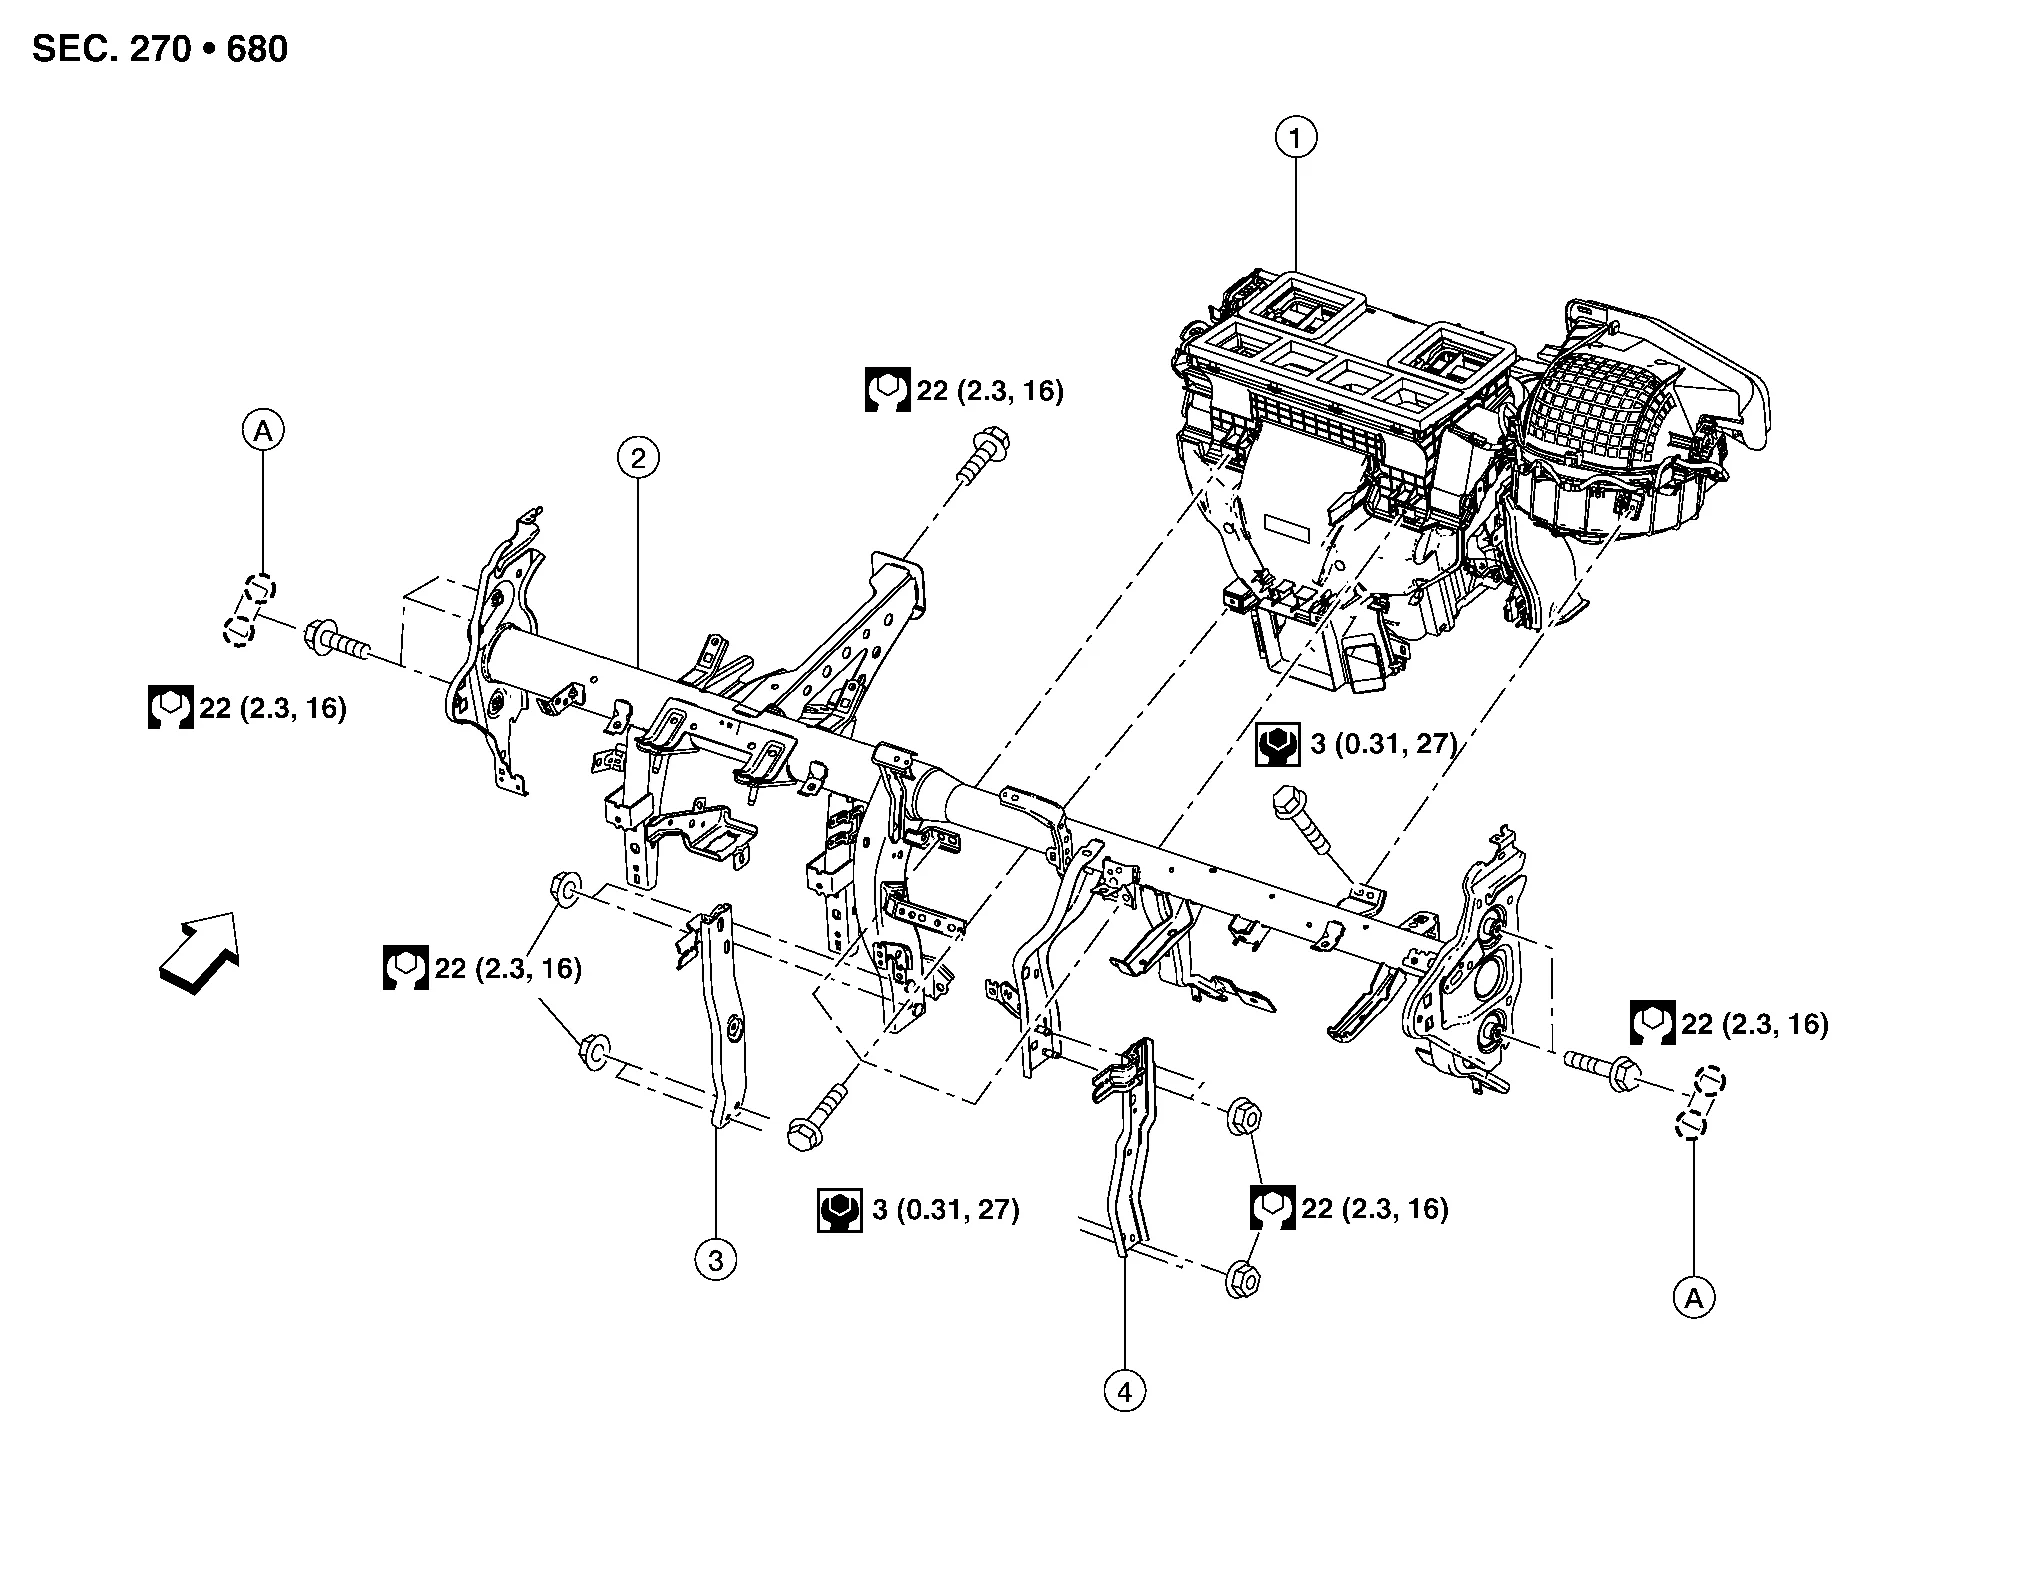
| 1. | Heating and cooling unit assembly | 2. | Steering member | 3. | Steering member brace (LH) |
| 4. | Steering member brace (RH) | A. | Steering member caps |  |
Pawl |
| Front |

| 1. | Heating and cooling unit assembly | 2. | Evaporator | 3. | Heater case side cover |
| 4. | Air mix door motor (RH) | 5. | Blower unit case | 6. | Intake door motor |
| 7. | Blower motor | 8. | Upper floor connecting duct (RH) | 9. | In-cabin microfilter cover |
| 10. | In-cabin microfilter | 11. | Drain hose | 12. | Expansion valve grommet |
| 13. | Expansion valve | 14. | Heater core | 15. | Air mix door motor (LH) |
| 16. | Aspirator hose | 17. | Upper floor connecting duct (LH) | 18. | Heater core pipe cover |
| 19. | Mode door motor (front) |
REMOVAL
CAUTION:
Before servicing, turn the ignition switch "OFF", disconnect both battery cables and wait at least three minutes.
 NOTE:
NOTE:
When removing components such as hoses, lines/tubes, etc., cap or plug openings to prevent fluid from leaking.
Discharge the refrigerant. Refer to Recycle Refrigerant.
Drain the engine coolant. Refer to Changing Engine Coolant.
Remove the instrument panel assembly. Refer to Removal and Installation.
Remove the steering column. Refer to Removal and Installation.
Remove the front floor connecting duct (LH/RH). Refer to Exploded View.
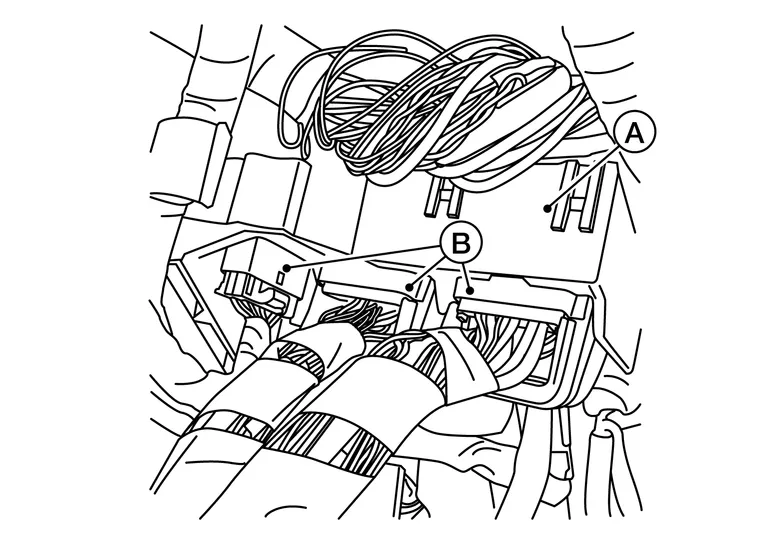
Disconnect the harness connectors (B) from the super multiple junction (SMJ) block (A).
Disconnect the high-pressure pipe and internal heat exchanger from the expansion valve.
CAUTION:
Cap or wrap the joint of the pipe with suitable material such as vinyl tape to avoid the entry of air.
Disconnect the heater hoses from the heater core.
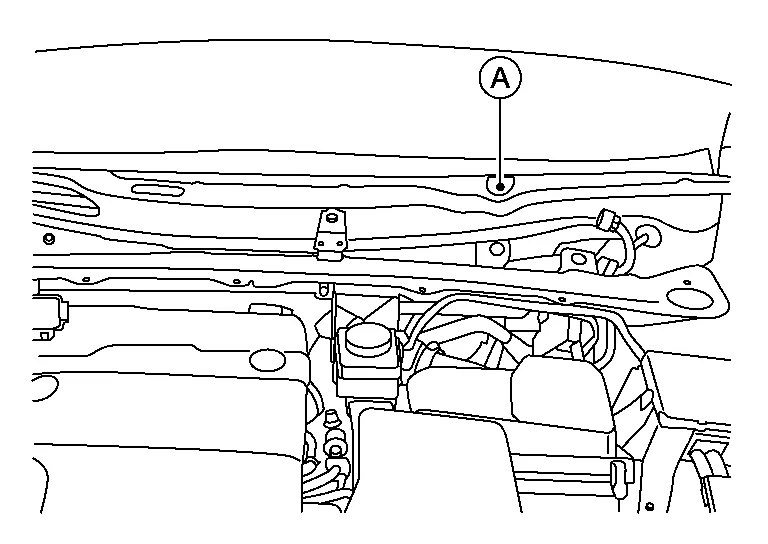
Remove the cowl top extension. Refer to Removal and Installation - Cowl Top Cover.
Remove the body panel plug (A) then remove the steering member bolt.
Remove the bolts that retain the steering member to the Nissan Murano vehicle body.
Disconnect the front drain hose from the heating and cooling unit assembly.
Disconnect the harness connectors from the heating and cooling unit assembly and steering member.
Remove the heating and cooling unit assembly and steering member from the Nissan Murano vehicle as an assembly.
CAUTION:
Use care not to damage the seats when removing the steering member.
Remove the bolts that retain the heating and cooling unit assembly to the steering member.
Separate the heating and cooling unit assembly from the steering member.
INSTALLATION
Installation is in the reverse order of removal.
 Refrigerant Pressure Sensor
Removal and Installation
REMOVALDischarge the refrigerant. Refer to Recycle Refrigerant.
Remove the front bumper fascia assembly. Refer to Removal and Installation...
 Heater Core
Exploded View
1.
Heating and cooling unit assembly
2.
Front foot duct (LH)
3.
Heater core pipes cover
4.
Heater core
Front
Removal and Installation
REMOVALNOTE:
When removing components such as hoses, lines/tubes, etc...
Other information:
Nissan Murano (Z52) 2015-2024 Service Manual: Water Outlet and Water Piping
Exploded View 1. Heater hose 2. Clamp 3. Water hose 4. Clamp 5. Water outlet 6. Gasket 7. Gasket 8. Water connector 9. O-ring 10. Water bypass pipe 11. Clamp 12. Water hose 13. Heater pipe 14. Water hose 15...
Nissan Murano (Z52) 2015-2024 Service Manual: B2560 Starter Cont Relay
DTC Description Starter control relay, integrated in IPDM E/R, permits the starter relay operation when in N (Neutral) or P (Park) position.DTC DETECTION LOGICNOTE: If DTC B2560 is displayed with DTC U1000, first perform the trouble diagnosis for DTC U1000...
Categories
- Manuals Home
- Nissan Murano Owners Manual
- Nissan Murano Service Manual
- Indicator lights
- Passenger compartment
- All-Wheel Drive (AWD) (if so equipped)
- New on site
- Most important about car
LATCH (Lower Anchors and Tethers for CHildren) system

LATCH system lower anchor locations - bench seat
Your vehicle is equipped with special anchor points that are used with LATCH system compatible child restraints. This system may also be referred to as the ISOFIX or ISOFIX compatible system. With this system, you do not have to use a vehicle seat belt to secure the child restraint unless the combined weight of the child and child restraint exceeds 65 lbs. (29.5 kg). If the combined weight of the child and child restraint is greater than 65 lbs. (29.5 kg), use the vehicle’s seat belt (not the lower anchors) to install the child restraint. Be sure to follow the child restraint manufacturer’s instructions for installation.