Nissan Murano: Glass & Window System :: Removal and Installation / Rear Door Glass
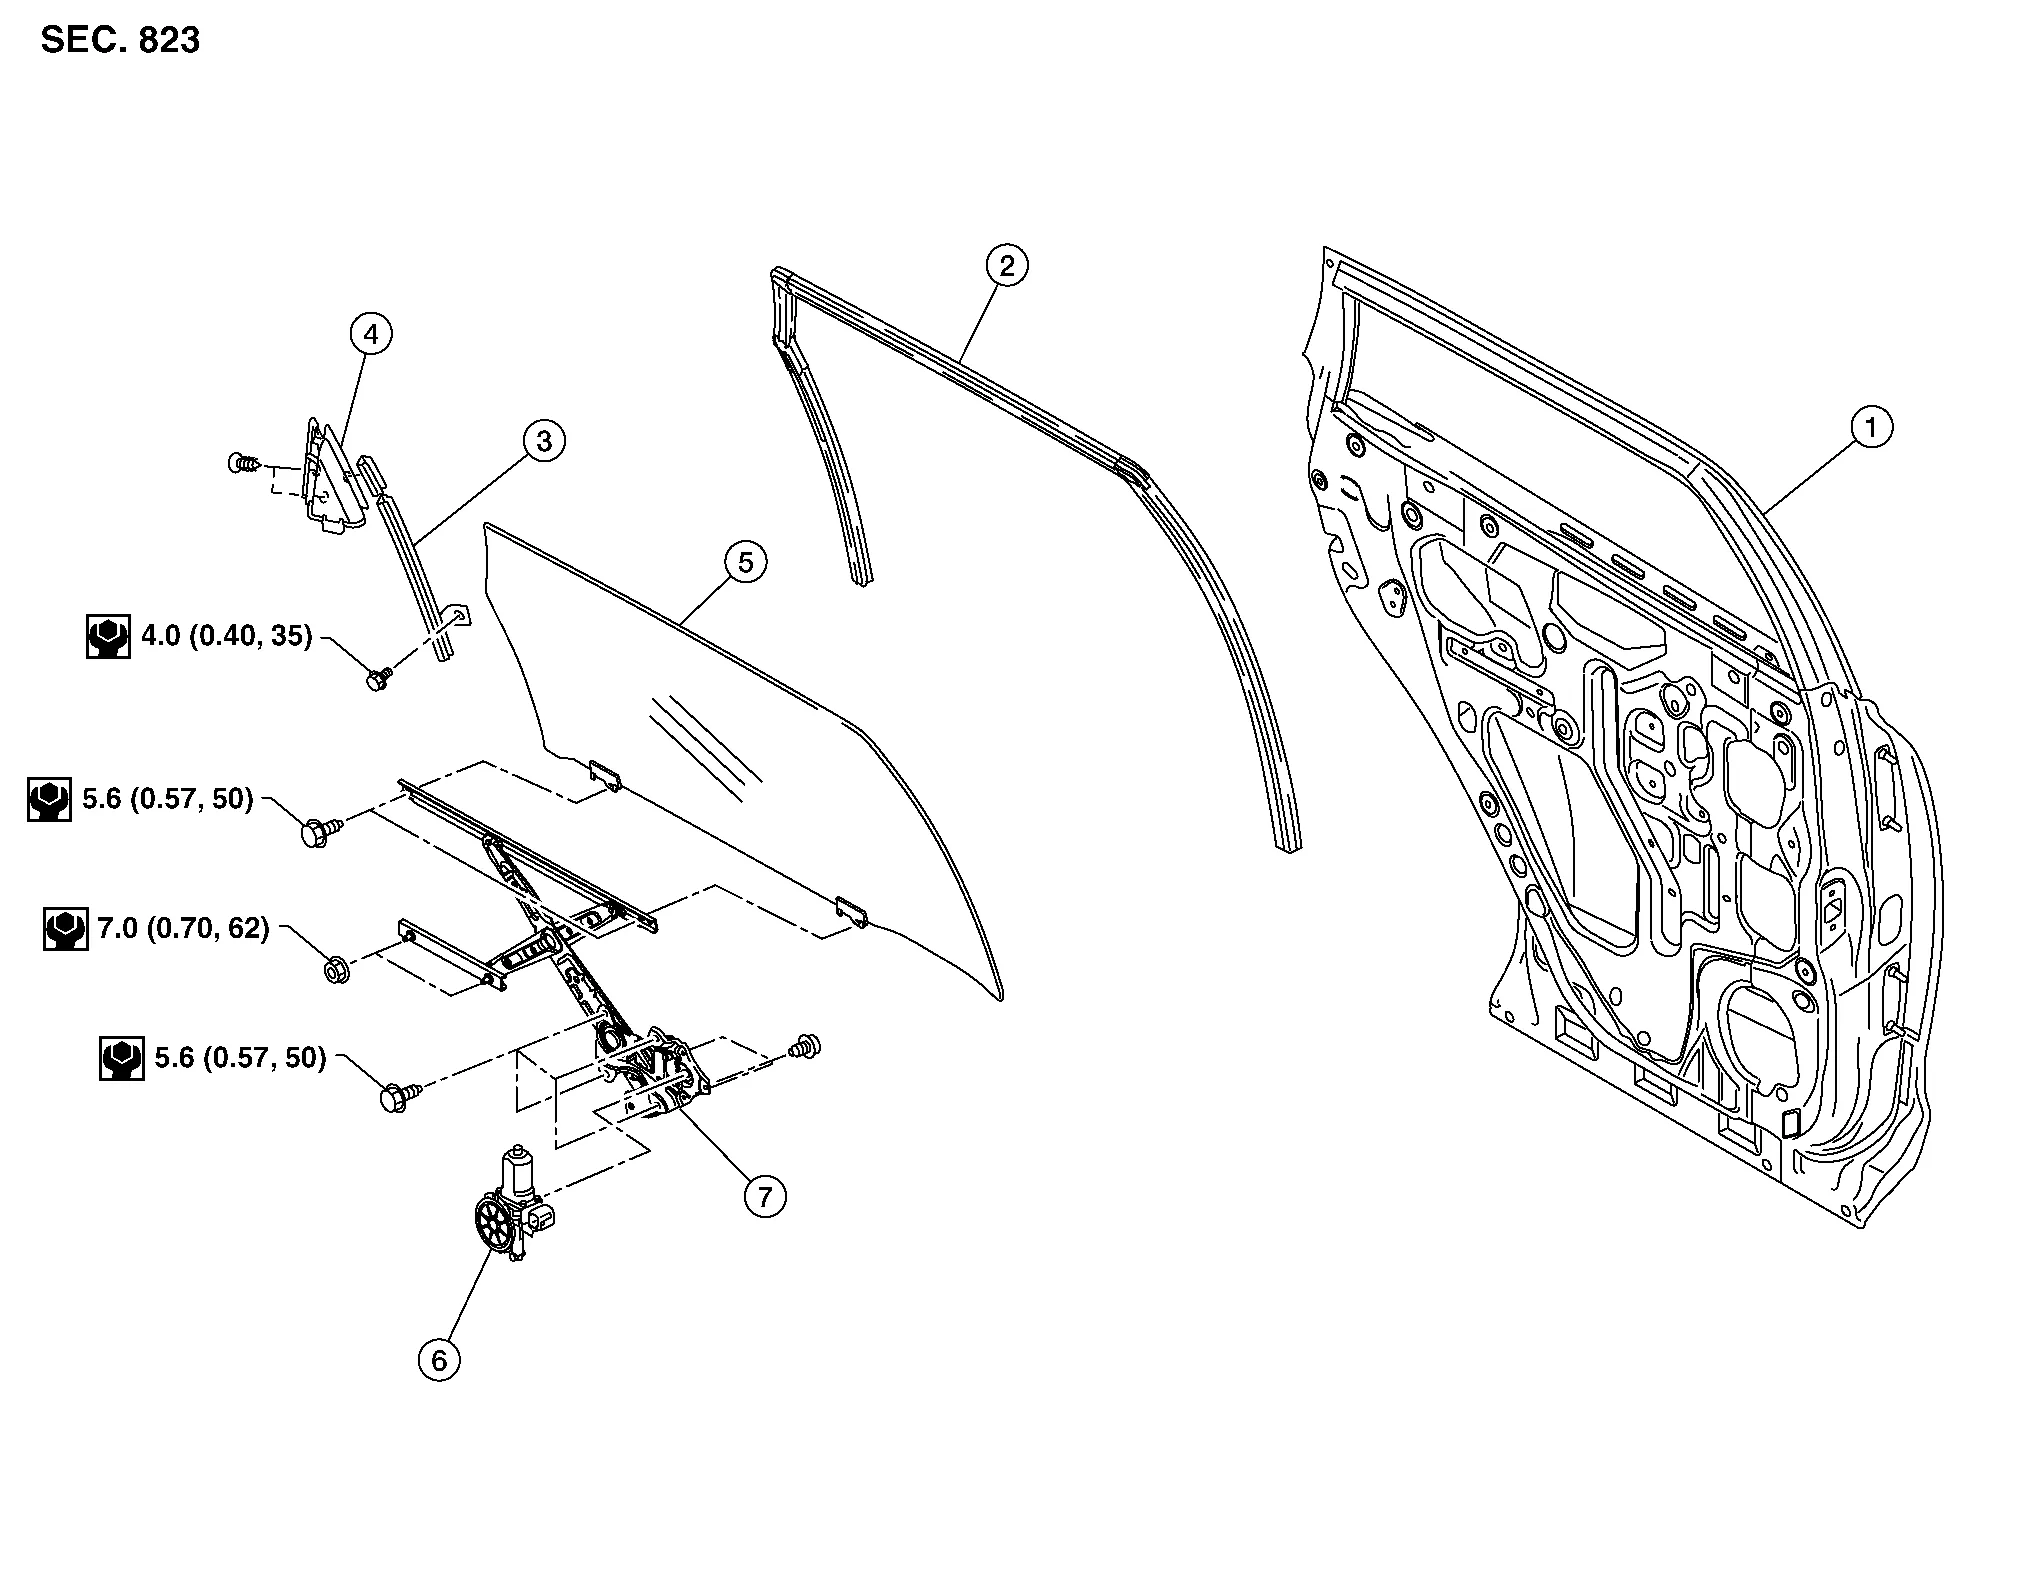
| 1. | Rear door | 2. | Rear door glass rubber run | 3. | Rear door glass rear run |
| 4. | Rear door glass corner finisher | 5. | Rear door glass | 6. | Rear door glass power window motor |
| 7. | Rear door glass regulator |
REMOVAL
Remove rear door finisher. Refer to Removal and Installation.
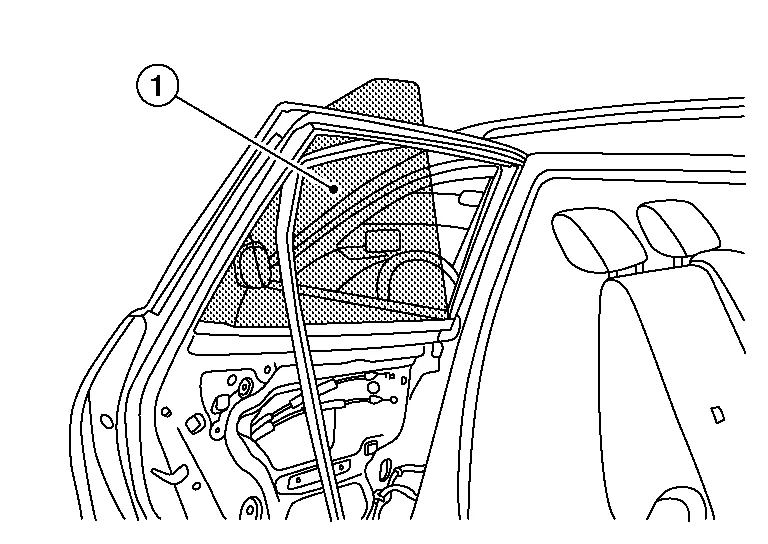
Remove rear door vapor barrier (1).

CAUTION:
Use care not to damage or tear vapor barrier during removal.
Temporarily reconnect the rear power window switch.
Operate rear power window switch to raise/lower rear door glass until rear door regulator to glass bolts (A) can be seen and remove.

Partially remove rear door glass rubber run channel.
Remove screws and rear door corner finisher (1).
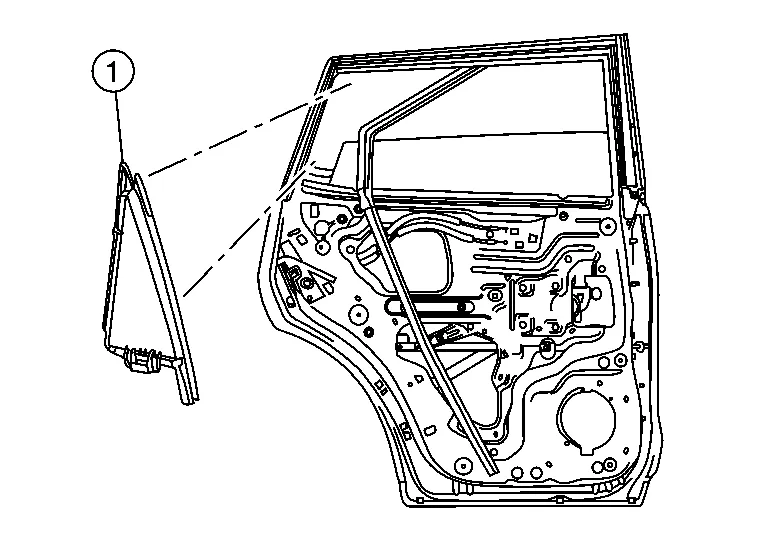
Remove rear door regulator to glass bolts and rear door glass (1).
INSTALLATION
Installation is in the reverse order of removal.
Fitting Inspection
-
Check that the rear door glass is securely fit into the rear door glass run channel.
-
Lower the rear door glass slightly [approximately 10 to 20 mm (0.4 to 0.8 in)], and check that the clearance to the sash is parallel. If the clearance between the rear door glass and sash is not parallel, loosen the rear door regulator to glass bolts, guide rail bolts, and rear door glass and carrier plate bolts to correct the rear door glass position.
 Front Power Window Motor
Removal and Installation
REMOVALRemove front door glass regulator. Refer to Removal and Installation.
Remove screws (A) and front power window motor (1) from front door glass regulator (2)...
 Rear Door Regulator
Exploded View
1.
Rear door
2.
Rear door glass rubber run
3.
Rear door glass rear run
4.
Rear door glass corner finisher
5.
Rear door glass
6...
Other information:
Nissan Murano (Z52) 2015-2024 Owners Manual: Weight distribution hitch
This type of hitch is also called a “loadleveling” or “equalizing” hitch. A set of bars attach to the ball mount and to the trailer to distribute the tongue weight (hitch weight) of your trailer. Many vehicles can’t carry the full tongue weight of a given trailer, and need some of the tongue weight transferred through the frame and pushing down on the front wheels...
Nissan Murano (Z52) 2015-2024 Owners Manual: Tilt and telescopic operation
To adjust the steering wheel move the switch in the following directions: Adjust the steering wheel up or down in direction to the desired tilt position. Adjust the steering wheel forward or backward in direction to the desired telescopic position...
Categories
- Manuals Home
- Nissan Murano Owners Manual
- Nissan Murano Service Manual
- Jacking up vehicle and removing the damaged tire
- High Beam Assist (if so equipped)
- All-Wheel Drive (AWD) (if so equipped)
- New on site
- Most important about car
LATCH (Lower Anchors and Tethers for CHildren) system

LATCH system lower anchor locations - bench seat
Your vehicle is equipped with special anchor points that are used with LATCH system compatible child restraints. This system may also be referred to as the ISOFIX or ISOFIX compatible system. With this system, you do not have to use a vehicle seat belt to secure the child restraint unless the combined weight of the child and child restraint exceeds 65 lbs. (29.5 kg). If the combined weight of the child and child restraint is greater than 65 lbs. (29.5 kg), use the vehicle’s seat belt (not the lower anchors) to install the child restraint. Be sure to follow the child restraint manufacturer’s instructions for installation.