Nissan Murano: Parking Brake System :: Removal and Installation / Parking Brake Shoe
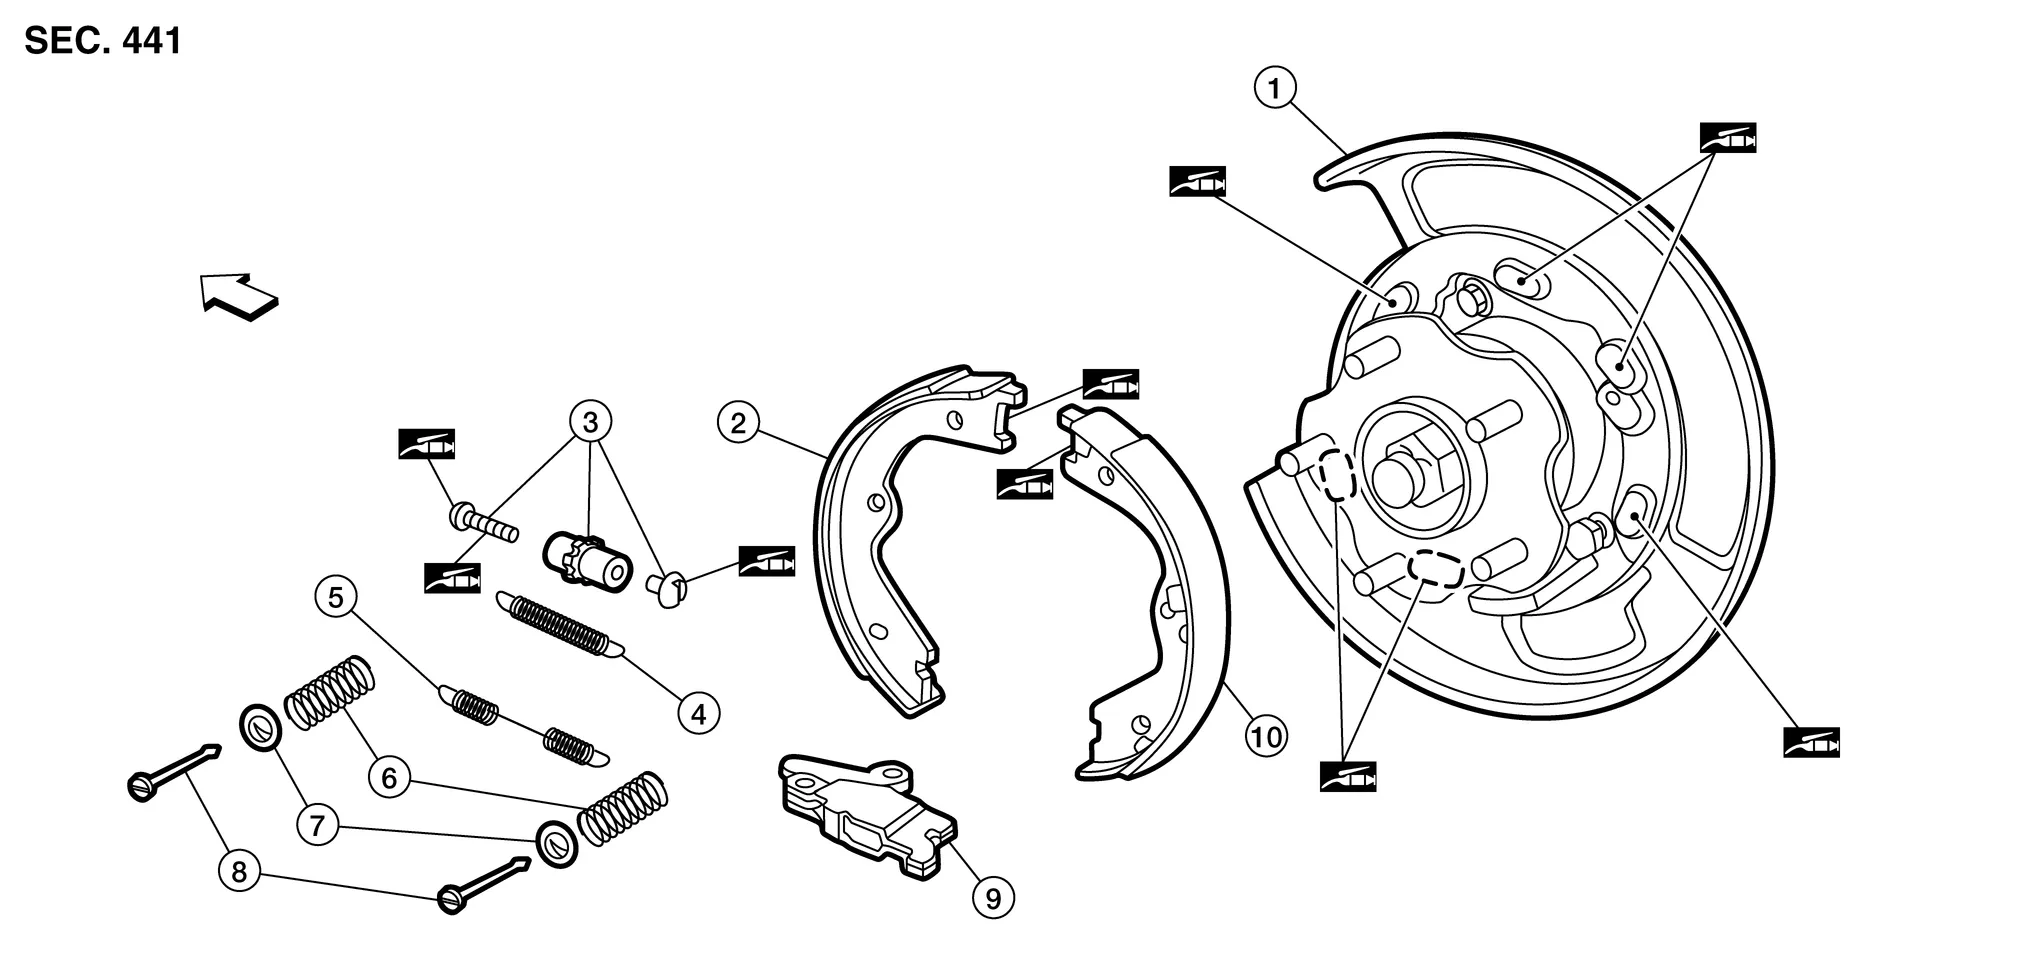
| 1. | Back plate | 2. | Parking brake shoe (front) | 3. | Adjuster |
| 4. | Adjuster spring | 5. | Return spring | 6. | Anti-rattle spring |
| 7. | Retainer | 8. | Anti-rattle pin | 9. | Toggle lever |
| 10. | Parking brake shoe (rear) | Front |  |
Apply PBC (Poly Butyl Cuprysil) grease or silicone-based grease |
REMOVAL
WARNING:
Clean dust on the parking brake shoes with a vacuum dust collector to minimize the hazard of air borne particles or other materials.
Remove rear wheel and tire using power tool. Refer to Removal and Installation.
Remove disc brake rotor. Refer to Removal and Installation.
CAUTION:
Parking brake must be in the completely released position.
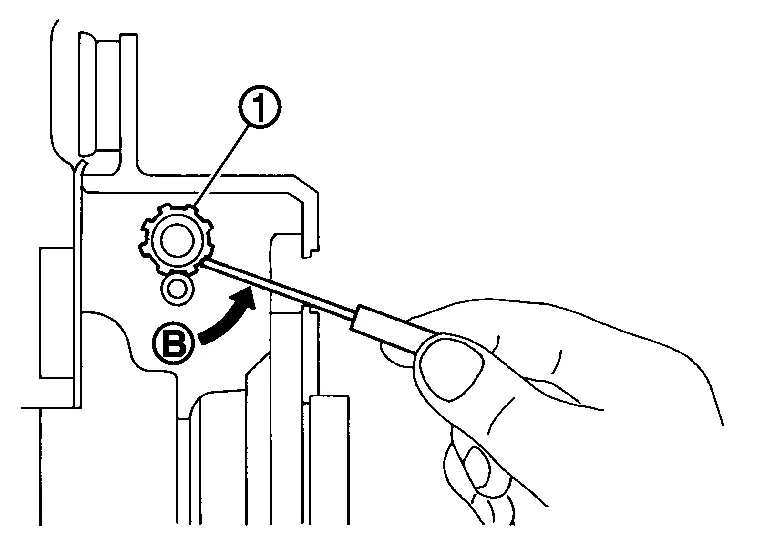
If disc brake rotor cannot be removed, remove as follows:Secure disc brake rotor with wheel nuts and remove adjusting hole plug. Using a suitable tool, rotate adjuster (1) in direction (B) to retract and loosen parking brake shoe.
Remove anti-rattle pins, retainers, anti-rattle springs, adjuster spring and return spring.
CAUTION:
Do not drop the removed parts.
Remove parking brake shoes, adjuster assembly and toggle lever.
CAUTION:
-
The parking brake shoes for the front side are made of different materials from those for the rear side. Do not misidentify them when removing.
-
Do not drop the removed parts.
INSTALLATION
Installation is in the reverse order of removal.
-
Apply PBC (Poly Butyl Cuprysil) grease or silicone-based grease to the back plate and brake shoe.
CAUTION:
The parking brake shoes for the front side are made of different materials from those for the rear side. Do not misidentify them when removing and replacing.
-
Assemble adjusters so that threaded part is shortened when rotating it in the direction shown by arrow.

(A) : For RH brake (B) : For LH brake 
: Front 
: Adjuster shortened -
Shorten adjuster by rotating it.
-
When assembling the adjuster, apply PBC (Poly Butyl Cuprysil) grease or silicone-based grease to threads and pivot.
-
Check parking brake shoe lining and drum inner surface for grease. Wipe off any grease on the surfaces.
INSPECTION AFTER REMOVAL
Brake Lining Thickness Inspection
-
Check thickness (A) of brake lining.

Limit (A) : Refer to Parking Drum Brake.
Disc Brake Rotor Drum Inner Diameter Inspection
-
Check inner diameter (B) of disc brake rotor drum using suitable tool.
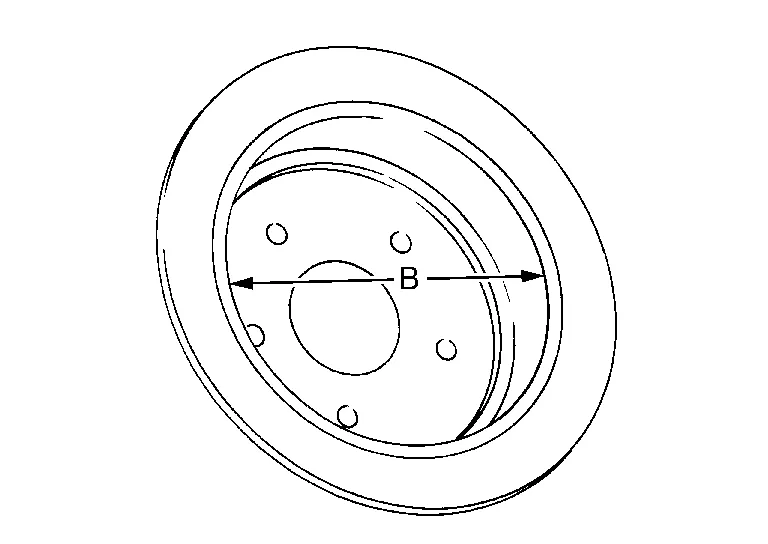
Limit (B) : Refer to Parking Drum Brake.
Other Inspections
-
Check brake lining for excessive wear, damage, and peeling. Replace if necessary.
-
Check parking brake shoe for excessive wear and damage. Replace if necessary.
-
Check anti-rattle pins and retainers for excessive wear, damage and rust. Replace if necessary.
-
Check adjuster spring, anti-rattle spring and return springs for settling, excessive wear, damage, and rust. Replace if necessary.
-
Check adjuster for binding. Replace if necessary.
-
Check toggle lever for excessive wear, damage and rust. Replace if necessary.
-
Visually check inside the disc brake rotor drum for rust, cracks, damage or excessive wear with a suitable tool. Replace if necessary.
ADJUSTMENT
Adjust parking brake pedal stroke. Refer to Inspection and Adjustment.
Rotate disc brake rotor with parking brake pedal released and check that there is no drag.
CAUTION:
If any drag is found, verify the parking brake components are installed and adjusted correctly.
 Parking Brake Switch
Removal and Installation
REMOVALRemove lower instrument panel LH. Refer to Removal and Installation.
Place fuse box aside.
Disconnect harness connector from parking brake switch...
 Parking Brake System :: Service Data and Specifications (sds). Service Data and Specifications (sds)
Parking Drum Brake
Unit: mm (in) Item Limit
Brake lining
Thickness
3.33 (0.131)
Wear thickness
1.5 (0.059)
Drum
Inner diameter
190 (7...
Other information:
Nissan Murano (Z52) 2015-2024 Service Manual: Preparation. Preparation
..
Nissan Murano (Z52) 2015-2024 Service Manual: Body Side Trim
Exploded View 1. Center pillar upper finisher 2. Front door welt 3. Front pillar finisher 4. Dash side finisher 5. Front outer kicking plate 6. Front inner kicking plate 7. Center pillar lower finisher 8. Rear door welt 9...
Categories
- Manuals Home
- Nissan Murano Owners Manual
- Nissan Murano Service Manual
- System malfunction
- High Beam Assist (if so equipped)
- Memory storage function (key-link)
- New on site
- Most important about car
Unfastening the seat belts. Checking seat belt operation
Unfastening the seat belts
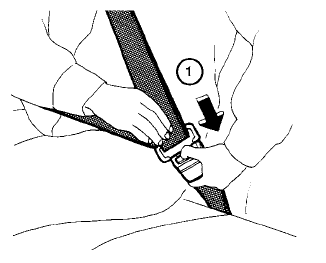
To unfasten the seat belt, press the button
on the buckle  . The seat belt
automatically
retracts.
. The seat belt
automatically
retracts.