
Nissan Murano: Instruments and controls / Interior lights
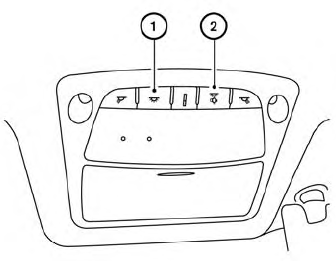
- When the ON switch
 is
pushed, the footwell
lights (if so equipped), step lights (if so
equipped), map lights and rear personal
lights will automatically turn on and stay on
for a period of time when:
is
pushed, the footwell
lights (if so equipped), step lights (if so
equipped), map lights and rear personal
lights will automatically turn on and stay on
for a period of time when: - The doors are unlocked by the Intelligent Key, a key or the request switch (if so equipped) while all doors are closed and the ignition switch is in the OFF position.
- The driver’s door is opened and then closed while the ignition switch is in the OFF position.
- Individually pushed.
When the OFF switch  is pushed,
the interior
lights will illuminate when pushed.
When the DOOR/OFF switch is pushed and
the ON switch is pushed, all of the lights will
come on.
is pushed,
the interior
lights will illuminate when pushed.
When the DOOR/OFF switch is pushed and
the ON switch is pushed, all of the lights will
come on.
NOTE:
The footwell lights (if so equipped) and step lights (if so equipped) illuminate when the driver and passenger doors are open regardless of the interior light switch position. These lights will turn off automatically after a period of time while doors are open to prevent the battery from becoming discharged.
CAUTION
Do not use for extended periods of time with the engine stopped. This could result in a discharged battery.
 Panoramic sunshade
The panoramic sunshade operates when
the ignition switch is in theONposition.The
sunshade switch is located near the roof
console. When opening or closing the sunshade
the switch need not be held...
 Console light (if so equipped). Map lights
Console light
The console light will turn on whenever the
parking lights or headlights are illuminated.
The console light brightness can be adjusted
with the illumination brightness
control in the vehicle information display...
Other information:
Nissan Murano (Z52) 2015-2024 Service Manual: U1000 Can Comm Circuit
DTC Description Refer to System Description.DTC DETECTION LOGIC DTC No. CONSULT screen terms (Trouble diagnosis content) DTC detection condition U1000 CAN COMM CIRCUIT (CAN COMM CIRCUIT) Diagnosis condition When ignition switch is ON. Signal (terminal) - Threshold When combination meter is not transmitting or receiving CAN communication signals...
Nissan Murano (Z52) 2015-2024 Service Manual: Water Pump
Exploded View 1. Timing chain tensioner (primary) 2. Valve timing control cover gasket (bank 1) 3. Valve timing control cover (bank 1) 4. Water pump cover 5. O-ring 6. O-ring (Identify with white mark) 7. Water pump A. Apply engine oil B...
Categories
- Manuals Home
- Nissan Murano Owners Manual
- Nissan Murano Service Manual
- How to enable/disable the LDW system
- Memory storage function (key-link)
- Shift lock release
- New on site
- Most important about car
Fuel gauge
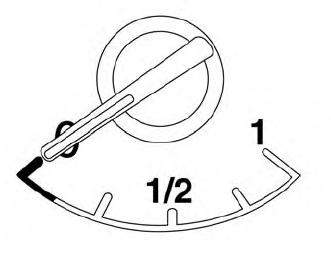
The gauge indicates the approximate fuel level in the tank.
The gauge may move slightly during braking, turning, acceleration, or going up or down hills.
The gauge needle returns to 0 (Empty) after the ignition switch is placed in the OFF position.
