
Nissan Murano: Instrument Panel :: Unit Disassembly and Assembly / Glove Box Assembly and Housing
Remove glove box assembly and housing. Refer Removal and Installation.
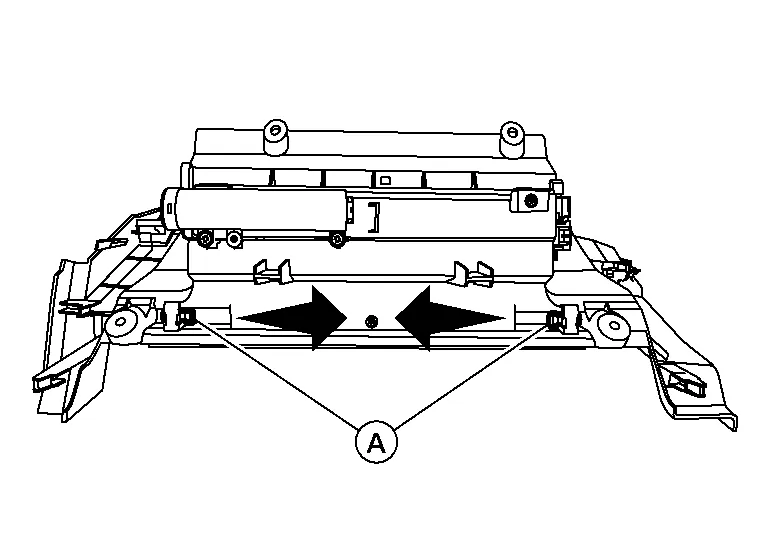
Remove pins (A) as shown.
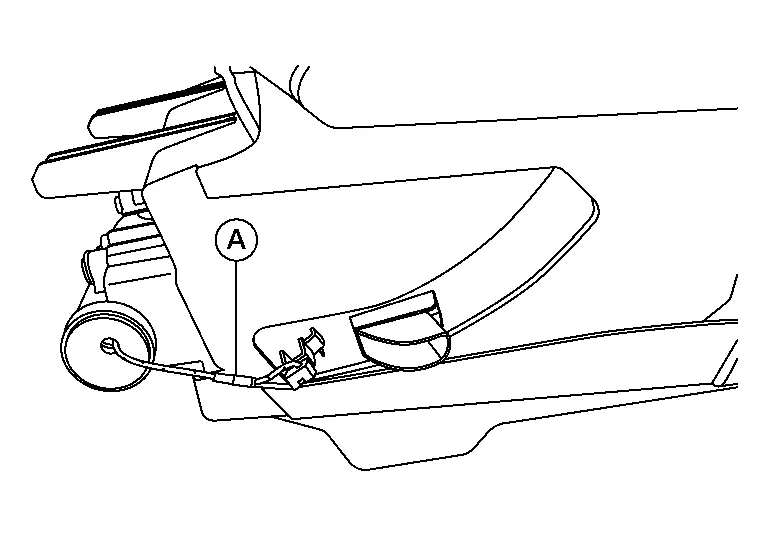
Release tensioner (A).
Release pawls and remove glove box lid as shown.
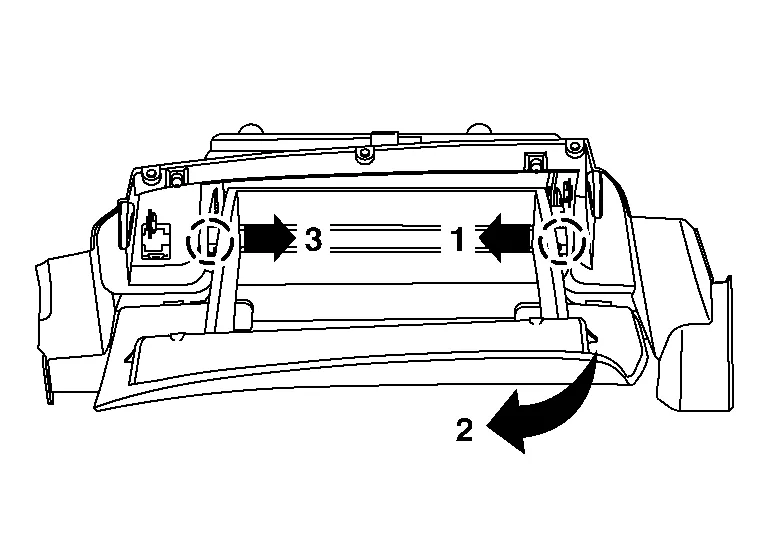
 : Pawl
ASSEMBLY
Assembly is in the reverse order of disassembly.
 Center Console Assembly
Exploded View
1.
Center console side finisher (RH)
2.
Center console side finisher (LH)
3.
Center console lower side finisher (LH)
4.
Center console reinforcement bracket
5...
 Seat :: Precaution. Precautions
Precaution for Supplemental Restraint System (SRS) "AIR BAG" and "SEAT BELT PRE-TENSIONER"
The Supplemental Restraint System such as “AIR BAG” and “SEAT BELT PRE-TENSIONER”, used along with a front seat belt, helps to reduce the risk or severity of injury to the driver and front passenger for certain types of collisions...
Other information:
Nissan Murano (Z52) 2015-2024 Owners Manual: Exhaust gas (carbon monoxide)
WARNING Do not breathe exhaust gases; they contain colorless and odorless carbon monoxide. Carbon monoxide is dangerous. It can cause unconsciousness or death. If you suspect that exhaust fumes are entering the vehicle, drive with all windows fully open, and have the vehicle inspected immediately...
Nissan Murano (Z52) 2015-2024 Service Manual: Relay Control System
System Description SYSTEM DIAGRAMSystem DescriptionIPDM E/R activates the internal control circuit to perform the relay ON-OFF control according to the input signals from various sensors and the request signals received from control units via CAN communication...
Categories
- Manuals Home
- Nissan Murano Owners Manual
- Nissan Murano Service Manual
- Shift lock release
- Fuel recommendation
- System malfunction
- New on site
- Most important about car
LATCH (Lower Anchors and Tethers for CHildren) system
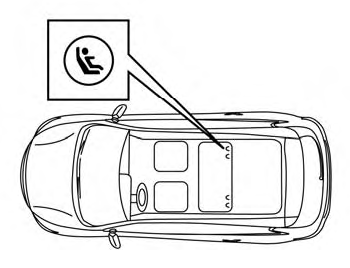
LATCH system lower anchor locations - bench seat
Your vehicle is equipped with special anchor points that are used with LATCH system compatible child restraints. This system may also be referred to as the ISOFIX or ISOFIX compatible system. With this system, you do not have to use a vehicle seat belt to secure the child restraint unless the combined weight of the child and child restraint exceeds 65 lbs. (29.5 kg). If the combined weight of the child and child restraint is greater than 65 lbs. (29.5 kg), use the vehicle’s seat belt (not the lower anchors) to install the child restraint. Be sure to follow the child restraint manufacturer’s instructions for installation.
