Nissan Murano: Basic Inspection / Cvt Fluid Cooler System
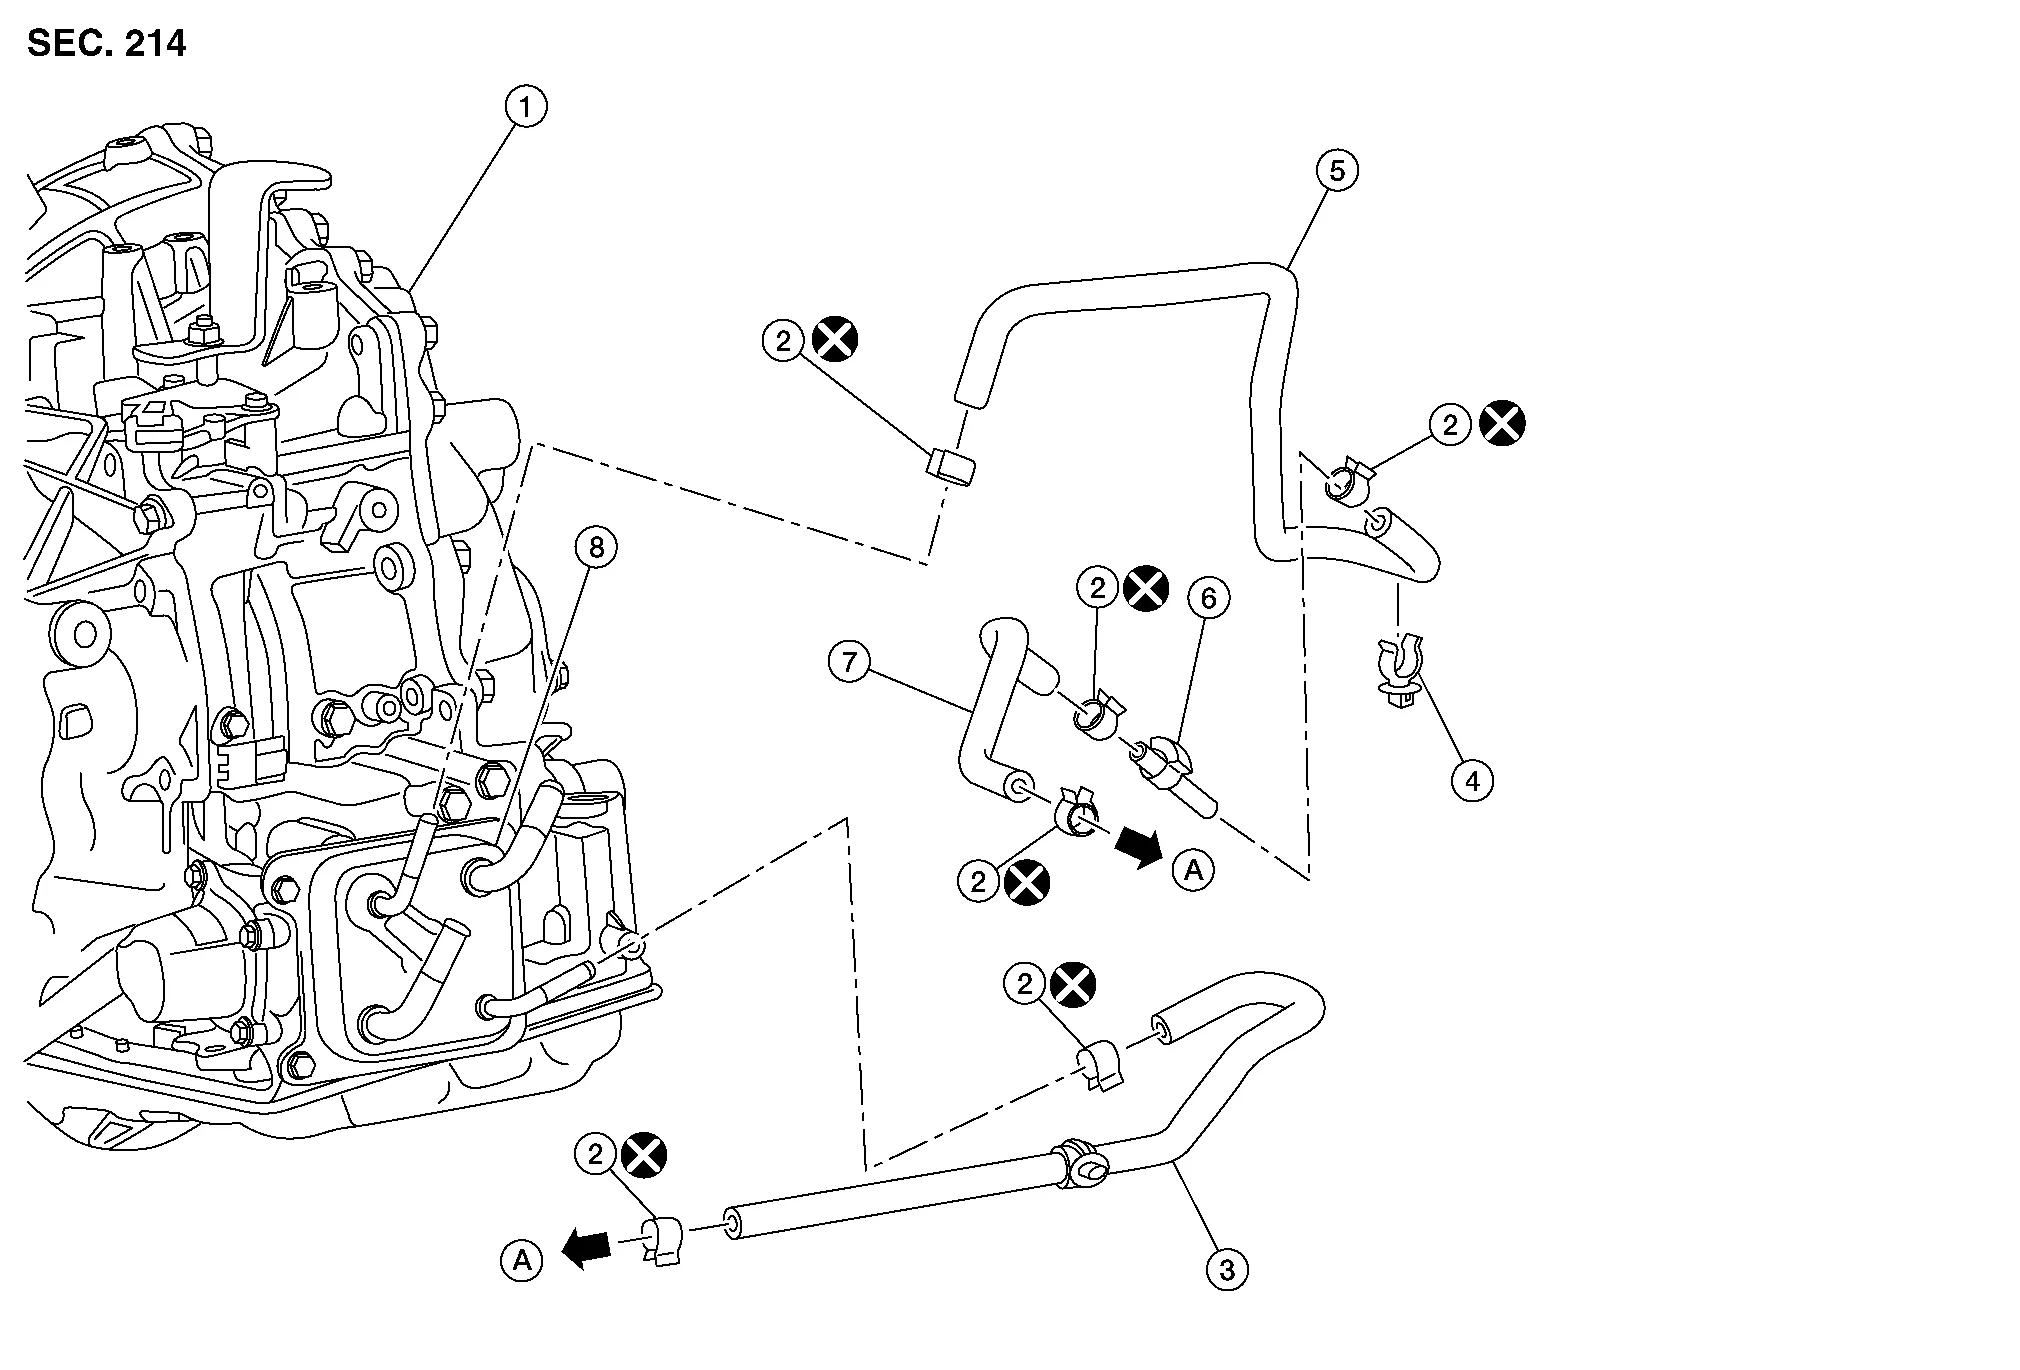
 |
Transaxle assembly |  |
Hose clamp |  |
CVT fluid cooler hose A |
 |
Hose clip |  |
CVT fluid cooler hose B |  |
Connector tube |
 |
CVT fluid cooler hose C |  |
Oil warmer | ||
 |
To radiator. Refer to Exploded View. | ||||
 |
: Always replace after every disassembly. | ||||
CAUTION:
Metal debris and friction material may become trapped in the radiator, cooling hoses, bypass valve or external CVT fluid cooler (if equipped). This debris can contaminate a newly serviced transmission, control valve or torque converter. In severe cases this debris can block or restrict flow and may cause damage to a newly serviced CVT.
Always perform a CVT Fluid Cooler Flush after any one of the following:
-
CVT (transaxle) assembly overhaul, internal repair or replacement
-
Control valve replacement
-
Torque converter replacement
CVT FLUID COOLER CLEANING PROCEDURE
CAUTION:
-
Wear safety glasses and rubber gloves when spraying the Transmission Cooler Cleaner.
-
Spray Cooler Cleaner only in areas with adequate ventilation.
-
Avoid contact with eyes and skin.
-
Do not breathe vapors or mist from spray.
Remove front under cover. Refer to Removal and Installation.
Position an oil drain pan under the CVT fluid cooler.
Position an oil drain pan under the CVT oil warmer.
Disconnect the CVT fluid cooler hose A and CVT fluid cooler hose B from the CVT oil warmer. Refer to Exploded View.
CAUTION:
Do not reuse hose clamps.
 NOTE:
NOTE:
-
If rubber material from cooler hose remains on the steel tube or fitting, clean steel tube and replace rubber hose.
-
The hoses removed from the CVT fluid warmer will be flushed first in one direction and then the other.
Allow any transmission fluid that remains in the CVT fluid cooler hoses to drain into the oil drain pan.
Flush CVT fluid cooler and hoses using the following steps:Attach a suitable hose (A) to the CVT fluid cooler hose (1).
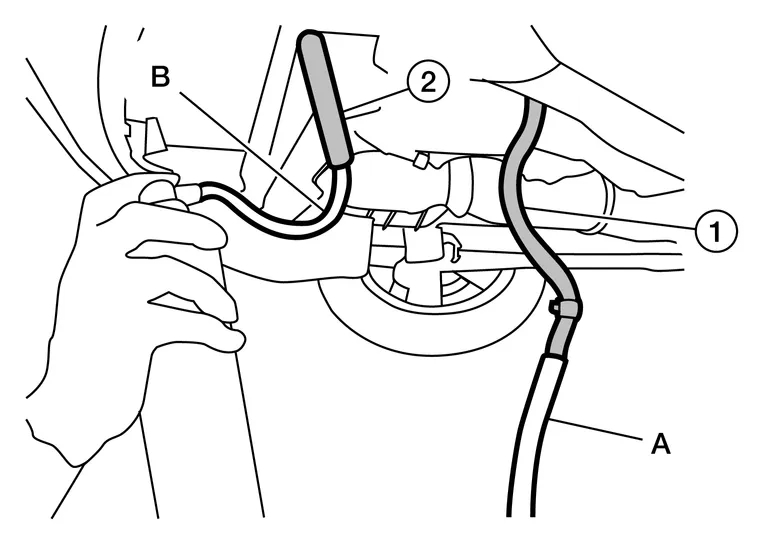
| Hose inside diameter | : 16mm (5/8 in) |
CAUTION:
-
Wear safety glasses and rubber gloves when spraying the Transmission Cooler Cleaner.
-
Spray Cooler Cleaner only in areas with adequate ventilation.
-
Avoid contact with eyes and skin.
-
Do not breathe vapors or mist from spray.
NOTE:
Always check with the Parts Department for latest parts information.
Holding the can and hose as high as possible, spray Transmission Cooler Cleaner in a continuous stream into the CVT fluid cooler inlet side hose until it flows from the outlet side hose for five seconds.Attach a suitable hose over the end of the CVT fluid cooler hose (2) that was used as the flush inlet.
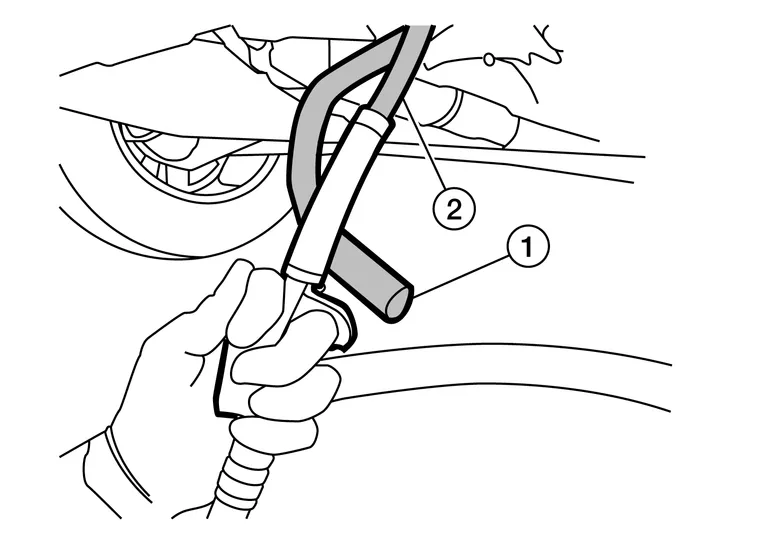
| Hose inside diameter | : 16mm (5/8 in) |
Blow compressed air through CVT fluid cooler hose (2) for 10 seconds to force remaining fluid out of CVT fluid cooler hose (1).
| Air pressure | : 490-883 kPa (5-9 kg/cm2, 70-128 psi) |
Repeat steps 6-8 one additional time, then proceed to step 10.
Reverse flush the CVT fluid cooler. Install Transmission Cooler Cleaner to CVT fluid cooler hose (1), then repeat steps 6-8 twice.
Install CVT fluid cooler hose A and CVT fluid cooler hose B to the CVT oil warmer. Refer to Exploded View.
CAUTION:
Do not reuse hose clamps.
Fill the transaxle assembly with CVT fluid. Refer to Replacement.
 Calibration of G Sensor
Description
TCM stores calibration data (inherent characteristic value) of G sensor to provide accurate control. Therefore, it is required to perform calibration of decel G sensor after the following work is performed...
 Stall Test
Work Procedure
INSPECTIONCheck the engine oil level. Replenish if necessary. Refer to Inspection.
Check for leak of the CVT fluid. Refer to Inspection...
Other information:
Nissan Murano (Z52) 2015-2024 Service Manual: Tcs Function
System Description SYSTEM DIAGRAM Wheel spin status of drive wheel is detected by wheel sensor of 4 wheels. Engine output and transmission shift status are controlled so that slip rate of drive wheels is in appropriate level. When wheel spin occurs on drive wheel, ABS actuator and electric unit (control unit) performs brake force control of LH and RH drive wheels (applies brake force by increasing brake fluid pressure of drive wheel) and decreases engine torque by engine torque control...
Nissan Murano (Z52) 2015-2024 Service Manual: Transaxle Assembly
Exploded View Transaxle assembly Terminal cord assembly Control valve Bracket O-ring Oil strainer assembly Oil pan gasket Oil pan Drain plug Drain plug gasket Magnet Spring washer Manual plate Lip seal Snap ring Overflow plug O-ring : Always replace after every disassembly : N·m (kg-m, ft-lb) : N·m (kg-m, in-lb) : Apply CVT fluid : Apply petroleum jelly Reduction gear assembly Differential assembly Clip Lubrication tube Baffle plate Converter housing Baffle plate Snap ring Drive sprocket Driven sprocket Oil pump chain O-ring Baffle plate (Chain cover) Thrust bearing Thrust bearing race Dummy cover Thrust washer Chain guide Bracket Oil pump O-ring Transaxle case : Always replace after every disassembly...
Categories
- Manuals Home
- Nissan Murano Owners Manual
- Nissan Murano Service Manual
- Power Steering Fluid (PSF)
- Vehicle Dynamic Control (VDC) OFF switch
- Jacking up vehicle and removing the damaged tire
- New on site
- Most important about car
Front manual seat adjustment (if so equipped)
Your vehicle seats can be adjusted manually. For additional information about adjusting the seats, refer to the steps outlined in this section.
Forward and backward
