Nissan Murano: Exterior :: Removal and Installation / Back Door Outer Finisher
Nissan Murano (Z52) 2015-2024 Service Manual / Body Exterior, Doors, Roof & Vehicle Security / Exterior :: Removal and Installation / Back Door Outer Finisher
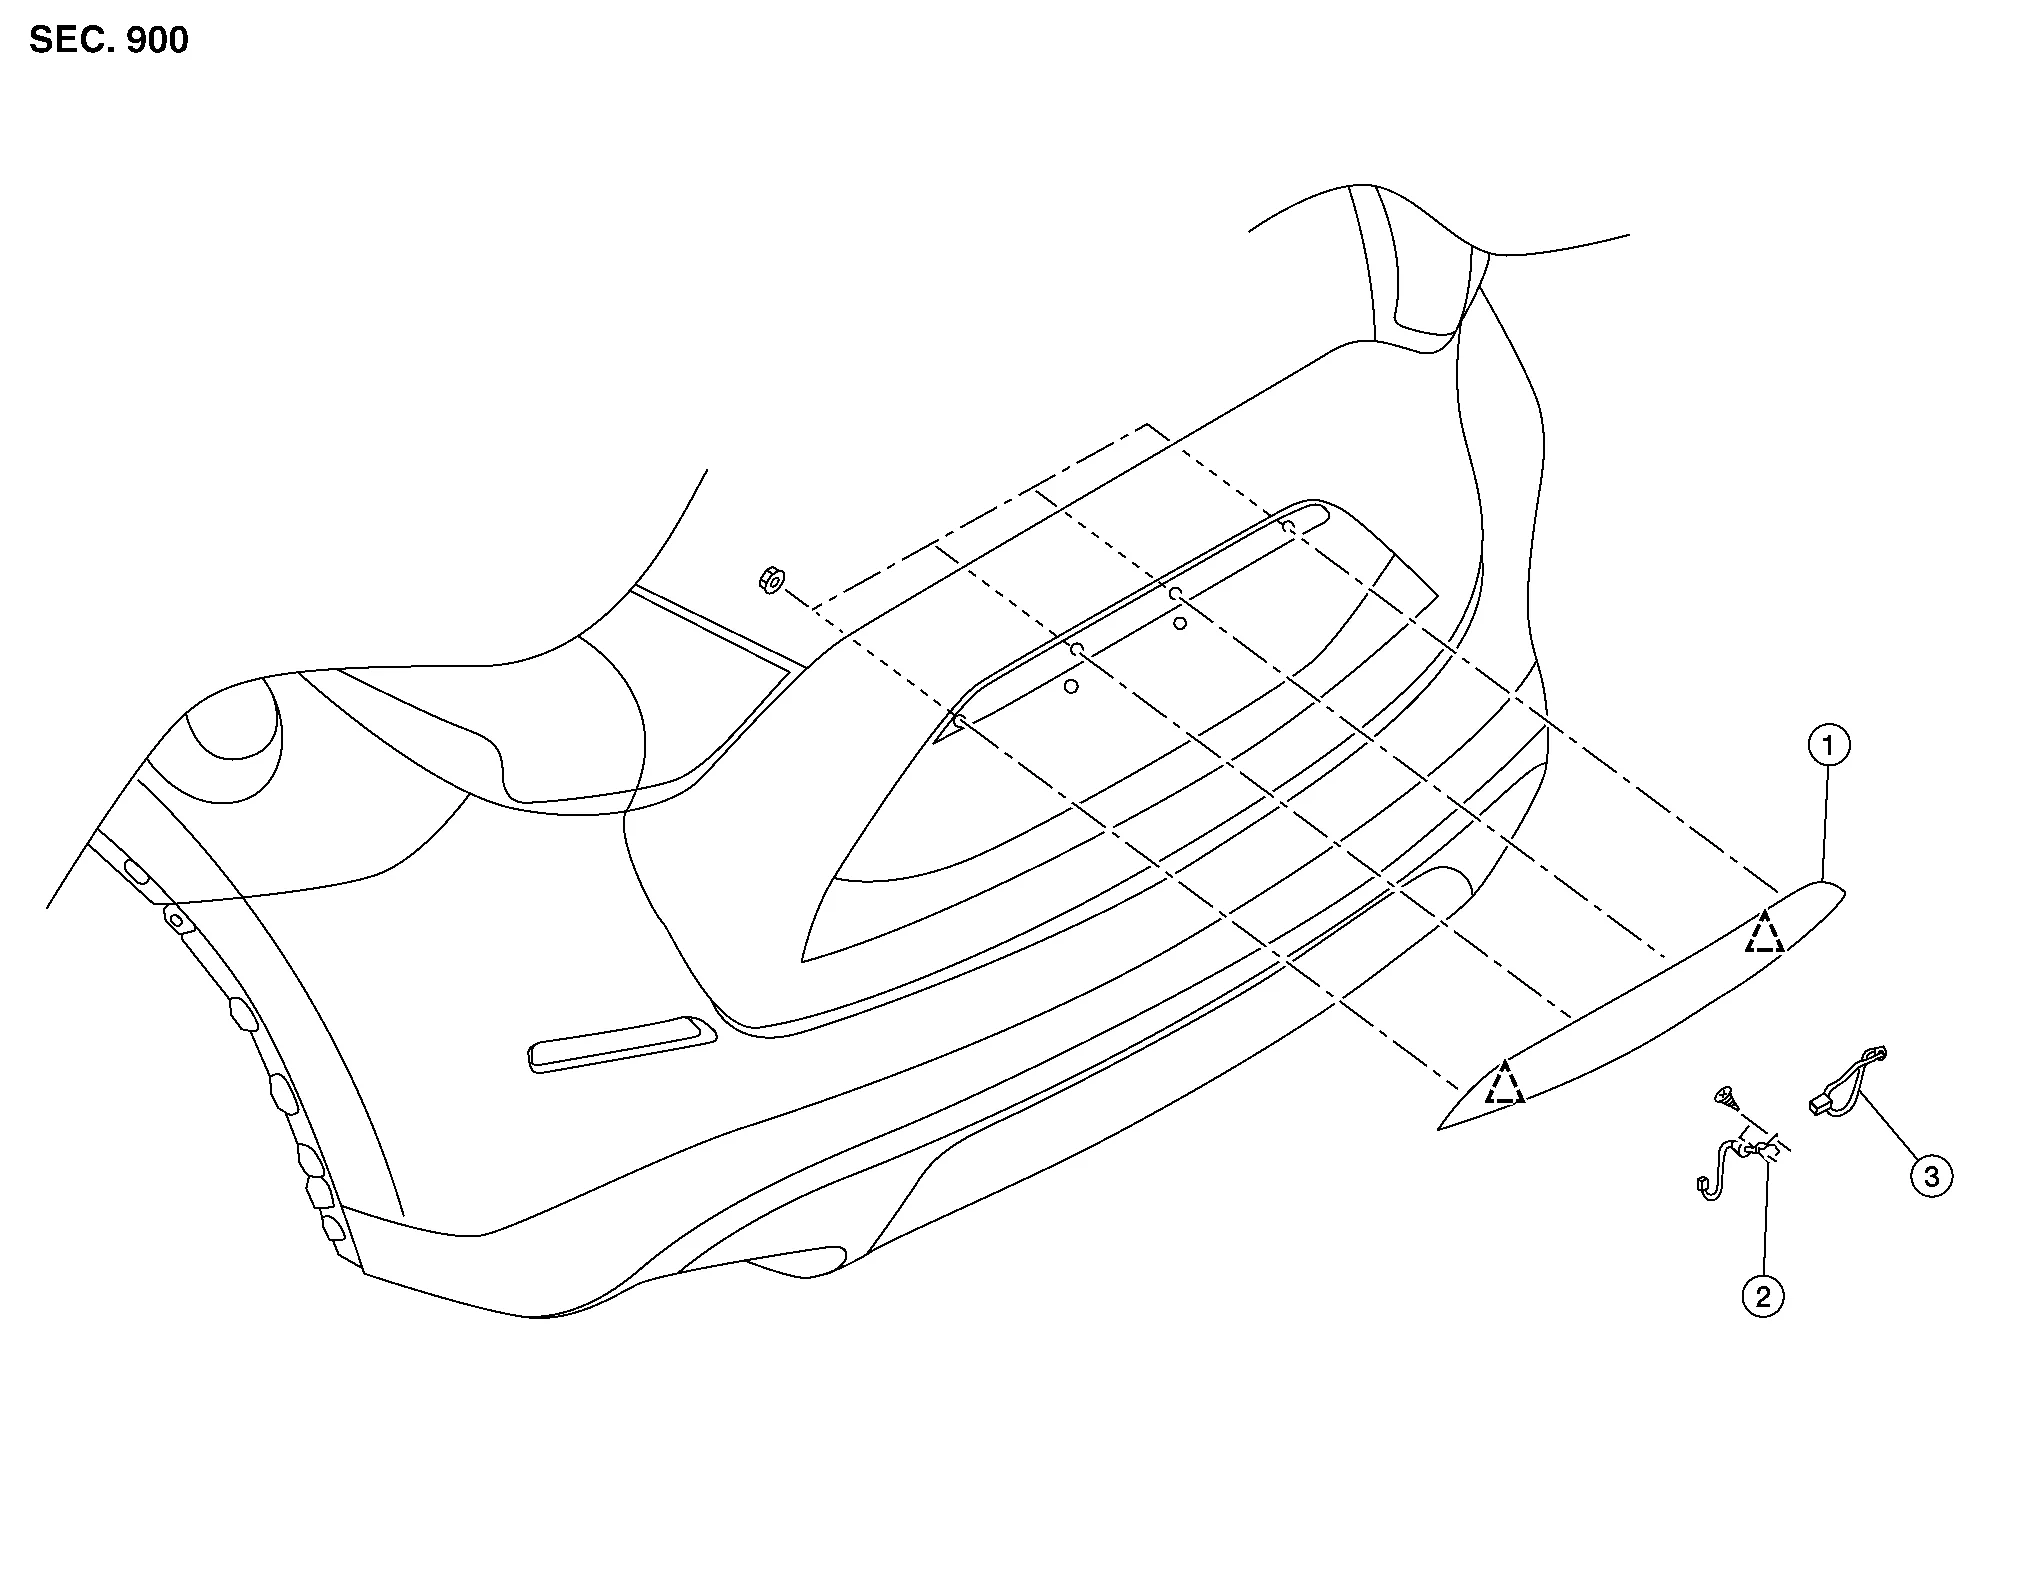
| 1. | Back door outer finisher | 2. | Rear view camera | 3. | Back door request switch |
 |
Clip | ||||
REMOVAL
Remove back door lower finisher. Refer to Removal and Installation.
Disconnect the harness connectors from back door request switch and rear view camera.
Remove back door outer finisher nuts.
Release clips and remove the back door outer finisher.
INSTALLATION
Installation is in the reverse order of removal.
CAUTION:
-
When installing back door finisher, check that clips are securely placed into body panel holes.
-
Perform camera image calibration (with intelligent around view monitor). Refer to Description (WITH DISPLAY AUDIO) or Description (WITH NAVIGATION).
 Side Air Spoiler
Exploded View
1.
Rear spoiler
2.
Side air spoiler
Clip
Removal and Installation
REMOVALRemove luggage side upper finisher. Refer to Removal and Installation...
 Emblem
Exploded View
1.
Emblem A
2.
Emblem B
3.
Emblem L (if equipped)
4.
Emblem C/D/E/F/G/H/J/K (if equipped)
Removal and Installation
REMOVALRemove the emblem from the panel heating with a heat gun...
Other information:
Nissan Murano (Z52) 2015-2024 Service Manual: P2237 A/f Sensor 1
DTC Description DTC DETECTION LOGICTo judge malfunctions, the diagnosis checks that the A/F signal computed by ECM from the A/F sensor 1 signal fluctuates according to fuel feedback control. The A/F signal computed by ECM from the A/F sensor 1 signal is constantly in a range other than approx...
Nissan Murano (Z52) 2015-2024 Service Manual: Side Air Spoiler
Exploded View 1. Rear spoiler 2. Side air spoiler Clip Removal and Installation REMOVALRemove luggage side upper finisher. Refer to Removal and Installation. Remove rear combination lamp. Refer to Removal and Installation. Remove side air spoiler bolts...
Categories
- Manuals Home
- Nissan Murano Owners Manual
- Nissan Murano Service Manual
- Intelligent Forward Collision Warning (I-FCW)
- Passenger compartment
- Shift lock release
- New on site
- Most important about car
Front manual seat adjustment (if so equipped)
Your vehicle seats can be adjusted manually. For additional information about adjusting the seats, refer to the steps outlined in this section.
Forward and backward

Copyright © 2026 www.nimurano.com