Nissan Murano: Dtc/circuit Diagnosis / P0447 Evap Canister Vent Control Valve
DTC DETECTION LOGIC
An improper voltage signal is sent to ECM through EVAP canister vent control valve.
| DTC |
CONSULT screen terms (Trouble diagnosis content) |
DTC detection condition | |
| P0447 |
VENT CONTROL VALVE (Evaporative emission system vent control circuit open) |
Diagnosis condition | Start engine and let it idle |
| Signal (terminal) | Voltage signal transmitted from EVAP canister vent control valve to ECM | ||
| Threshold | An improper voltage signal is sent to ECM through EVAP canister vent control valve | ||
| Diagnosis delay time | — | ||
POSSIBLE CAUSE
-
Harness or connectors
(The valve circuit is open or shorted.)
-
EVAP canister vent control valve
-
Hoses
(Hoses are connected incorrectly or clogged.)
FAIL-SAFE
Not applicable
PRECONDITIONING
If DTC Confirmation Procedure has been previously conducted, always perform the following before conducting the next test.
-
Turn ignition switch OFF and wait at least 10 seconds.
-
Turn ignition switch ON.
-
Turn ignition switch OFF and wait at least 10 seconds.
TESTING CONDITION:
Before performing the following procedure, confirm battery voltage is more than 11 V at idle.
>>
GO TO 2.
PERFORM DTC CONFIRMATION PROCEDURE
-
Start engine and wait at least 8 seconds.
-
Check 1st trip DTC.
Is 1st trip DTC detected?
YES>>Proceed to Diagnosis Procedure.
NO>>To check malfunction symptom before repair: Refer to Intermittent Incident.
NO>>Confirmation after repair: INSPECTION END
INSPECTION START
Will CONSULT be used?
Will CONSULT be used?
YES>>GO TO 2.
NO>>GO TO 3.
CHECK EVAP CANISTER VENT CONTROL VALVE CIRCUIT
 With CONSULT
-
Turn ignition switch OFF and then ON.
-
Select “VENT CONTROL/V” in “ACTIVE TEST” mode with CONSULT.
-
Touch “ON/OFF” on CONSULT screen.
-
Check for operating sound of the valve.
Clicking sound should be heard.
Is the inspection result normal?
YES>>GO TO 6.
NO>>GO TO 3.
CHECK EVAP CANISTER VENT CONTROL VALVE POWER SUPPLY
-
Turn ignition switch OFF.
-
Disconnect EVAP canister vent control valve harness connector.
-
Turn ignition switch ON.
-
Check the voltage between EVAP canister vent control valve harness connector and ground.
EVAP canister vent control valve Ground Voltage Connector Terminal B31 1 Ground Battery voltage
Is the inspection result normal?
YES>>GO TO 4.
NO>>Perform the trouble diagnosis for power supply circuit.
CHECK EVAP CANISTER VENT CONTROL VALVE OUTPUT SIGNAL CIRCUIT
-
Turn ignition switch OFF.
-
Disconnect ECM harness connector.
-
Check the continuity between ECM harness connector and EVAP canister vent control valve harness connector.
Refer to Wiring Diagram.
EVAP canister vent control valve ECM Continuity Connector Terminal Connector Terminal B31 2 E32 141 Existed -
Also check harness for short to ground and short to power.
Is the inspection result normal?
YES>>GO TO 5.
NO>>Repair open circuit, short to ground or short to power in harness or connectors.
CHECK RUBBER TUBE FOR CLOGGING
-
Disconnect rubber tube connected to EVAP canister vent control valve.
-
Check the rubber tube for clogging.
Is the inspection result normal?
YES>>GO TO 6.
NO>>Clean the rubber tube using an air blower.
CHECK EVAP CANISTER VENT CONTROL VALVE
Check EVAP canister vent control valve. Refer to Component Inspection.
Is the inspection result normal?
YES>>INSPECTION END
NO>>Replace EVAP canister vent control valve. Refer to Removal and Installation.
CHECK EVAP CANISTER VENT CONTROL VALVE-1
-
Disconnect hose from (A), (B), and (C) with remaining harness connector connected.
-
Block port (B).
-
Blow air into port (A) and check that it flows freely out of port (C).

Is sufficient air flowed from port (C)?
YES>>GO TO 2.
NO>>Replace EVAP canister vent control valve. Refer to Removal and Installation.
CHECK EVAP CANISTER VENT CONTROL VALVE-2
With CONSULT
-
Turn iginition switch ON.
-
Perform “VENT CONTROL/V” in “ACTIVE TEST” mode of “ENGINE” using CONSULT and select "ON" to close EVAP canister vent control valve.
-
Block port (B).
-
Blow air into port (A) and check that where is leakage point of air.
Where is leakage point?
YES>>Replace EVAP canister vent control valve. Refer to Removal and Installation.
NO>>GO TO 3.
NO>>INSPECTION END
CHECK EVAP CANISTER VENT CONTROL VALVE-3
Visually check connection portion between EVAP canister vent control valve and EVAP canister for cracks and damage.
Is the inspection result normal?
YES>>Replace EVAP canister and EVAP canister vent control valve. Refer to Removal and Installation.
NO>>Replace EVAP canister. Refer to Removal and Installation.
 P0444 Evap Canister Purge Volume Control Solenoid Valve
DTC Description
DTC DETECTION LOGIC
An excessively low voltage signal is sent to ECM through the valve.
An excessively high voltage signal is sent to ECM through the valve...
 P0448 Evap Canister Vent Control Valve
DTC Description
DTC DETECTION LOGICEVAP canister vent control valve remains closed under specified driving conditions. DTC
CONSULT screen terms
(Trouble diagnosis content)
DTC detection condition
P0448
VENT CONTROL VALVE
(Evaporative emission system vent control circuit shorted)
Diagnosis condition
—
Signal (terminal)
—
Threshold
EVAP canister vent control valve remains closed under specified driving conditions
Diagnosis delay time
—
POSSIBLE CAUSE
EVAP canister vent control valve
EVAP control system pressure sensor and the circuit
Blocked rubber tube to EVAP canister vent control valve
EVAP canister is saturated with water
FAIL-SAFENot applicable
DTC Confirmation Procedure
PRECONDITIONING
If DTC Confirmation Procedure has been previously conducted, always perform the following before conducting the next test...
Other information:
Nissan Murano (Z52) 2015-2024 Service Manual: Power Window Control System :: Preparation. Preparation
..
Nissan Murano (Z52) 2015-2024 Owners Manual: Difference between predicted and actual distances
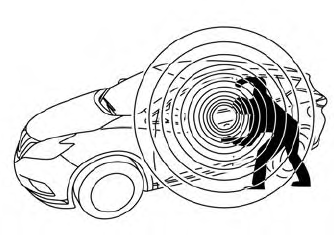
The displayed guidelines and their locations on the ground are for approximate reference only. Objects on uphill or downhill surfaces or projecting objects will be actually located at distances different from those displayed in the monitor relative to the guidelines (refer to illustrations)...
Categories
- Manuals Home
- Nissan Murano Owners Manual
- Nissan Murano Service Manual
- Rear bench seat adjustment
- Settings
- Checking engine oil level
- New on site
- Most important about car
Vehicle security system
Your vehicle has two types of security systems:
Vehicle security system NISSAN Vehicle Immobilizer SystemThe vehicle security system provides visual and audible alarm signals if someone opens the doors, liftgate or the hood when the system is armed. It is not, however, a motion detection type system that activates when a vehicle is moved or when a vibration occurs.