Nissan Murano: Mirrors :: Removal and Installation / Inside Mirror
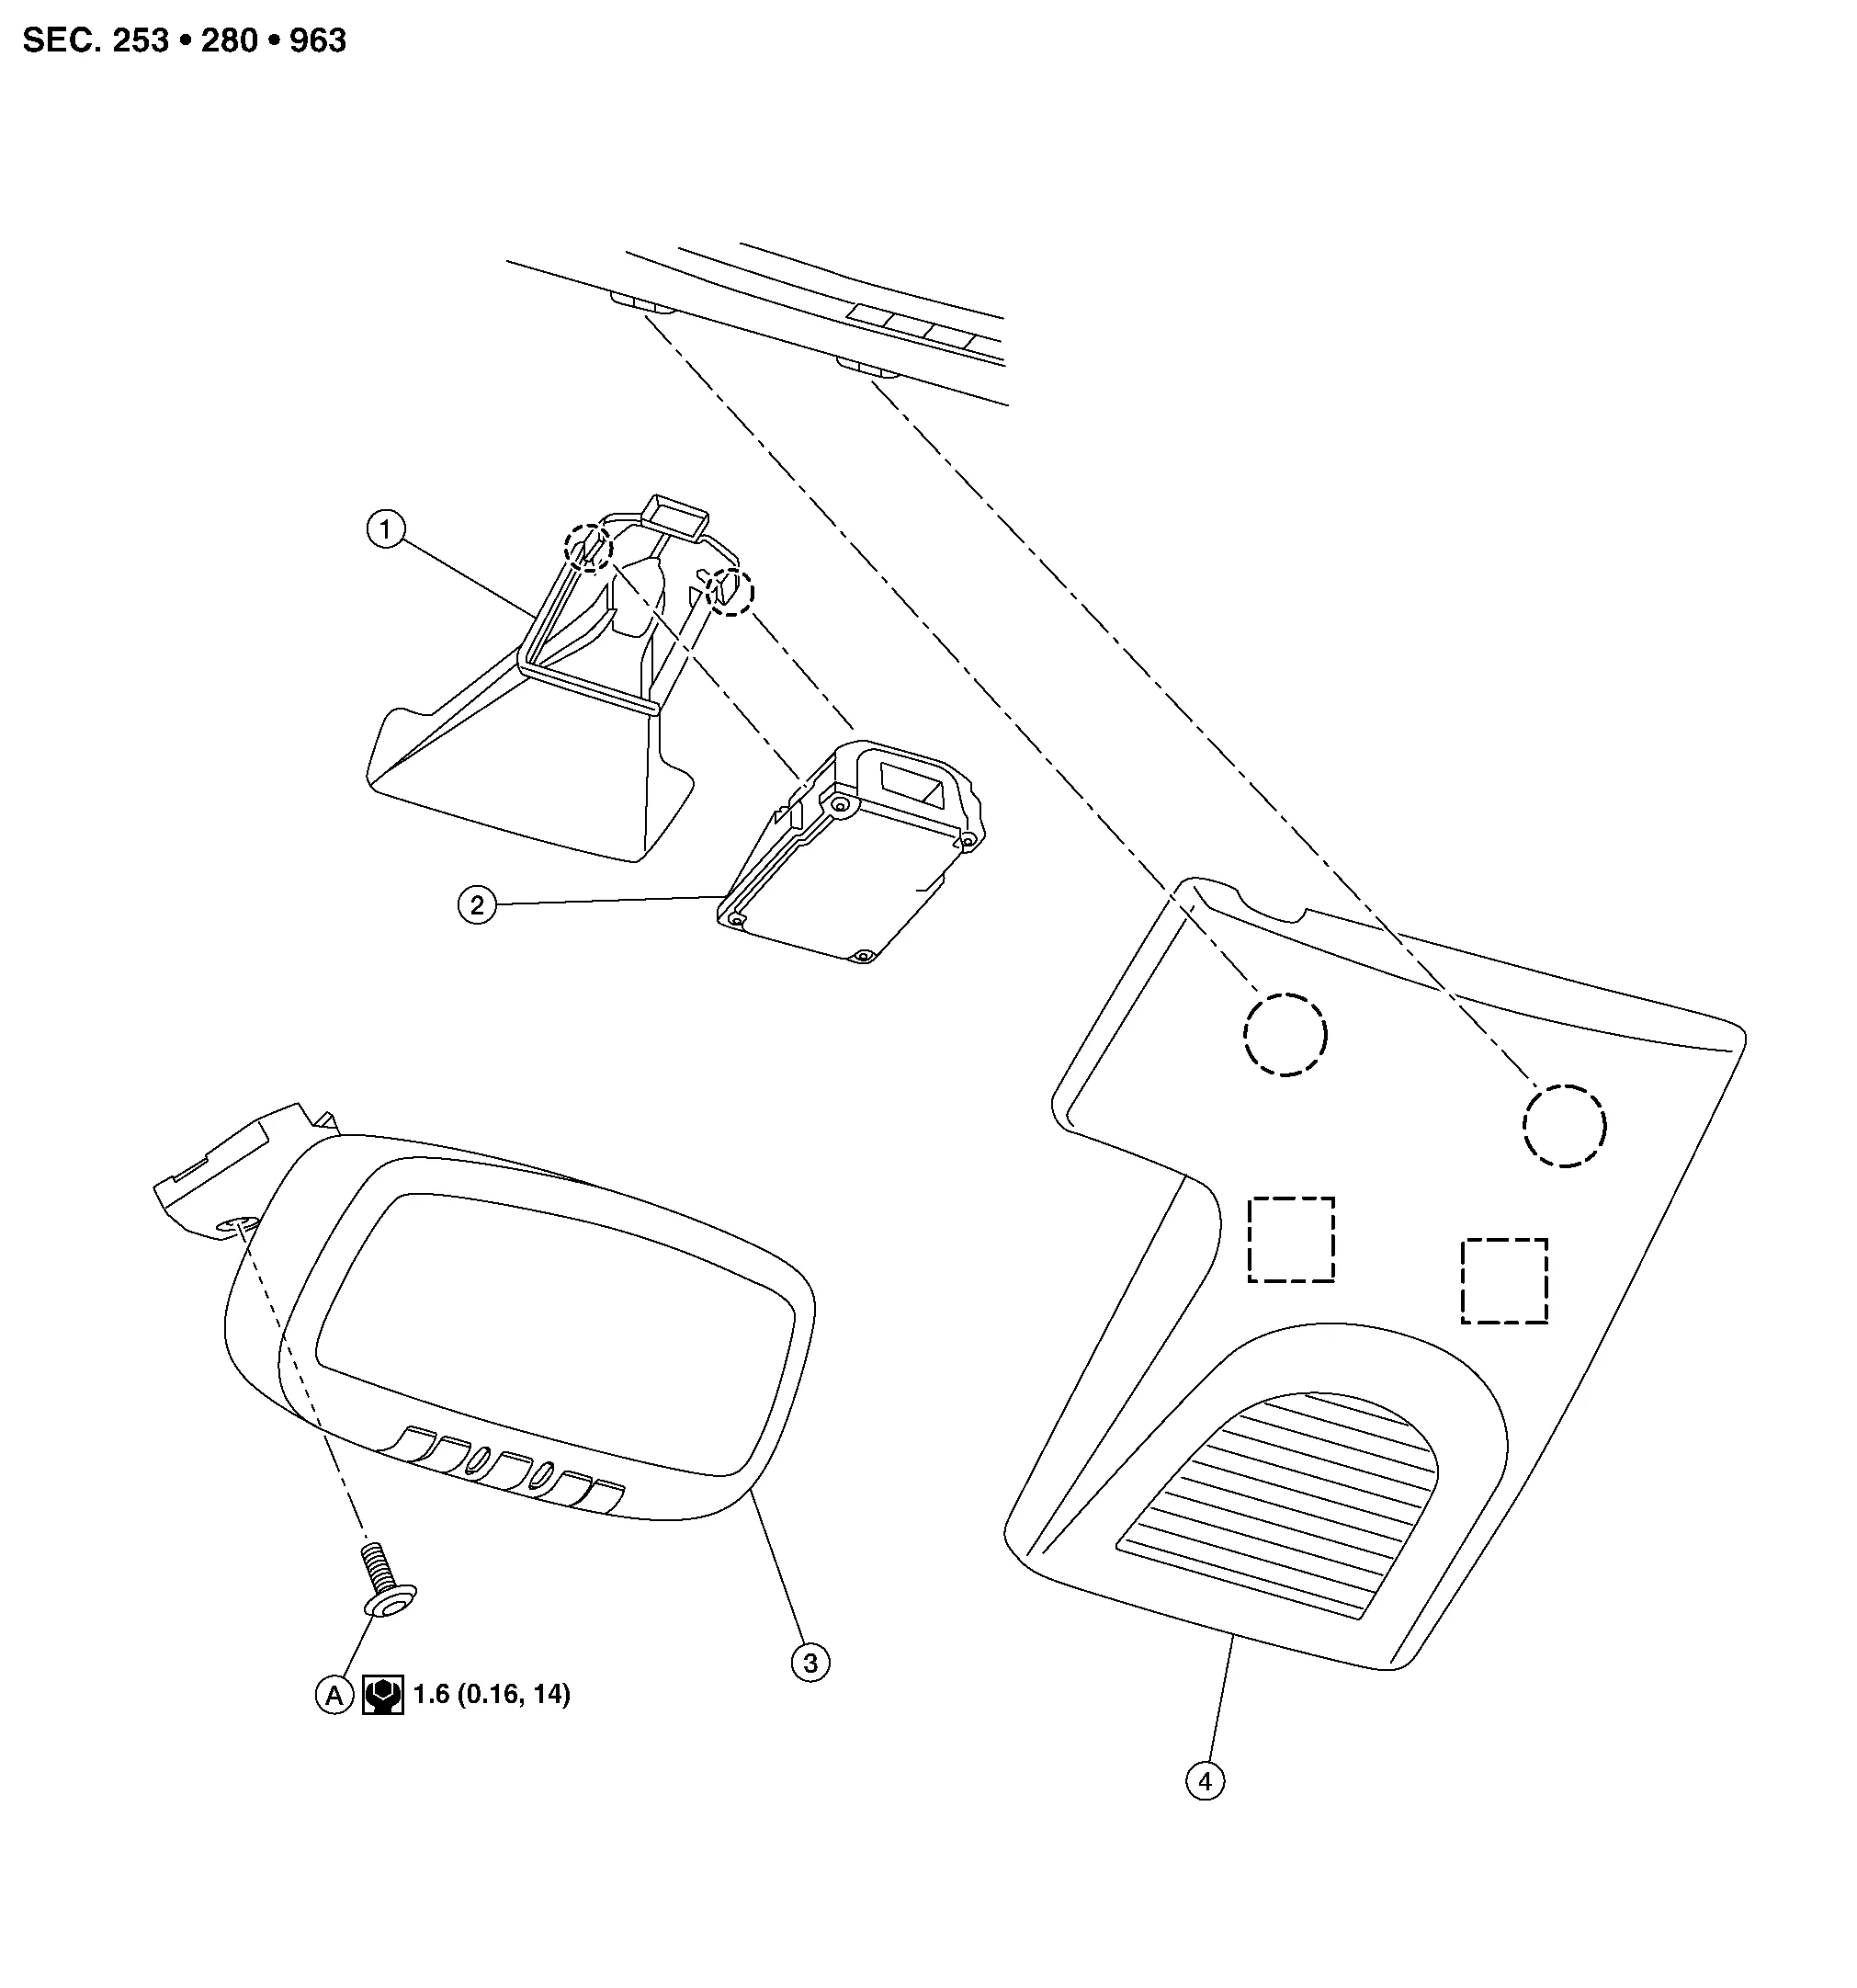
| 1. | Lane camera bracket | 2. | Lane camera | 3. | Inside mirror |
| 4. | Inside mirror finisher | A. | Bolt |  |
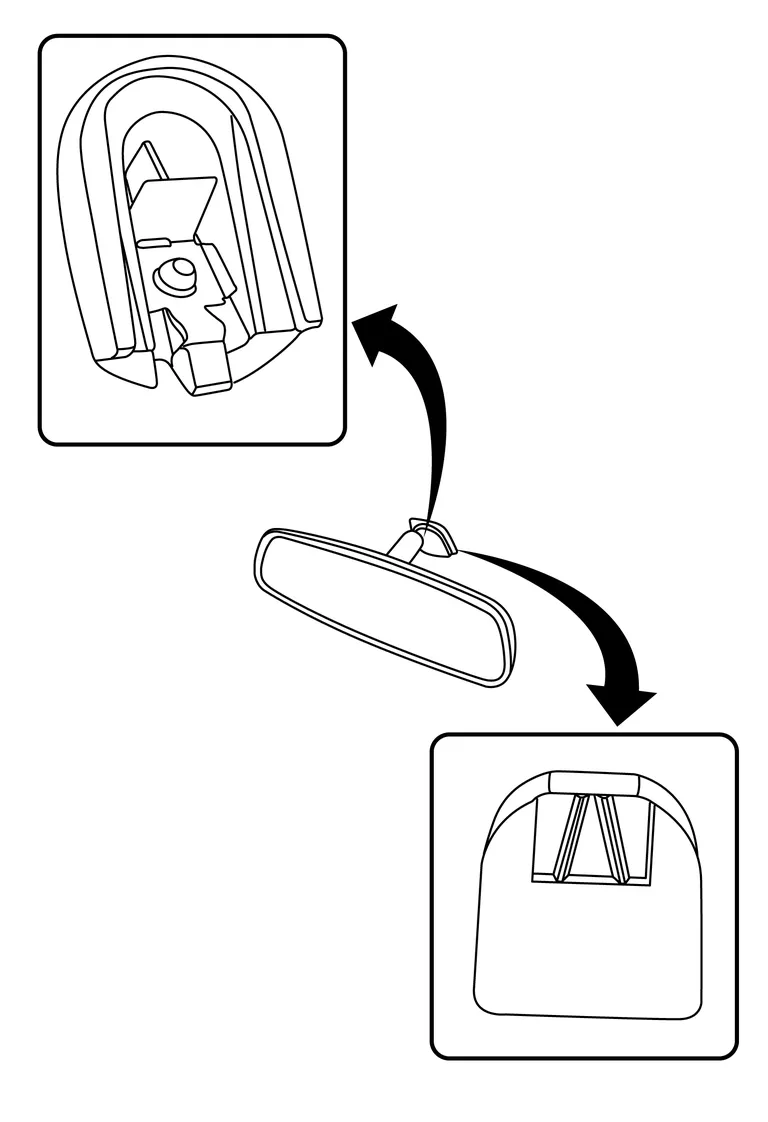
Metal clip |
 |
Pawl |
MANUAL ANTI-DAZZLING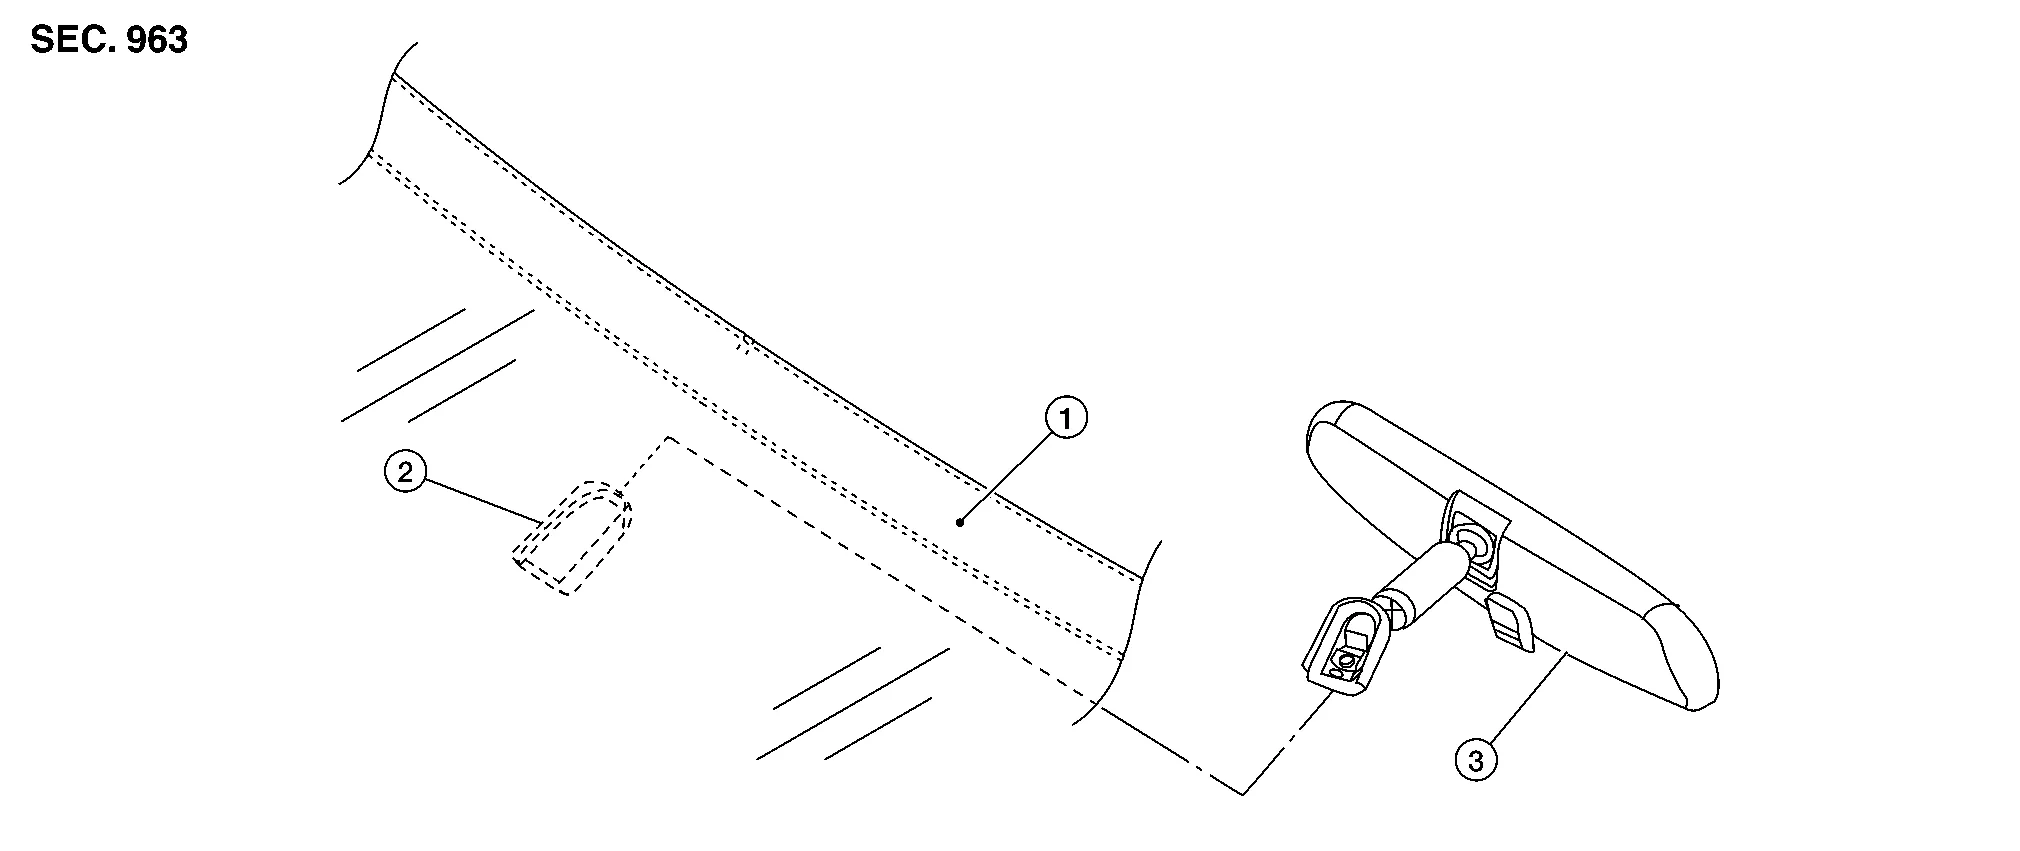
| 1. | Windshield glass | 2. | Mirror base | 3. | Inside mirror |
AUTO ANTI-DAZZLING
Removal
Using a suitable tool, release pawls and clips of inside mirror finisher. Refer to Exploded View.
Remove inside mirror finisher.
Disconnect harness connector from inside mirror.
Loosen bolt and slide inside mirror upward to remove.
Installation
Installation is in the reverse order of removal.
CAUTION:
Apply genuine mirror adhesive or equivalent to bonding surface of mirror base if loose or removed. Refer to Recommended Chemical Products and Sealants.
MANUAL ANTI-DAZZLING
Removal
Hold inside mirror at base and push upward, while using a suitable tool to release pawl and remove.
CAUTION:
Use care when removing inside mirror to avoid damage to mirror, mirror base or windshield.
Installation
Installation is in the reverse order of removal.
CAUTION:
Apply genuine mirror adhesive or equivalent to bonding surface of mirror base if loose or removed. Refer to Recommended Chemical Products and Sealants.

 Door Mirror
Exploded View
1.
Door mirror glass
2.
Door mirror actuator
3.
Side camera (if equipped)
4.
Door mirror
5.
Door mirror rear finisher
6...
Other information:
Nissan Murano (Z52) 2015-2024 Service Manual: Power Supply and Ground Circuit. Av Control Unit
Diagnosis Procedure CHECK FUSE Check that the following fuses are not blown: Terminal No. Signal name Fuse No. Capacity 7 ACC power supply 7 10 A 17 Ignition power supply 29 10 A 19 Battery power supply 15 20 A Are the fuses blown? YES>> Replace the blown fuse after repairing the affected circuit...
Nissan Murano (Z52) 2015-2024 Service Manual: Awd
Exploded View 1. Rear torque rod 2. Rear torque rod bracket 3. Engine mounting bracket (RH) 4. Upper torque rod 5. Engine mounting insulator (RH) 6. Engine mounting insulator (front) 7. Engine mounting bracket (front) 8...
Categories
- Manuals Home
- Nissan Murano Owners Manual
- Nissan Murano Service Manual
- Rear bench seat adjustment
- Tire rotation
- High Beam Assist (if so equipped)
- New on site
- Most important about car
Fuel gauge
The gauge indicates the approximate fuel level in the tank.
The gauge may move slightly during braking, turning, acceleration, or going up or down hills.
The gauge needle returns to 0 (Empty) after the ignition switch is placed in the OFF position.