Nissan Murano: Lights / Headlights
For additional information on headlight bulb replacement, refer to the instructions outlined in this section.
Replacing the halogen headlight bulb (if so equipped)
If bulb replacement is required, it is recommended that you visit a NISSAN dealer for this service.
CAUTION
- Aiming is not necessary after replacing the bulb.Whenaiming adjustment is necessary, it is recommended that you visit a NISSAN dealer for this service.
- Do not leave the headlight assembly open without a bulb installed for a long period of time. Dust, moisture, smoke, etc. entering the headlight body may affect bulb performance. Remove the bulb from the headlight assembly just before a replacement bulb is installed.
- Only touch the base when handling the bulb. Never touch the glass envelope. Touching the glass could significantly affect bulb life and/or headlight performance.
- High pressure halogen gas is sealed inside the halogen bulb. The bulb may break if the glass envelope is scratched or the bulb is dropped.
- Use the same number and wattage as shown in the chart.
Fog may temporarily form inside the lenses of the exterior lights in the rain or in a car wash. A temperature difference between the inside and the outside of the lens causes the fog. This is not a malfunction. If large drops of water collect inside the lens, it is recommended that you visit a NISSAN dealer for servicing.
Replacing the LED headlight bulb (if so equipped)
If LED headlight bulb replacement is required, it is recommended that you visit a NISSAN dealer for this service.
 Lights
..
 Fog lights (if so equipped)
For additional information on fog light bulb
replacement, refer to the instructions outlined
in this section.
Replacing the LED fog light bulb
If LED fog light bulb replacement is required,
it is recommended that you visit a
NISSAN dealer for this service...
Other information:
Nissan Murano (Z52) 2015-2024 Service Manual: Mode Door Motor
Removal and Installation REMOVALRemove the center console side finisher (LH). Refer to Exploded View. Remove the instrument lower panel LH. Refer to Removal and Installation. Remove the screws (A) and the front foot duct (LH) (1). Remove the mode door motor screws...
Nissan Murano (Z52) 2015-2024 Service Manual: Intelligent Key Warning Buzzer
Component Function Check CHECK FUNCTION CONSULT Select “OUTSIDE BUZZER” in “Active Test” mode of “BCM(INTELLIGENT KEY)”. Select “On” or “Off” to check that it works normally. Is the inspection result normal? YES>> Intelligent Key warning buzzer is OK...
Categories
- Manuals Home
- Nissan Murano Owners Manual
- Nissan Murano Service Manual
- Shift lock release
- GAS STATION INFORMATION
- Checking engine oil level
- New on site
- Most important about car
Driver and passenger supplemental knee air bag
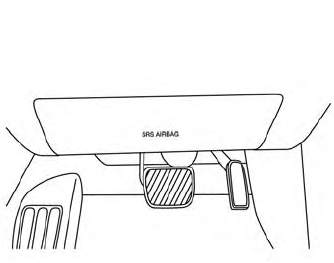
Driver’s side
The knee air bag is located in the knee bolster, on the driver’s and passenger’s side. All of the information, cautions and warnings in this manual apply and must be followed. The knee air bag is designed to inflate in higher severity frontal collisions, although it may inflate if the forces in another type of collision are similar to those of a higher severity frontal impact. It may not inflate in certain collisions.
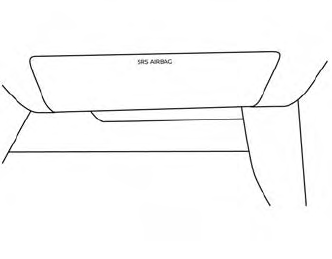
Passenger’s side