Nissan Murano: Exterior :: Removal and Installation / Door Outside Lower Molding
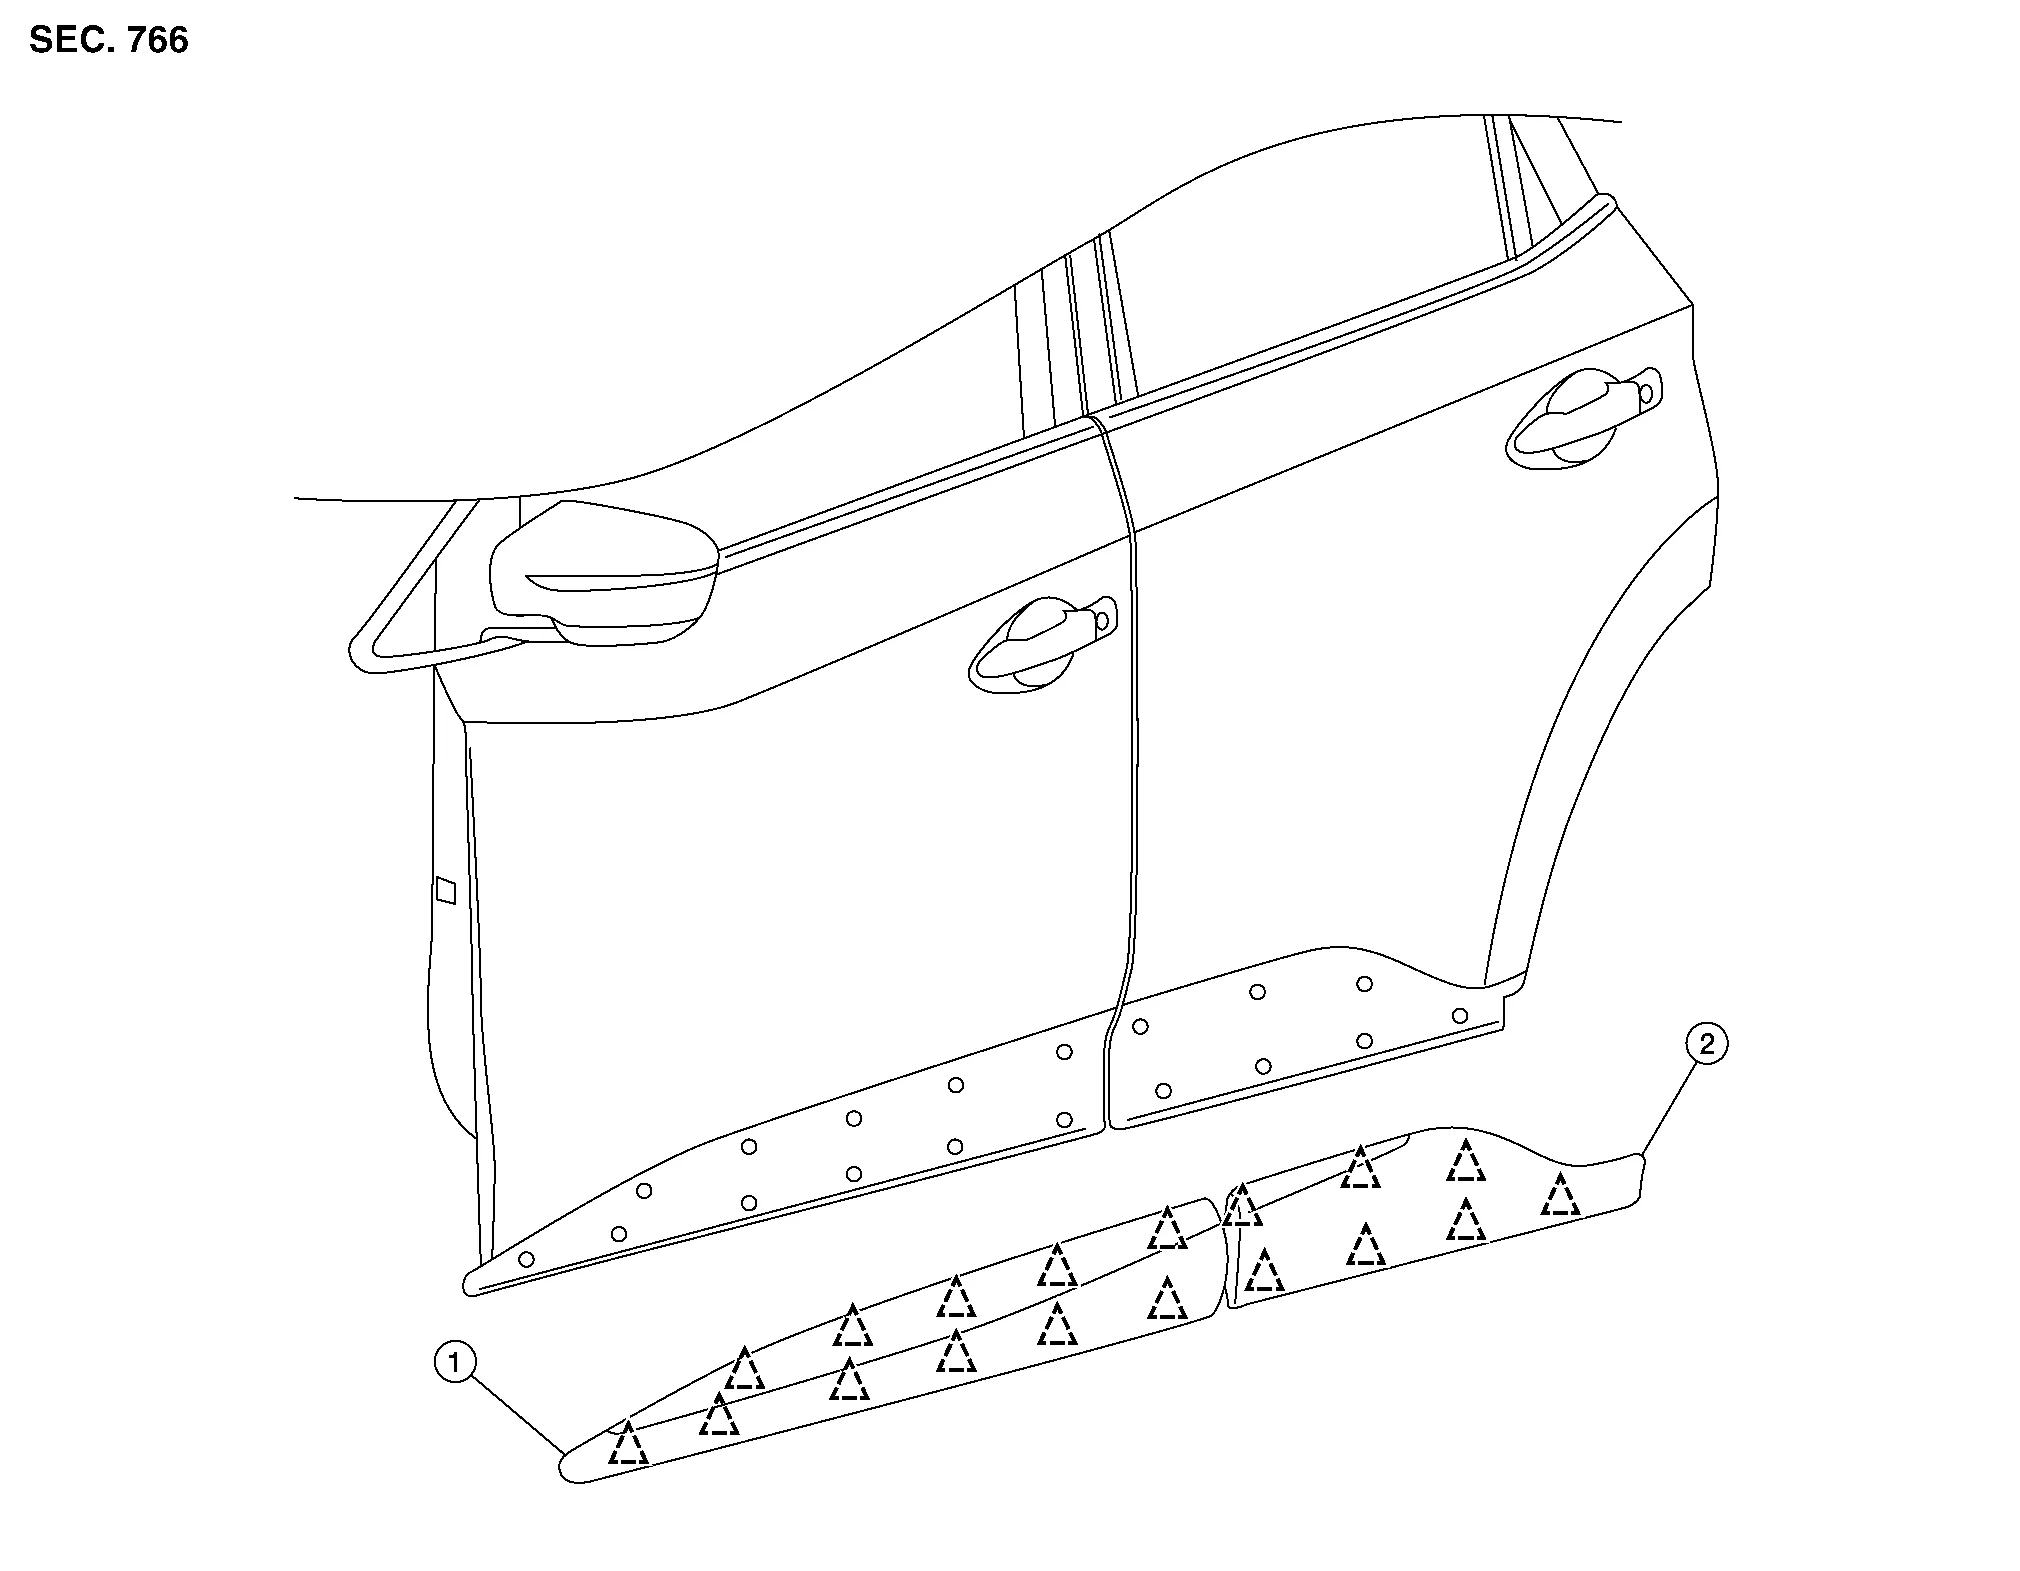
| 1. | Front door outside lower molding | 2. | Rear door outside lower molding |  |
Clip |
FRONT DOOR OUTSIDE LOWER MOLDING
Removal
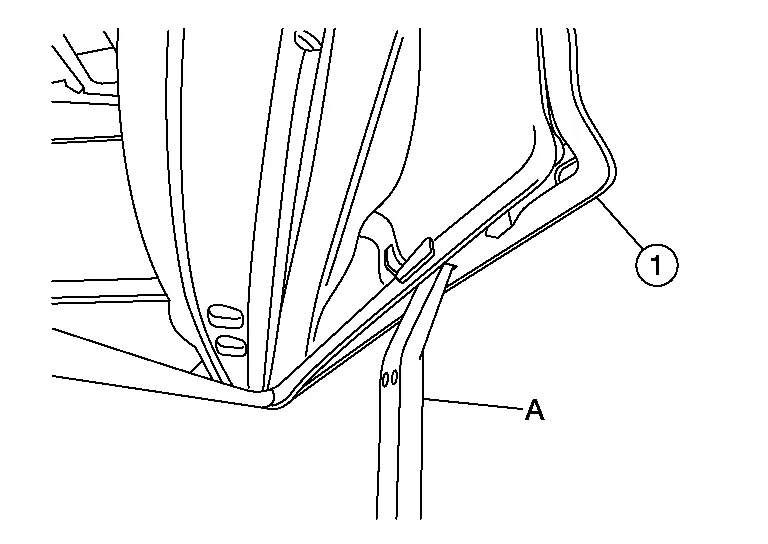
Using a suitable tool (A), release clips from front door outside lower molding (1) starting at the rear and working forward.
CAUTION:
-
Release the clips slowly and carefully.
-
Do not pull the front door outside lower molding.
Remove the front door outside lower molding.
Installation
Installation is in the reverse order of removal.
CAUTION:
-
Do not reuse double-sided tape; always replace with new tape.
-
When installing, visually check the front door outside lower molding and clips; replace with new clips if they have been damaged.
-
When installing front door outside lower molding, make sure clips are attached to the molding. Make sure all old clips have been removed from door.
REAR DOOR OUTSIDE LOWER MOLDING
Removal
Using a suitable tool (A), release clips from rear door outside lower molding (1) starting at the rear and working forward.
CAUTION:
-
Release the clips slowly and carefully.
-
Do not pull the front door outside lower molding.
Remove the rear door outside lower molding.
Installation
Installation is in the reverse order of removal.
CAUTION:
-
Do not reuse double-sided tape; always replace with new tape.
-
When installing, visually check the rear door outside lower molding and clips; replace with new clips if they have been damaged.
-
When installing rear door outside lower molding, make sure clips are attached to the molding. Make sure all old clips have been removed from door.
 Door Outside Molding
Exploded View
1.
Front door panel
2.
Front door outside molding
3.
Rear door panel
4.
Rear door outside molding
Pawl
Removal and Installation
FRONT DOOR OUTSIDE MOLDINGRemovalLower front door glass...
 Quarter Glass Molding
Exploded View
1.
Quarter glass molding
Clip
Removal and Installation
REMOVALCAUTION:
Disengage the clips slowly and carefully.
Release quarter glass molding clips, using suitable tool...
Other information:
Nissan Murano (Z52) 2015-2024 Service Manual: System Setting
Temperature Setting Trimmer (Front) DESCRIPTIONIf the temperature felt by the customer is different from the front air flow temperature controlled by the temperature setting, the A/C auto amp. control temperature can be adjusted to compensate for the temperature setting...
Nissan Murano (Z52) 2015-2024 Owners Manual: LATCH lower anchor location
..
Categories
- Manuals Home
- Nissan Murano Owners Manual
- Nissan Murano Service Manual
- Jacking up vehicle and removing the damaged tire
- GAS STATION INFORMATION
- Shift lock release
- New on site
- Most important about car
Seatback pockets
Theremaybe one or two seatback pockets located on the back of the driver and passenger seats. The pockets can be used to store maps.
WARNING