Nissan Murano: Brake System :: Removal and Installation / Brake Pedal
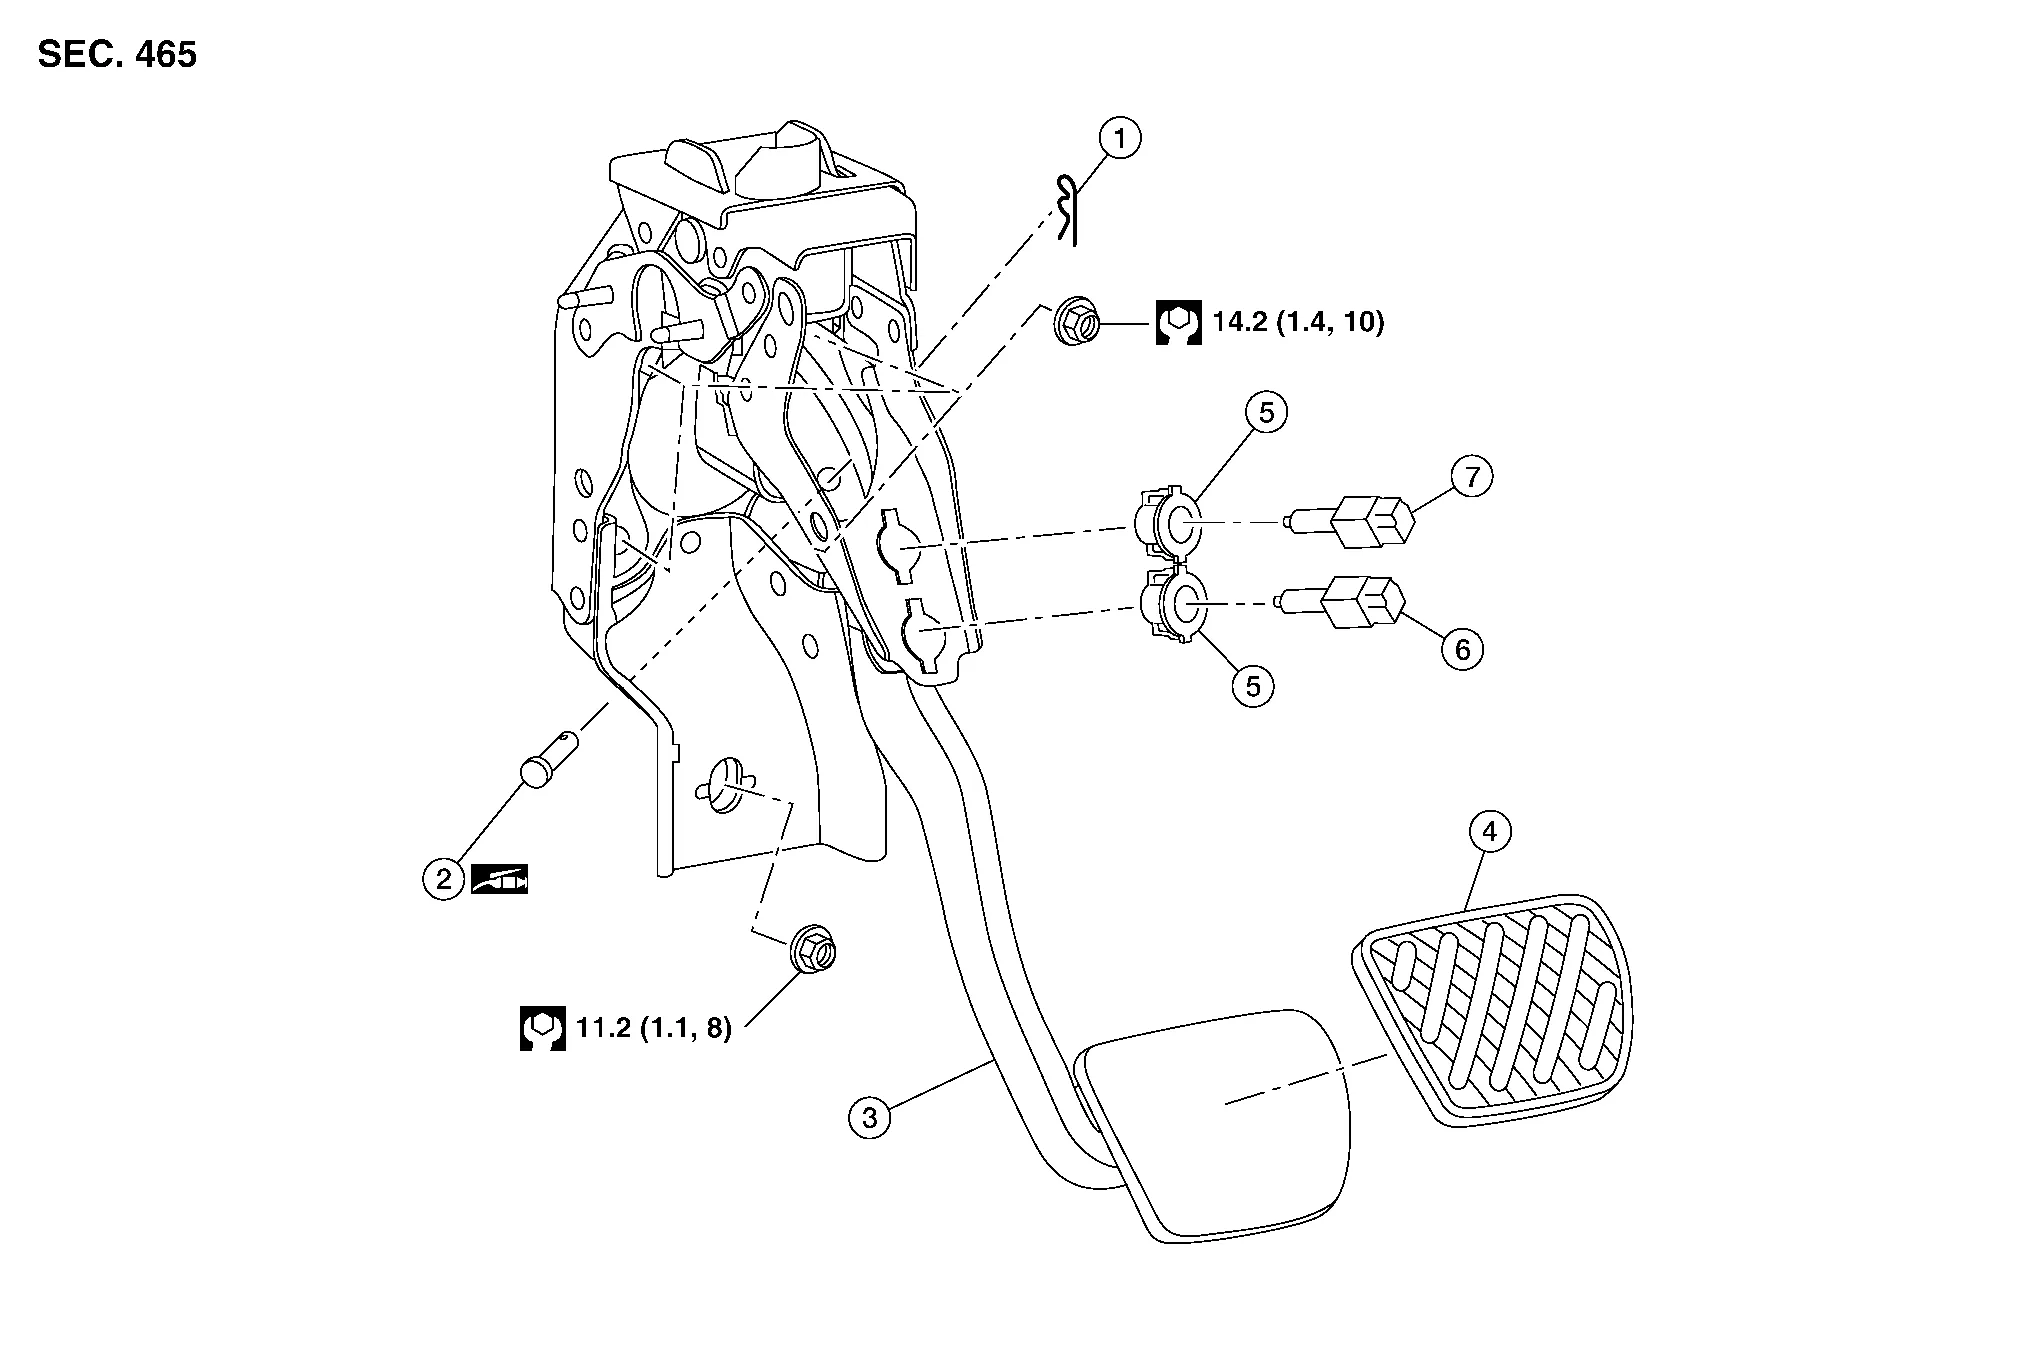
| 1. | Snap pin | 2. | Clevis pin | 3. | Brake pedal assembly |
| 4. | Brake pedal pad | 5. | Clip | 6. | Stop lamp switch |
| 7. | Brake pedal position switch |
REMOVAL
Remove instrument lower panel LH. Refer to Removal and Installation.
Remove the lower nut from the brake pedal assembly.
Disconnect the harness connectors from the stop lamp switch and brake pedal position switch.
Remove wire harness clips from brake pedal assembly.
Remove snap pin (1) and clevis pin (2) from the brake pedal assembly.
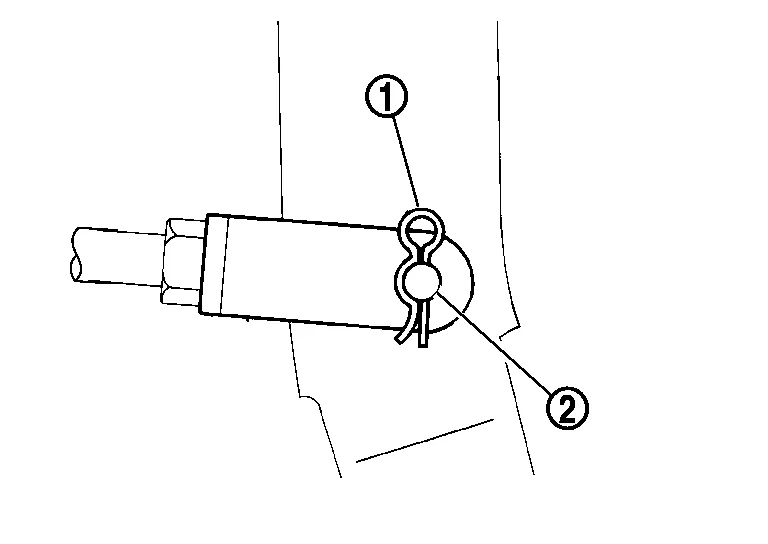
CAUTION:
Do not reuse the snap pin or clevis pin
Remove the remaining nuts from the brake pedal and remove the brake pedal.
CAUTION:
Support the brake booster and master cylinder to prevent contact with other components.
INSPECTION AFTER REMOVAL
-
Check the following items and replace the brake pedal assembly if necessary.
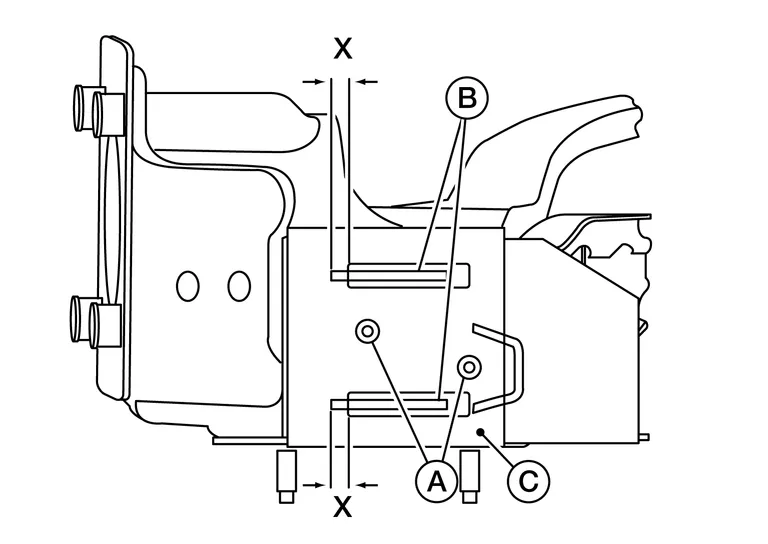
-
Check the brake pedal upper rivets (made of aluminum) (A) for deformation.
-
Check the brake pedal for bend, damage, and cracks on the welded parts.
-
Check the overlap distance (X) between sub-bracket (B) and slide plate (C).
Overlap distance (X) between sub-bracket (B) and slide plate (C). : Refer to Brake Pedal.
-
INSTALLATION
Installation is in the reverse order of removal.
-
Inspect the brake pedal height after installing the brake pedal to the vehicle. Adjust if necessary refer to Inspection.
CAUTION:
Replace the brake pedal if it has been dropped or sustained an impact.

 Brake Piping
..
Other information:
Nissan Murano (Z52) 2015-2024 Owners Manual: NISSAN Intelligent Key®
WARNING Radio waves could adversely affect electric medical equipment. Those who use a pacemaker should contact the electric medical equipment manufacturer for the possible influences before use. The Intelligent Key transmits radio waves when the buttons are pressed...
Nissan Murano (Z52) 2015-2024 Service Manual: Door Does Not Lock/unlock with Intelligent Key (one Key)
Diagnosis Procedure All doors do not lock/unlock using Intelligent Key button. (One Intelligent Key has the symptom, other keys operate normally.)NOTE: Before starting diagnosis check that vehicle condition is as shown in “Conditions of Nissan Murano vehicle”, and check each symptom...
Categories
- Manuals Home
- Nissan Murano Owners Manual
- Nissan Murano Service Manual
- Fuel recommendation
- All-Wheel Drive (AWD) (if so equipped)
- High Beam Assist (if so equipped)
- New on site
- Most important about car
Autolight system
The autolight system allows the headlights to turn on and off automatically. The autolight system can:
Turn on the headlights, front parking, tail, license plate and instrument panel lights automatically when it is dark. Turn off all the lights (except daylight running lights) when it is light. Keep all the lights on for a period of time after you place the ignition switch in the OFF position and all doors are closed.