Nissan Murano: Power Supply, Ground & Circuit Elements :: Removal and Installation / Battery Tray
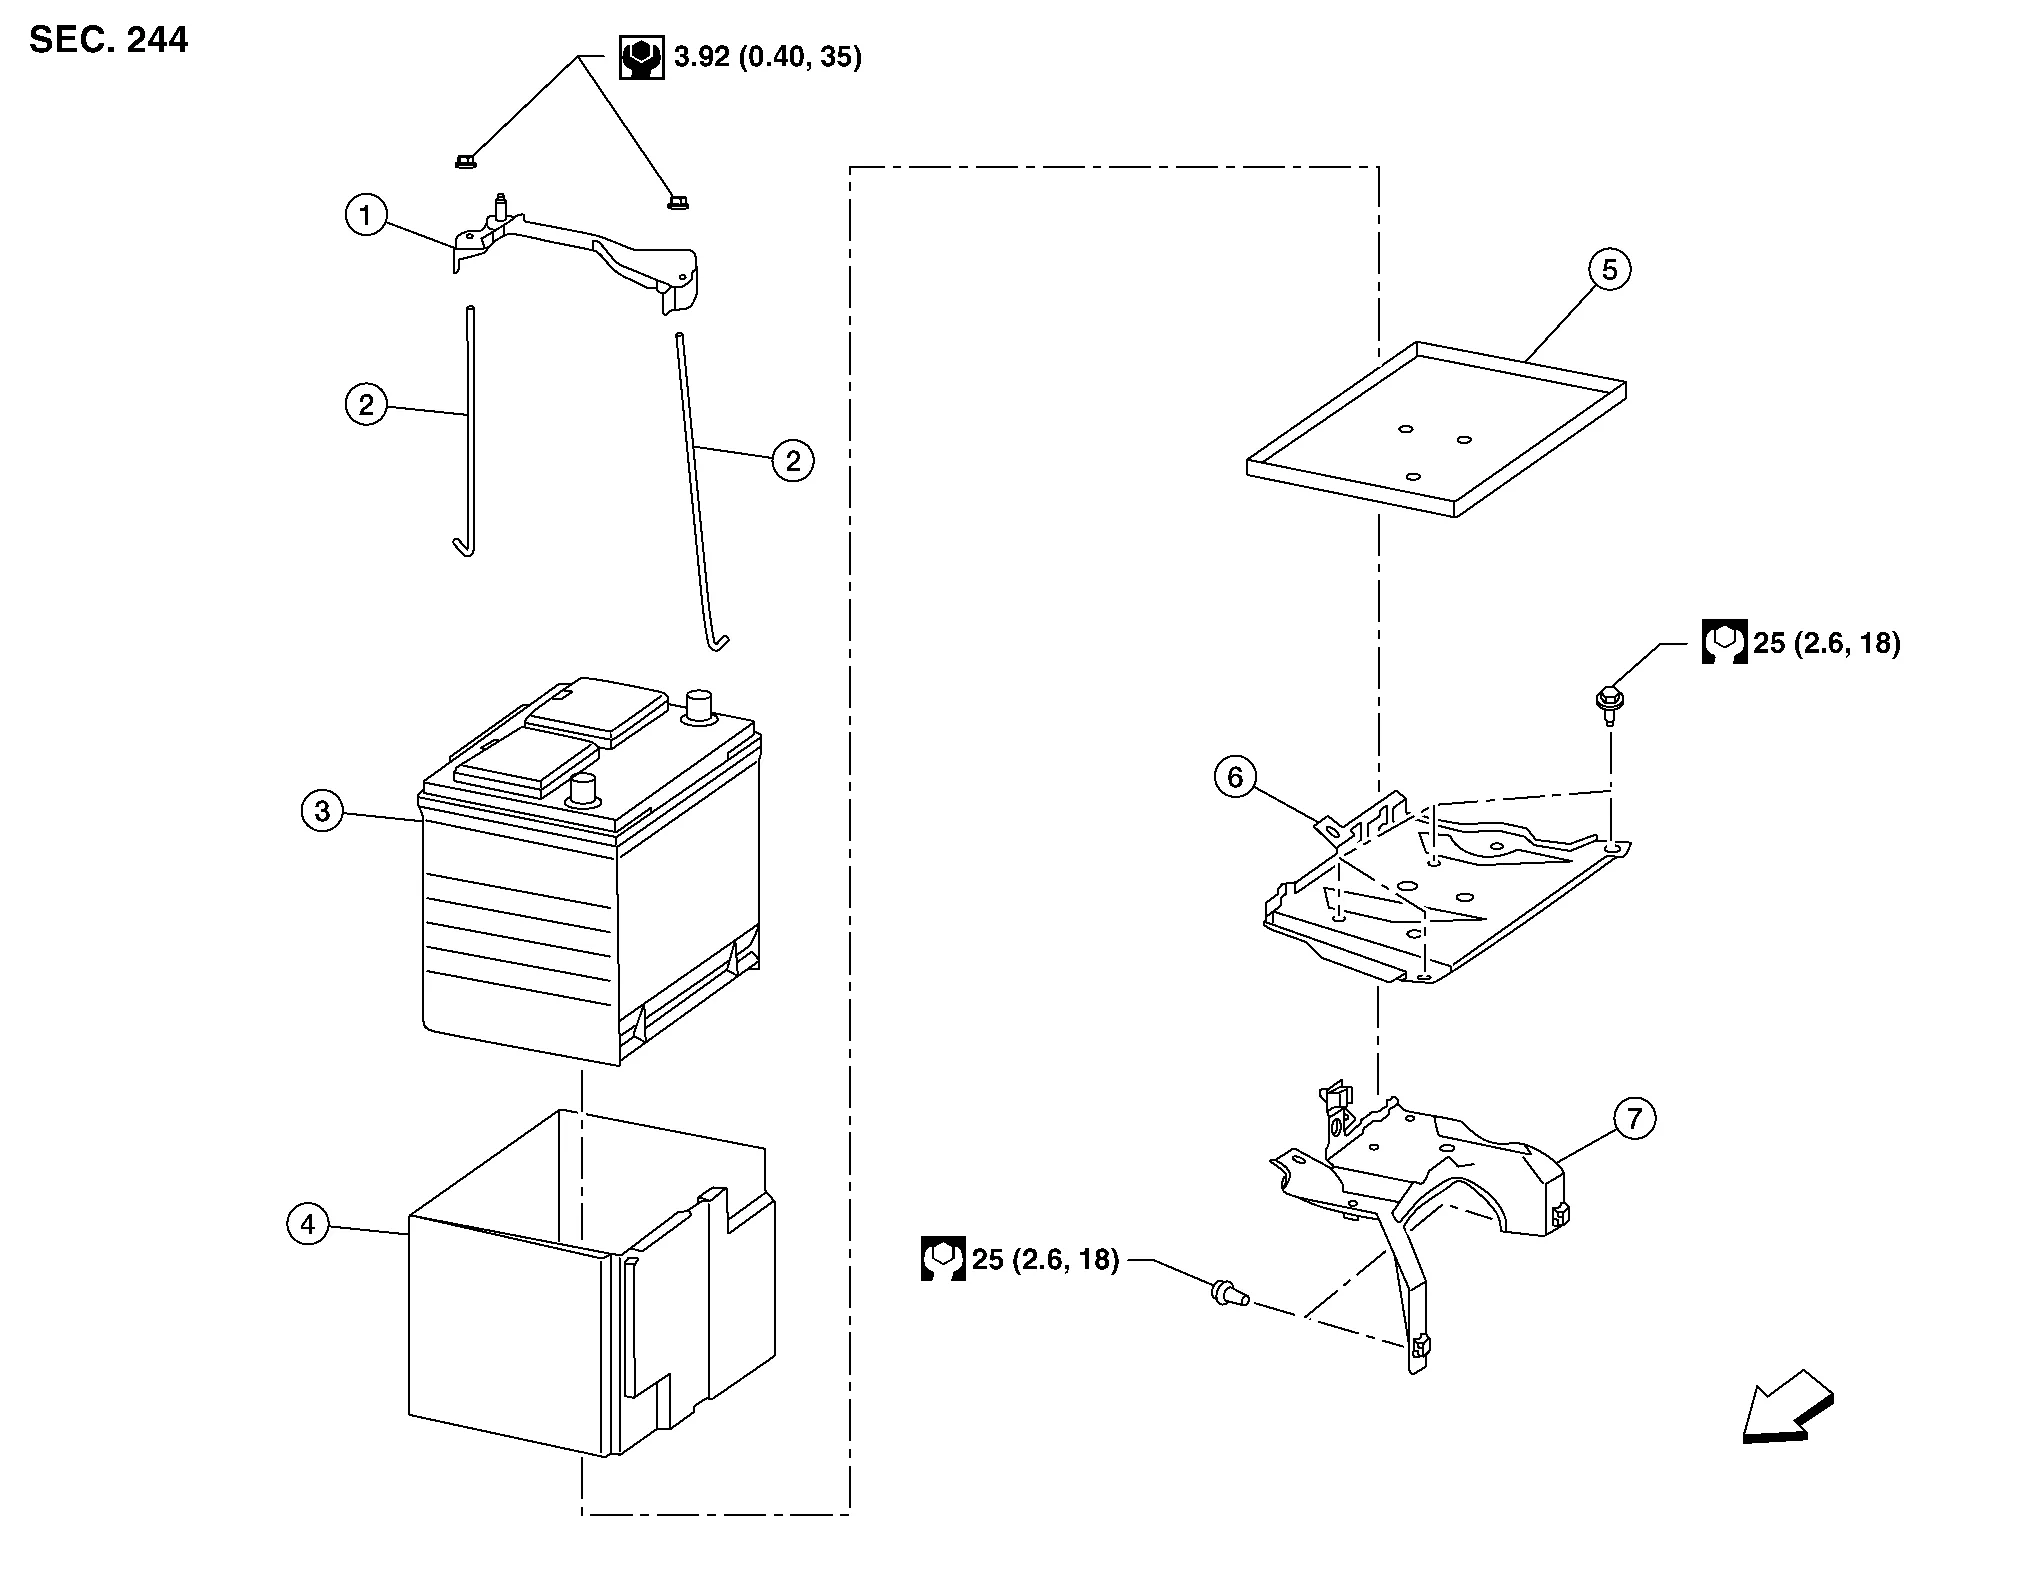
| 1. | Battery frame | 2. | Battery rods | 3. | Battery |
| 4. | Battery cover | 5. | Battery tray liner | 6. | Battery tray |
| 7. | Battery tray support | Front |
REMOVAL
Remove the battery. Refer to Removal and Installation.
Remove the air cleaner and air duct. Refer to Removal and Installation.
Disconnect the transmission control module (TCM). Refer to Exploded View.
Remove the ECM bracket.
Remove the battery tray bolts and battery tray.
Remove the battery tray support bolts and battery tray support.
INSTALLATION
Installation is in the reverse order of removal.
Reset electronic systems as necessary. Refer to Special Repair Requirement.
 Battery Terminal with Fusible Link
Exploded View
1.
Cover
2.
Positive terminal
3.
Battery
4.
Harness connectors
5.
Fusible link box (battery)
6.
Positive cable
Front
Removal and Installation
REMOVALDisconnect negative battery terminal...
 Power Supply, Ground & Circuit Elements :: Service Data and Specifications (sds). Service Data and Specifications (sds)
Battery
Type* L2
Capacity (20HR) minimum V-AH
12 - 63
Cold cranking current A @ -18°C (0°F)
550
*: Always check with the Parts Department for the latest parts information...
Other information:
Nissan Murano (Z52) 2015-2024 Service Manual: Diagnosis System [distance Sensor (icc Sensor)]
CONSULT Function (LASER/RADAR) APPLICATION ITEMSCONSULT performs the following functions via CAN communication with ADAS control unit and the communication with distance sensor (ICC sensor). Diagnosis mode Description Self Diagnostic Result Displays malfunctioning system memorized in distance sensor (ICC sensor) Data Monitor Displays real-time input/output data of distance sensor (ICC sensor) Work support It can monitor the adjustment direction indication in order to perform the radar adjustment operation smoothly ECU Identification Displays distance sensor (ICC sensor) part number CAN Diag Support Monitor The results of transmit/receive diagnosis of ITS communication can be read...
Nissan Murano (Z52) 2015-2024 Service Manual: Linking Key Fob to the Meter Display
System Description SYSTEM DIAGRAMSIGNAL TRANSMISSION FUNCTION LISTSeveral types of signals are transmitted from the following units to the driver seat control unit via CAN communication. Component Signal ABS actuator and electric unit (control unit) Nissan Murano Vehicle speed signal Combination meter Vehicle speed signal BCM Ignition switch signal Key ID signal Key link signal Log-in permit signal TCM Shift position signal AV control unit User information signal IPDM E/R Detention switch signal DESCRIPTIONLog-in function is the function that registers the setting status of various systems and retrieves the status for each Intelligent Key as desired...
Categories
- Manuals Home
- Nissan Murano Owners Manual
- Nissan Murano Service Manual
- GAS STATION INFORMATION
- Checking engine oil level
- Power Steering Fluid (PSF)
- New on site
- Most important about car
Copyright © 2026 www.nimurano.com