Nissan Murano: Hood Lock / Hood Lock
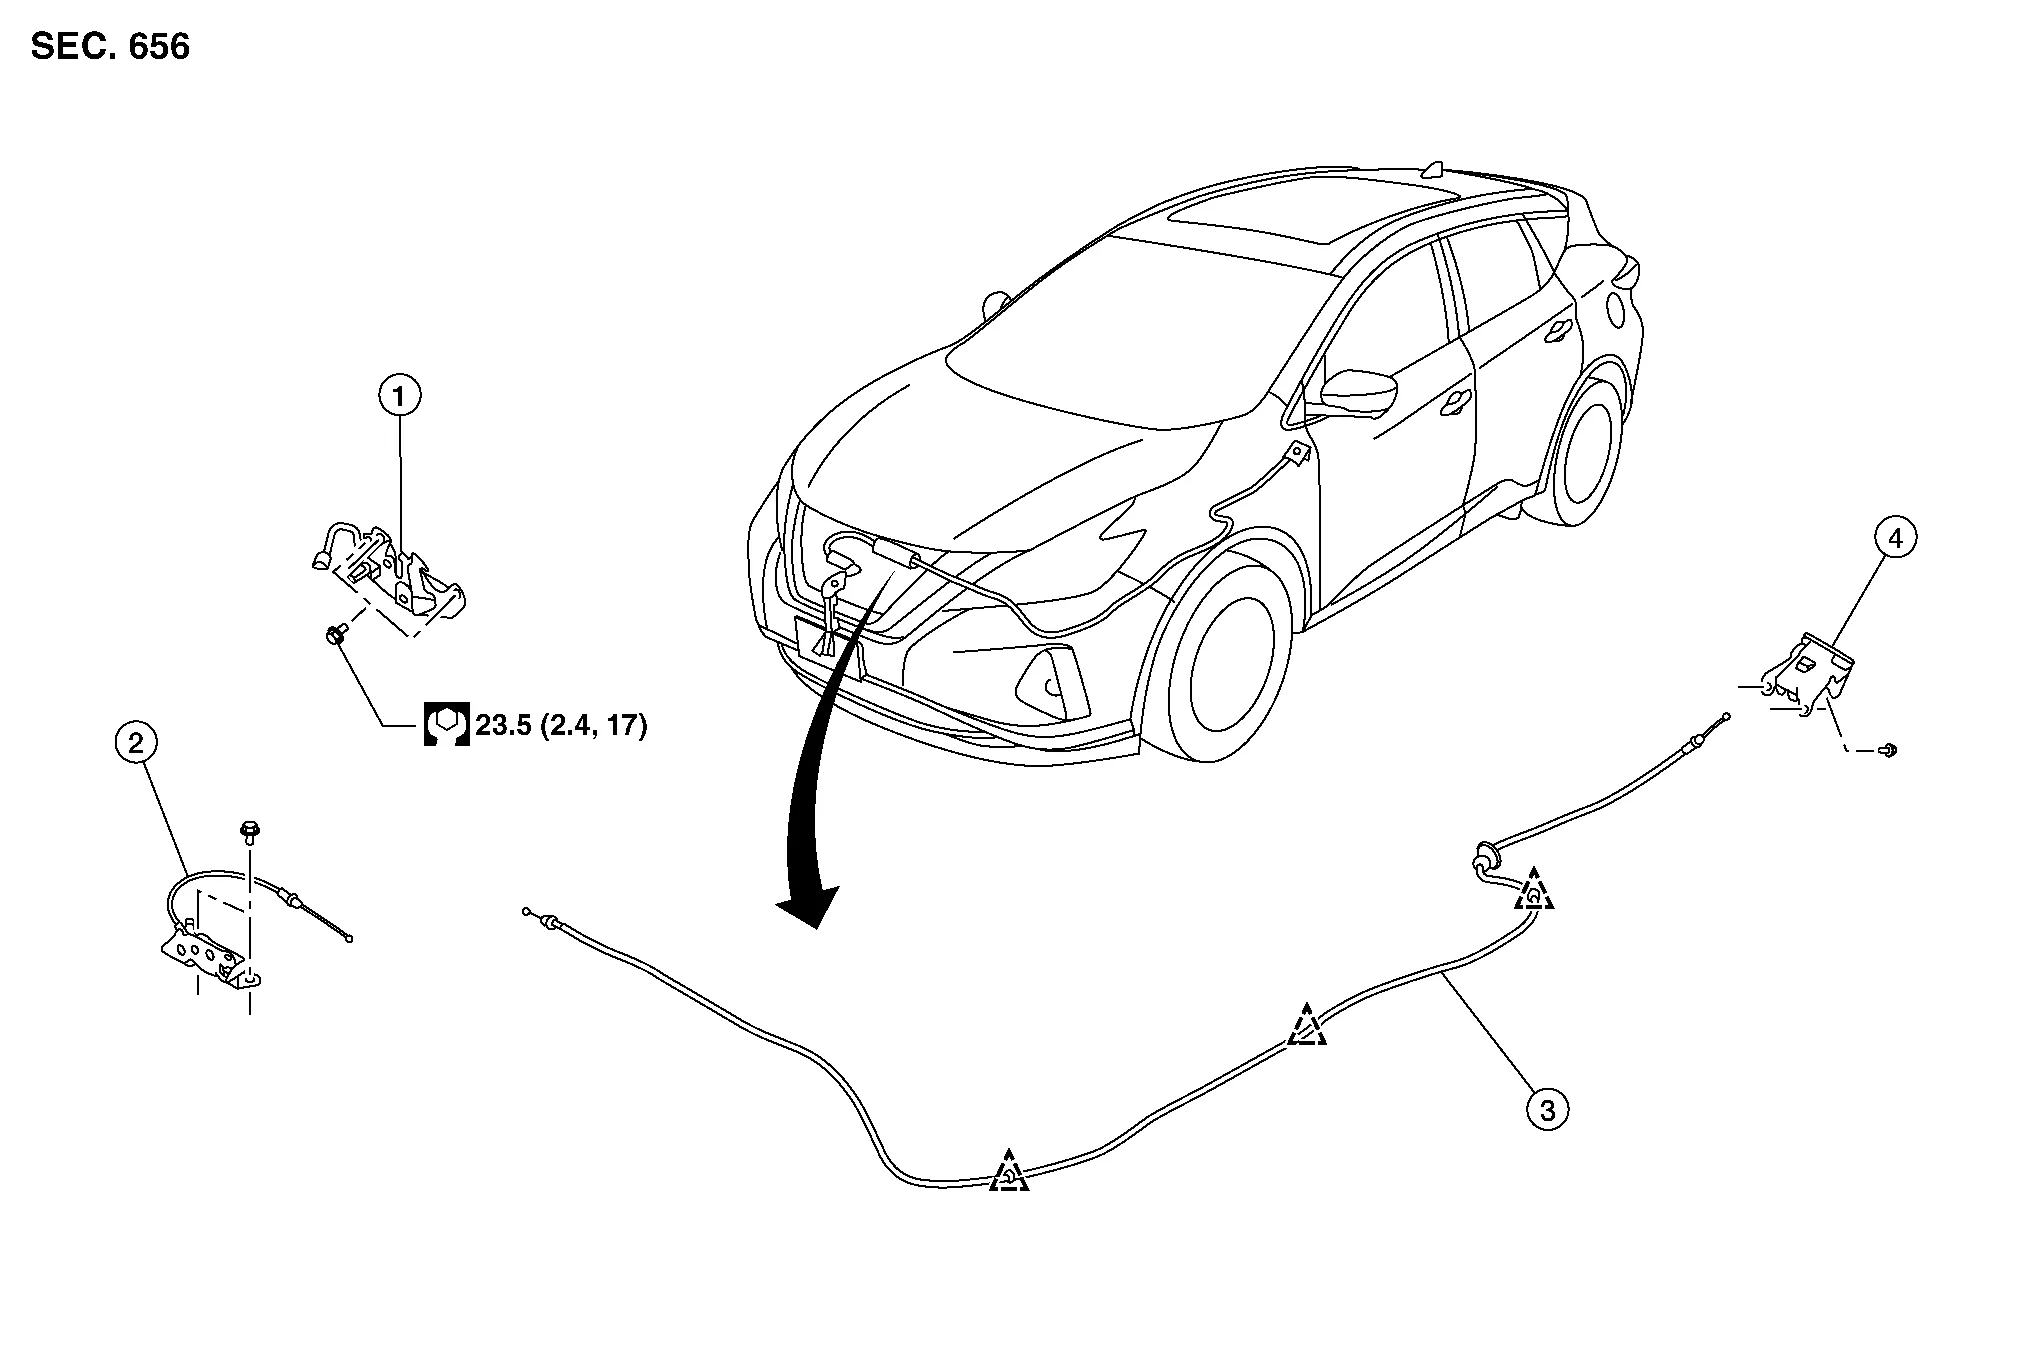
| 1. | Hood lock | 2. | Secondary latch | 3. | Hood lock release cable |
| 4. | Hood lock release handle |  |
Clip |
REMOVAL
Remove core support cover. Refer to Exploded View.
Disconnect hood lock release cable and secondary latch cable from hood lock.
Remove bolts, disconnect the harness connector and remove hood lock.
INSTALLATION
Installation is in the reverse order of removal.
CAUTION:
-
Tighten bolts to specified torque. Refer to Exploded View.
-
Check that hood lock release cable and secondary latch cable are properly engaged with hood lock.
-
After installation, perform hood assembly adjustment procedure. Refer to Adjustment.
-
After adjusting, perform hood lock inspection. Refer to Inspection.
 NOTE:
NOTE:
If hood lock cable is bent or deformed, replace it.
Check that secondary latch is properly engaged with secondary striker with hood’s own weight.
While operating hood lock release handle, carefully check that front end of hood assembly is raised by approximately 20.0 mm (0.79 in). Also check that hood lock release handle returns to original position.
Check that hood lock release handle operates at 49 N (5.0 kg-m, 11.0 ft-lb) or below.
Install so that static closing force of hood is 315-490 N (32.1-50.0 kg–m, 70.8-110.2 ft–lb).
NOTE:
-
Do not exert vertical force on right side and left side of hood lock.
-
Do not press simultaneously on both sides.
Check hood lock lubrication condition. If necessary, apply a suitable multi-purpose grease to hood lock assembly.
 Hood Lock
..
 Secondary Latch
Removal and Installation
REMOVALRemove front grille. Refer to Removal and Installation.
Disconnect secondary latch cable from hood lock assembly.
Remove bolts and secondary latch...
Other information:
Nissan Murano (Z52) 2015-2024 Owners Manual: RCTA system operation
Side BSW/RCTA Indicator Light BSW/RCTA Indicator The RCTA system can help alert the driver of an approaching vehicle when the driver is backing out of a parking space. When the shift position is in R (Reverse) and the vehicle speed is less than approximately 5 mph (8 km/h), the RCTA system is operational...
Nissan Murano (Z52) 2015-2024 Owners Manual: Auto-reverse function
The auto-reverse function can be activated when a window is closed by automatic operation. Depending on the environment or driving conditions, the auto-reverse function may be activated if an impact or load similar to something being caught in the window occurs...
Categories
- Manuals Home
- Nissan Murano Owners Manual
- Nissan Murano Service Manual
- Shift lock release
- How to enable/disable the LDW system
- Indicator lights
- New on site
- Most important about car