Nissan Murano: Dtc/circuit Diagnosis / C1116 Stop Lamp Switch
DTC DETECTION LOGIC
| DTC No. |
CONSULT screen item (Trouble diagnosis content) | DTC detected condition | |
|---|---|---|---|
| C1116 |
STOP LAMP SW (Stop lamp switch) |
Diagnosis condition |
|
| Signal (terminal) | Stop lamp switch signal | ||
| Threshold | When a malfunction is detected in stop lamp switch signal. | ||
| Diagnosis delay time | 1 seconds or more | ||
POSSIBLE CAUSE
 NOTE:
NOTE:
Confirm if DTC is PAST or CRNT. If DTC is CRNT, proceed with Diagnosis Procedure. If DTC is PAST, clear the DTC. Do not replace the ABS actuator and electric unit (control unit) for a PAST DTC.
| PAST DTC | CRNT DTC |
|---|---|
|
|
FAIL-SAFE
The following functions are suspended:
-
VDC function
-
TCS function
-
Brake assist function
-
Hill start assist function
PRECONDITIONING
If “DTC CONFIRMATION PROCEDURE” has been previously conducted, always ignition switch OFF and wait at least 10 seconds before conducting the next test.
>>
GO TO 2.
CHECK DTC DETECTION
 CONSULT
-
Ignition switch OFF, and wait 10 seconds or more.
-
Start the engine.
NOTE:
Stop the Nissan Murano vehicle.
-
Wait 1 minute or more.
NOTE:
Never depress brake pedal.
-
Depress brake pedal by 3.94 in (100 mm) or more, and maintain at that position for a minimum of 1 minute or more.
-
Release brake pedal, and wait 1 minute or more.
-
Repeat step 4 to 5 ten or more times.
-
Ignition switch OFF.
NOTE:
Wait at least 10 seconds after ignition switch OFF.
-
Start the engine.
NOTE:
Wait at least 10 seconds after starting the engine.
-
Select “Self Diagnostic Result” mode of “ABS”.
Is DTC “C1116” detected?
YES>>“C1116” is displayed as “CRNT”: Proceed to DTC Diagnosis Procedure.
YES>>“C1116” is displayed as “PAST”: Inspection End (Erase the memory of “Self Diagnostic Result” mode of “ABS”).
NO>>To check malfunction symptom before repair: Refer to Intermittent Incident.
NO>>Confirmation after repair: Inspection End.
NOTE:
DTC “C1116” may be detected when the brake pedal and the accelerator pedal are simultaneously depressed for 1 minute or more while driving the Nissan Murano vehicle. This is not a malfunction.
INTERVIEW FROM THE CUSTOMER
Check if the brake pedal and the accelerator pedal are simultaneously depressed for 1 minute or more while driving the Nissan Murano vehicle.
Is there such a history?
YES>>GO TO 2.
NO>>GO TO 3.
CHECK BRAKE PEDAL AND CHECK STOP LAMP SWITCH GAP ADJUSTMENT
Check the brake pedal and check stop lamp switch gap adjustment.
-
Brake pedal height: Refer to Inspection.
-
Brake pedal assembly: Refer to Adjustment.
Is the inspection result normal?
YES>>GO TO 3.
NO>>Adjust the brake pedal height or replace brake pedal assembly.
-
Adjust the brake pedal: Refer to Adjustment.
-
Replace the brake pedal: Refer to Removal and Installation.
PERFORM SELF DIAGNOSTIC RESULT
CONSULT
-
Erase the memory of “Self Diagnostic Result” mode of “ABS”.
-
Ignition switch OFF → ON → OFF.
NOTE:
Wait at least 10 seconds after ignition switch OFF or ON.
-
Start the engine.
NOTE:
Stop the Nissan Murano vehicle.
-
Depress the brake pedal several times.
-
Ignition switch OFF.
NOTE:
Wait at least 10 seconds after ignition switch OFF.
-
Start the engine.
NOTE:
Wait at least 10 seconds after starting the engine.
-
Select “Self Diagnostic Result” mode of “ABS”.
Is DTC “C1116” detected?
YES>>GO TO 3.
NO>>Inspection End.
STOP LAMP FOR ILLUMINATION
Depress brake pedal and check that stop lamps turn ON.
Do the stop lamps turn ON?
YES>>GO TO 5.
NO>>Check the stop lamp system. Refer to Wiring Diagram. GO TO 4.
CHECK DATA MONITOR (1)
CONSULT
-
Erase the memory of “Self Diagnostic Result” mode of “ABS”.
-
Ignition switch OFF → ON → OFF.
NOTE:
Wait at least 10 seconds after ignition switch OFF or ON.
-
Start the engine.
NOTE:
Stop the Nissan Murano vehicle.
-
Select “STOP LAMP SW” in “Data Monitor” mode of “ABS”, and according to this order. Check that Data Monitor displays “On” or “Off” when brake pedal is depressed or released. Refer to Values on the Diagnosis Tool.
-
Select “PRESS SENSOR” in “Data Monitor” mode of “ABS”, and according to this order. Depress the brake pedal and check if “PRESS SENSOR” indicates “5 bar” or less when “STOP LAMP SW” of “Data Monitor” turns from “Off” to “On”.
Is the inspection result normal?
YES>>Inspection End.
NO>>GO TO 5.
CHECK CONNECTOR
-
Ignition switch OFF.
-
Check the ABS actuator and electric unit (control unit) harness connector for disconnection or looseness.
-
Check the stop lamp switch harness connector for disconnection or looseness.
Is the inspection result normal?
YES>>GO TO 6.
NO>>Repair / replace harness or connector, and GO TO 6.
CHECK ABS ACTUATOR AND ELECTRIC UNIT (CONTROL UNIT) POWER SUPPLY AND GROUND CIRCUIT
Check the ABS actuator and electric unit (control unit) power supply and ground circuits. Refer to Diagnosis Procedure.
Is the inspection result normal?
YES>>GO TO 7.
NO>>Repair / replace harness, connector, fuse, or fusible link.
CHECK STOP LAMP SWITCH CLEARANCE
-
Ignition switch OFF.
-
Check the stop lamp switch clearance. Refer to Inspection.
Is the inspection result normal?
YES>>GO TO 9.
NO>>Adjust stop lamp switch clearance. Refer to Adjustment. GO TO 8.
CHECK DATA MONITOR (2)
CONSULT
-
Erase the memory of “Self Diagnostic Result” mode of “ABS”.
-
Ignition switch OFF → ON → OFF.
NOTE:
Wait at least 10 seconds after ignition switch OFF or ON.
-
Start the engine.
NOTE:
Stop the Nissan Murano vehicle.
-
Select “STOP LAMP SW” in “Data Monitor” mode of “ABS”, and according to this order. Check that Data Monitor displays “On” or “Off” when brake pedal is depressed or released. Refer to Values on the Diagnosis Tool.
-
Select “PRESS SENSOR” in “Data Monitor” mode of “ABS”, and according to this order. Depress the brake pedal and check if “PRESS SENSOR” indicates “5 bar” or less when “STOP LAMP SW” of “Data Monitor” turns from “Off” to “On”.
Is the inspection result normal?
YES>>Inspection End.
NO>>GO TO 9.
CHECK STOP LAMP SWITCH
Check the stop lamp switch. Refer to Component Inspection.
Is the inspection result normal?
YES>>GO TO 10.
NO>>Replace the stop lamp switch. Refer to Exploded View. GO TO 10.
CHECK DATA MONITOR (3)
CONSULT
-
Erase the memory of “Self Diagnostic Result” mode of “ABS”.
-
Ignition switch OFF → ON → OFF.
NOTE:
Wait at least 10 seconds after ignition switch OFF or ON.
-
Start the engine.
NOTE:
Start the Nissan Murano vehicle.
-
Select “STOP LAMP SW” in “Data Monitor” mode of “ABS”, and according to this order. Check that Data Monitor displays “On” or “Off” when brake pedal is depressed or released. Refer to Values on the Diagnosis Tool.
-
Select “PRESS SENSOR” in “Data Monitor” mode of “ABS”, and according to this order. Depress the brake pedal and check if “PRESS SENSOR” indicates “5 bar” or less when “STOP LAMP SW” of “Data Monitor” turns from “Off” to “On”.
Is the inspection result normal?
YES>>Inspection End.
NO>>GO TO 11.
CHECK CONNECTOR AND TERMINAL
-
Ignition switch OFF.
-
Disconnect ABS actuator and electric unit (control unit) harness connector.
-
Check the ABS actuator and electric unit (control unit) harness connector for disconnection or looseness.
-
Check the ABS actuator and electric unit (control unit) pin terminals for damage or loose connection with harness connector.
-
Disconnect stop lamp switch harness connector.
-
Check the stop lamp switch harness connector for disconnection or looseness.
-
Check the stop lamp switch pin terminals for damage or loose connection with harness connector.
-
Disconnect VDC resistor harness connector.
-
Check the VDC resistor harness connector for disconnection or looseness.
-
Check the VDC resistor pin terminals for damage or loose connection with harness connector.
Is the inspection result normal?
YES>>GO TO 13.
NO>>Repair / replace harness, connector, or terminal, and GO TO 12.
CHECK DATA MONITOR (4)
CONSULT
-
Connect ABS actuator and electric unit (control unit) harness connector.
-
Connect stop lamp switch harness connector.
-
Connect VDC resistor harness connector.
-
Erase the memory of “Self Diagnostic Result” mode of “ABS”.
-
Ignition switch OFF → ON → OFF.
NOTE:
Wait at least 10 seconds after ignition switch OFF or ON.
-
Start the engine.
NOTE:
Stop the Nissan Murano vehicle.
-
Select “STOP LAMP SW” in “Data Monitor” mode of “ABS”, and according to this order. Check that Data Monitor displays “On” or “Off” when brake pedal is depressed or released. Refer to Values on the Diagnosis Tool.
-
Select “PRESS SENSOR” in “Data Monitor” mode of “ABS”, and according to this order. Depress the brake pedal and check if “PRESS SENSOR” indicates “5 bar” or less when “STOP LAMP SW” of “Data Monitor” turns from “Off” to “On”.
Is the inspection result normal?
YES>>Inspection End.
NO>>GO TO 13.
CHECK STOP LAMP SWITCH CIRCUIT (1)
-
Ignition switch OFF.
-
Disconnect ABS actuator and electric unit (control unit) harness connector.
-
Check the voltage between ABS actuator and electric unit (control unit) harness connector and ground.
ABS actuator and electric unit (control unit) — Condition Voltage
(Approx.)Connector Terminal E125 30 Ground Brake pedal depressed Battery voltage Brake pedal not depressed 0 V -
Ignition switch ON.
-
Check the voltage between ABS actuator and electric unit (control unit) harness connector and ground.
ABS actuator and electric unit (control unit) — Condition Voltage
(Approx.)Connector Terminal E125 30 Ground Brake pedal depressed Battery voltage Brake pedal not depressed 0 V
Is the inspection result normal?
YES>>Replace the ABS actuator and electric unit (control unit). Refer to Removal and Installation.
NO>>Repair / replace harness or connector, and GO TO 14.
CHECK STOP LAMP SWITCH CIRCUIT (2)
-
Ignition switch OFF.
-
Disconnect stop lamp switch harness connector.
-
Disconnect VDC resistor harness connector.
-
Check the continuity between ABS actuator and electric unit (control unit) harness connector and stop lamp switch harness connector.
ABS actuator and electric unit (control unit) Stop lamp switch Continuity Connector Terminal Connector Terminal E125 30 E38 4 Yes -
Check the continuity between ABS actuator and electric unit (control unit) harness connector and VDC resistor harness connector.
ABS actuator and electric unit (control unit) VDC resistor Continuity Connector Terminal Connector Terminal E125 30 E56 1 Yes -
Check the continuity between ABS actuator and electric unit (control unit) harness connector and the ground.
ABS actuator and electric unit (control unit) — Continuity Connector Terminal E125 30 Ground No -
Check the continuity between VDC resistor and the ground.
VDC resistor — Continuity Connector Terminal E56 1 Ground No 2 Yes
Is the inspection result normal?
YES>>Replace the ABS actuator and electric unit (control unit). Refer to Removal and Installation.
NO>>Repair / replace harness or connector, and GO TO 15.
CHECK DATA MONITOR (5)
CONSULT
-
Connect ABS actuator and electric unit (control unit) harness connector.
-
Connect stop lamp switch harness connector.
-
Connect VDC resistor harness connector.
-
Erase the memory of “Self Diagnostic Result” mode of “ABS”.
-
Ignition switch OFF → ON → OFF.
NOTE:
Wait at least 10 seconds after ignition switch OFF or ON.
-
Start the engine.
NOTE:
Stop the Nissan Murano vehicle.
-
Select “STOP LAMP SW” in “Data Monitor” mode of “ABS”, and according to this order. Check that Data Monitor displays “On” or “Off” when brake pedal is depressed or released. Refer to Values on the Diagnosis Tool.
-
Select “PRESS SENSOR” in “Data Monitor” mode of “ABS”, and according to this order. Depress the brake pedal and check if “PRESS SENSOR” indicates “5 bar” or less when “STOP LAMP SW” of “Data Monitor” turns from “Off” to “On”.
Is the inspection result normal?
YES>>Inspection End.
NO>>Replace the ABS actuator and electric unit (control unit). Refer to Removal and Installation.
CHECK STOP LAMP SWITCH
-
Ignition switch OFF.
-
Disconnect stop lamp switch harness connector.
-
Check the continuity when stop lamp switch is operated.
Stop lamp switch Condition Continuity Terminals 3 4 When stop lamp switch is pressed
(When brake pedal is depressed)Yes When stop lamp switch is released
(When brake pedal is released)No
Is the inspection result normal?
YES>>Inspection End.
NO>>Replace the stop lamp switch. Refer to Exploded View.
 C1115 Wheel Sensor
DTC Description
DTC DETECTION LOGIC DTC No.
CONSULT screen item
(Trouble diagnosis content) DTC detected condition
C1115
ABS SENSOR [ABNORMAL SIGNAL]
(Wheel sensor [abnormal signal])
Diagnosis condition
When ignition switch ON...
 C1130 Engine Signal
DTC Description
DTC DETECTION LOGIC DTC No.
CONSULT screen item
(Trouble diagnosis content) DTC detection condition
C1130
ENGINE SIGNAL 1
(Engine system signal)
Diagnosis condition
When ignition switch ON...
Other information:
Nissan Murano (Z52) 2015-2024 Service Manual: Tcu Branch Line Circuit
Diagnosis Procedure CHECK CONNECTOR Turn the ignition switch OFF. Disconnect the battery cable from the negative terminal. Check the following terminals and connectors for damage, bend and loose connection (unit side and connector side). TCU 3CH CAN gateway Is the inspection result normal? YES>> GO TO 2...
Nissan Murano (Z52) 2015-2024 Service Manual: Diagnosis System (adas Control Unit 2)
CONSULT Function (ICC/ADAS) APPLICATION ITEMSCONSULT performs the following functions via CAN communication using ADAS control unit. Diagnosis mode Description Configuration The Nissan Murano vehicle specification that is written in ADAS control unit can be displayed or stored The Nissan Murano vehicle specification can be written when ADAS control unit is replaced Work support Displays causes of automatic system cancellation occurred during system control Self Diagnostic Result Displays the name of a malfunctioning system stored in the ADAS control unit Data Monitor Displays ADAS control unit input/output data in real time Active Test Enables an operational check of a load by transmitting a driving signal from the ADAS control unit to the load ECU Identification Displays ADAS control unit part number CAN Diag Support Monitor Displays a reception/transmission state of CAN communication and ITS communication CONFIGURATIONConfiguration includes functions as follows...
Categories
- Manuals Home
- Nissan Murano Owners Manual
- Nissan Murano Service Manual
- Power Steering Fluid (PSF)
- Indicator lights
- Tire rotation
- New on site
- Most important about car
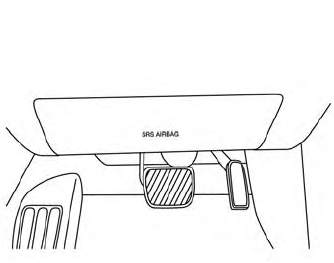
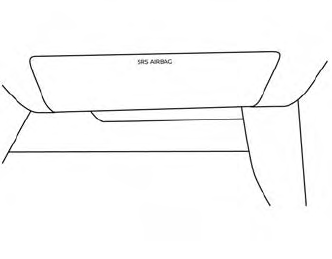
Driver and passenger supplemental knee air bag
Driver’s side
The knee air bag is located in the knee bolster, on the driver’s and passenger’s side. All of the information, cautions and warnings in this manual apply and must be followed. The knee air bag is designed to inflate in higher severity frontal collisions, although it may inflate if the forces in another type of collision are similar to those of a higher severity frontal impact. It may not inflate in certain collisions.
Passenger’s side